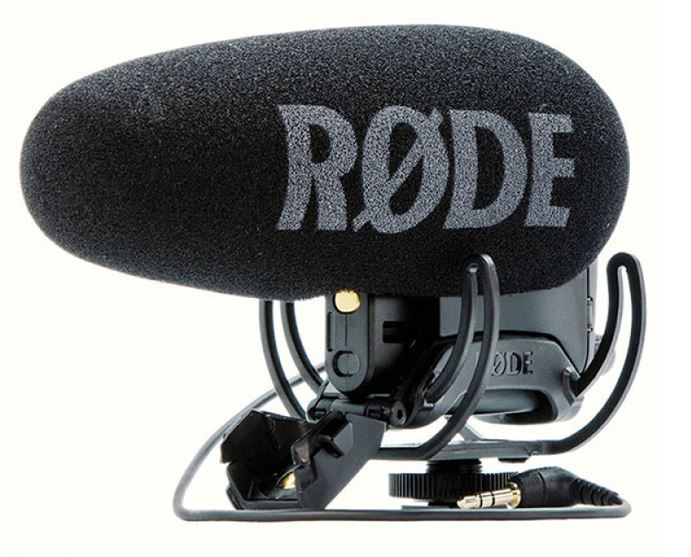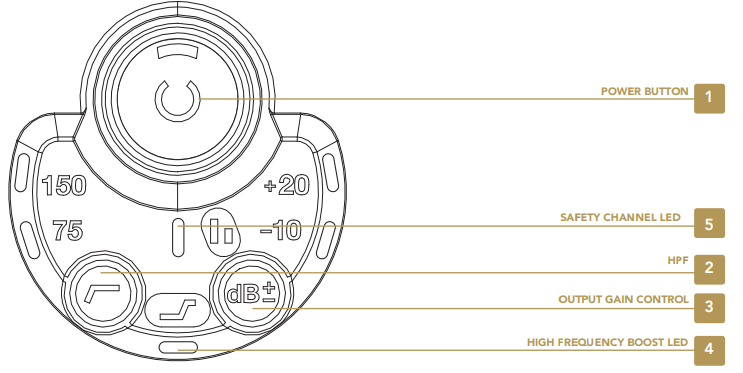
Rode VideoMic Pro Plus Camera-Mount Shotgun Microphone
About RODE
RODE is a well-known Australian manufacturer of high-quality microphones and audio equipment for various applications such as podcasting, cinematography, music recording, and more. They are famous for manufacturing a wide range of microphones, including USB and shotgun microphones and studio-grade condenser mics.
The RØDE Video Mic GO TM features an integrated shock mount based on Ricotta Lyre technology. Constructed from a single piece of hard-wearing thermoplastic, the Lyre provides superior acoustic suspension to traditional elastic solutions and will never wear out, sag, or snap.
Protect Your VideoMic Pro+. Register Online Now For Your 10-Year Warranty
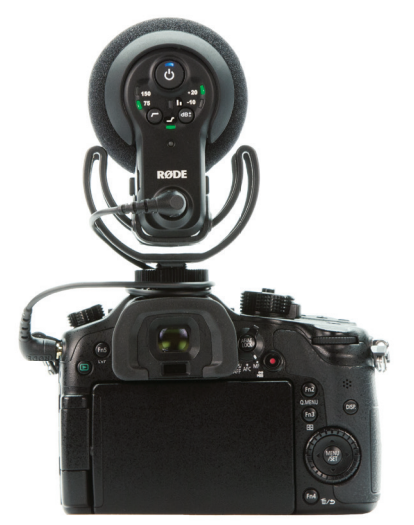
PARTS GUIDE
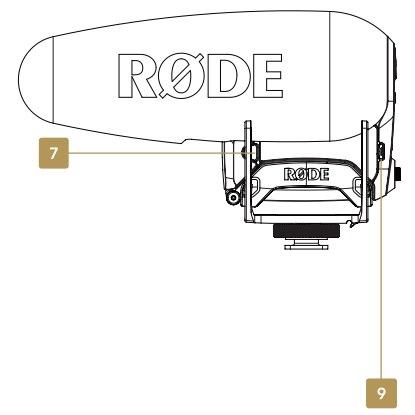
- Power Button/Status LED
- Safety Channel LED
- High Pass Filter (HPF) Button
- Output Gain Control Button
- High-Frequency Boost LED
- LED Brightness Sensor
- Battery Compartment Latches
- 3.5mm Threaded TRS Output Socket
- Micro USB Charging Socket
- Camera Shoe Mount with 3/8” Thread
- 3.5mm TRS Output Cable (not shown)
- Micro USB Cable (not shown)
- LB-1 Lithium-Ion Rechargeable Battery (not shown)
POWER AND CHARGING STATUS
The Power Button/Status LED (1) indicates power status via color.
Charge
- Slow flashing BLUE = charging
- Fast flashing BLUE = 75% charged
- Solid BLUE = 100% charged
Power Usage (LB-1 Battery* & AA Batteries**)
The VMP+ is designed for best performance with the LB-1 Lithium-Ion Rechargeable Battery. When using the LB-1 Battery or AA Batteries, the Status LED (1) will change color:
- Solid BLUE indicates LB-1 Battery
- Solid GREEN indicates AA Batteries
- Solid RED = 10 hours charge remaining
- Slow flashing RED = 2 hours charge remaining
- Fast flashing RED = 30 minutes charge remaining
The LB-1 Battery charges while inserted into the VMP+ and the included Micro USB Cable is connected to a power source. Rechargeable AA Batteries can be used, but will not charge in the VMP+
- Results may vary depending on environmental conditions.
- Results may vary depending on the type of battery used and environmental conditions.
POWERING ON
The VideoMic Pro+ can be powered by the LB-1 Battery, 2 x AA Batteries, or via the Micro USB Charging Socket.
- Squeeze Battery Compartment Latches (7) to open.
- Insert the included LB-1 Battery, and 2 x AA Batteries, or connect the included Micro USB Cable.
- Press and hold the Power Button (1) until the Status LED illuminates.
VIDEOMIC PRO+ CONTROLS
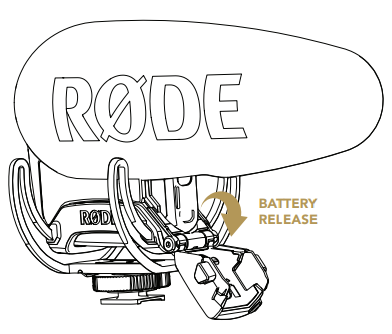
- The High Pass Filter (HPF) will reduce low frequencies such as the rumble from traffic or air-conditioning. Press the HPF Button (2) to select one of the two available filter settings (75Hz, 150Hz) or to disable the filter. When both LEDs are off, the filter is disabled.
- The Output Gain Control Button will switch the microphone output gain between 0, -10, and +20 dB. Press the Output Gain Control Button (3) to cycle through the three settings. The LED will illuminate indicating the active setting. When both LEDs are off, the output level is set to 0dB.
- The High Frequency Boost will boost high frequencies above 7kHz by 5dB which enhances clarity and detail in your recording. This is particularly helpful if you are using a RODE Deadcat Windshield or other wind protection. Press the HPF (2) and Output Gain Control (3) Buttons together to enable or disable the High Frequency Boost. When the LED (4) is off, the High Frequency Boost is disabled.
- The Safety Channel will lower the output of the RIGHT channel of the dual-mono signal by 10dB. This will help ensure the signal does not clip when unexpected spikes in level occur. Press the Output Gain Control Button (3) and Power Button (1) together to enable or disable the Safety Channel. When the LED (5) is off, the output on both the Left and Right channels is the same.
- The VMP+ will automatically power on when plugged into a DSL camera or portable recorder’s 3.5mm microphone input if plug-in power is supplied by the device. To disable this feature, press the Power (1) and HPF Buttons (2) together. The HPF and Output Gain Control LEDs will flash green three times to indicate this feature is disabled and will flash green once when it is enabled.
FAQS About Rode VideoMic Pro plus Camera-Mount Shotgun Microphone
How long does it take to charge a Rode VideoMic Pro Plus?
AA batteries, a USB connection, or an internal rechargeable battery can all now be used to power devices.
What is the Rode VideoMic Pro Plus’s frequency response?
20 Hz–20 kHz
How long does the battery on a Rode VideoMic Pro last?
70 hours
Can I use a PC and Rode VideoMic?
As a USB microphone, the VideoMic may be connected to iOS, Android, Windows, and macOS devices.
Is the stereo or mono Rode VideoMic Pro?
mono
The function of the Rode VideoMic.
powered straight from the 3.5mm microphone input of your camera or other device
What kind of batteries can I use with a Rode VideoMic Pro?
9V, 250mAh CELLULAR battery pack
The Rode VideoMic Pro has what kind of a jack?
TRS minijack 3.5 mm
RDE microphones are waterproof.
Water-resistant but not watertight, for sure.
Why is the red flickering on my Rode VideoMic Pro?
extremely low charge.
Describe VideoMic.
The VideoMic is a very portable and adaptable shotgun microphone.
For more manuals by Rode, Visit Manualsdock
[embeddoc url=”https://manualsdock.com/wp-content/uploads/2023/09/Rode-VideoMic-Pro-plus-Camera-Mount-Shotgun-Microphone-Guide.pdf” download=”all”]


