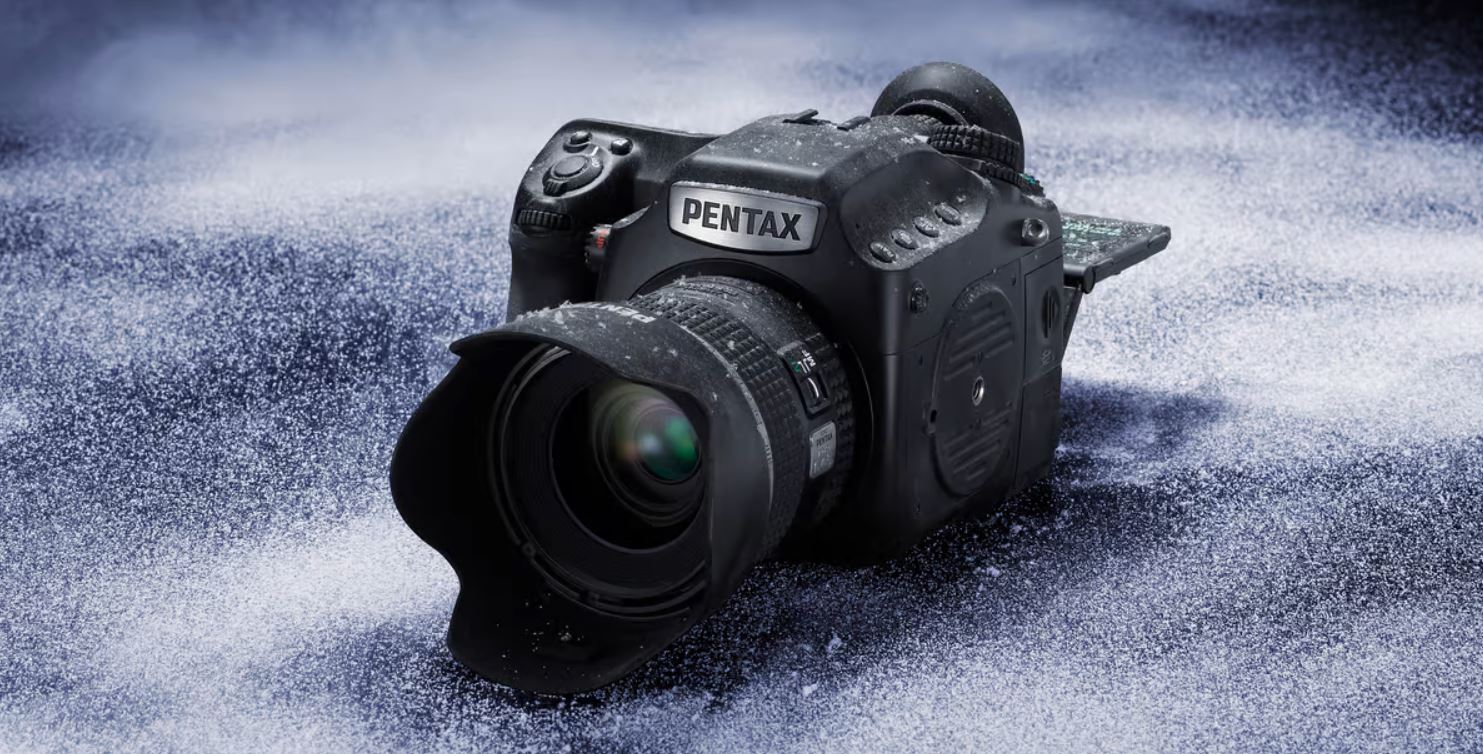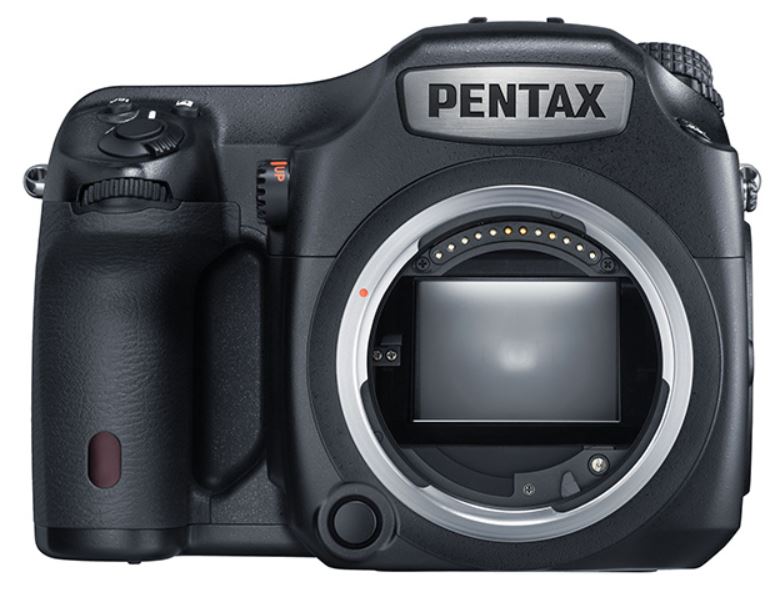
Ricoh PENTAX 645Z Digital SLR Camera
About Ricoh
Ricoh Corporation, commonly known as Ricoh, is a multinational imaging and electronics company based in Tokyo, Japan. Founded in 1936, Ricoh has grown into a global technology provider known for its diverse range of products and services. The company’s primary focus areas are office equipment, imaging products, and industrial systems.
Operating Manual Contents
Thank you for purchasing our PENTAX 645Z medium format digital SLR camera. Please read this manual before using the camera to get the most out of all the features and functions. Keep this manual safe, as it can be a valuable tool in helping you to understand all the camera’s capabilities.
Lenses you can use
In general, lenses that can be used with this camera are D FA645 and FA645 lenses, and 645 lenses that have an Aperture A (Auto) position. To use any other lens or accessory, see p.28 of this manual.
Regarding copyrights
Images taken with this camera that are for anything other than personal enjoyment cannot be used without permission according to the rights specified in the Copyright Act. Please take care, as there are cases where limitations are placed on taking pictures even for personal enjoyment during demonstrations, performances, or of items on display. Images taken to obtain copyrights also cannot be used outside the scope of use of the copyright as laid out in the Copyright Act, and care should be taken here too.
Trademarks
Microsoft, Windows, and Windows Vista are registered trademarks of Microsoft Corporation in the United States of America and other countries. Macintosh, Mac OS, and QuickTime are trademarks of Apple Inc., registered in the U.S. and other countries. Intel, Intel Core, and Pentium are trademarks of Intel Corporation in the U.S. and/or other countries. SDXC Logo is a trademark of SD-3C, LLC. Eye-Fi, the Eye-Fi logo, and Eye-Fi Connected are trademarks of Eye-Fi, Inc. This product includes DNG technology under license by Adobe Systems Incorporated. The DNG logo is either a registered trademark or trademark of Adobe Systems Incorporated in the United States and/or other countries HDMI, the HDMI logo and High-Definition Multimedia Interface are trademarks or registered trademarks of HDMI Licensing, LLC in the United States and/or other countries. All other trademarks are the property of their respective owners.
To users of this camera
- Do not use or store this camera in the vicinity of equipment that generates strong electromagnetic radiation or magnetic fields. Strong static charges or the magnetic fields produced by equipment such as radio transmitters could interfere with the monitor, damage the stored data, or affect the camera’s internal circuitry and cause camera misoperation.
- The liquid crystal panel used for the monitor is manufactured using extremely high-precision technology. Although the level of functioning pixels is 99.99% or better, you should be aware that 0.01% or fewer of the pixels may not illuminate or may illuminate when they should not. However, this does not affect the recorded image. • In this manual, the generic term “computer(s)” refers to either a Windows PC or a Macintosh.
- In this manual, the term “battery(ies)” refers to any type of battery used for this camera and its accessories.
There is a possibility that the illustrations and the display screen of the monitor in this manual are different from the actual ones
FOR USING YOUR CAMERA SAFELY
We have paid close attention to the safety of this camera. When using this camera, we request your special attention regarding items marked with the following symbols.
Warning This symbol indicates that ignoring this item could cause serious personal injuries.
Caution This symbol indicates that ignoring this item could cause minor or medium personal injuries or loss of property.
Care to be Taken During Handling
Before Using Your Camera
- When traveling, take the Worldwide Service Network listing that is included in the package. This will be useful if you experience problems abroad.
- When the camera has not been used for a long time, confirm that it is still working properly, particularly before taking important pictures (such as at a wedding or when traveling). Contents of the recording cannot be guaranteed if recording, playback, or transferring your data to a computer, etc. is not possible due to a malfunction of your camera or recording media (memory cards), etc.
About the Battery and Charger
- To keep the battery in optimum condition, avoid storing it in a fully charged state or at high temperatures.
- If the battery is left inserted and the camera is not used for a long time, the battery will over-discharge and shorten the battery’s life.
- Charging the battery a day before use or on the day of use is recommended.
- The AC plug cord provided with this camera is developed exclusively for the battery charger D-BC90. Do not use it with other devices.
About SD Memory Cards
- The SD Memory Card is equipped with a write-protect switch. Setting the switch to LOCK prevents new data from being recorded on the card, the stored data from being deleted, and the card from being formatted by the camera or computer.
- The SD Memory Card may be hot when removing the card immediately after using the camera.
- Do not remove the SD Memory Card or turn off the power while the card is being accessed. This may cause the data to be lost or the card to be damaged.
- Do not bend the SD Memory Card or subject it to violent impact. Keep it away from water and store it away from high temperatures.
- Do not remove the SD Memory Card while formatting. The card may be damaged and become unusable.
- Data on the SD Memory Card may be deleted in the following circumstances. We do not accept any liability for data that is deleted if
- the SD Memory Card is mishandled by the user.
- the SD Memory Card is exposed to static electricity or electrical interference.
- the SD Memory Card has not been used for a long time
- the SD Memory Card or the battery is removed while the card is being accessed.
- If the SD Memory Card is not used for a long time, the data on the card may become unreadable. Be sure to regularly make a backup of important data on a computer.
- Format new SD Memory Cards. Also, format SD Memory Cards previously used with other cameras.
- Please note that deleting data stored on an SD Memory Card, or formatting an SD Memory Card does not completely erase the original data. Deleted data can sometimes be recovered using commercially available software. If you are going to discard, give away, or sell your SD Memory Card, you should ensure that the data on the card is completely deleted or the card itself is destroyed if it contains any personal or sensitive information.
- The data on your SD Memory Card should be managed at your own risk.
Before Using Your Camera
Checking the Contents of the Package
The following accessories are packaged with this camera. Check that all accessories are included before using your camera.
Names and Functions of Working Parts
Caution
- Although the angle of the tiltable monitor can be changed (raised or lowered), the monitor cannot be moved in the left/right direction. Do not twist or apply strong force to the movable section, or hit the viewfinder part with the monitor. Always return to its original position when not in use
- Be sure to close the terminal cover correctly to keep out dust and moisture.
Operating Controls
- Shutter release button Press to capture images. (p.38) In playback mode, press halfway to switch to capture mode.
- ISO button ( (SO) Press to change the ISO sensitivity. (p.47)
- EV Compensation button (®) Press to change the exposure compensation value. (p.50)
- Main switch Move to turn the power on/off or to preview. (p.34, p.67)
- Front e-dial ( salsa) Changes the values for camera settings such as exposure. (p.49) You can change the menu category when a menu screen is displayed. (p.42) In playback mode, use this to select a different image. (p.39)
- Lens unlock button Press to detach the lens on the camera. (p.26)
- The metering mode switching dial Changes the metering mode. (p.47)
- Lock button (Lock) Temporarily disables e-dial and button operations to prevent misoperation. (I p.R43)
- AF area button (AND) Press to change the AF point. (p.45)
- Exposure Bracketing button (0) Sets exposure bracketing. (p.62)
- RAW/Fx button (RAW) You can assign a function to this button. (0 p.R20)
- Mode dial lock button Press to allow the mode dial to be turned. (p.49)
- Mode dial Changes the exposure mode. (p.49
- The stills/Movie switching dial Switches between @ (Still capture) mode and is (Movie recording) mode. (p.38)
- Rear e-dial ( S) Changes the values for camera settings such as exposure. (p.49) You can change the menu tabs when a menu screen is displayed. (0.42) You can change the camera settings when the control panel is displayed. (p.41) In playback mode, use this to magnify an image or display multiple images at the same time. (p.73, p.74)
- AF mode switching dial Switches between the autofocus modes (AF.S/C). (p.44)
- The mirror-up dial Enables shooting with the mirror raised. (p.63)
- Illumination button (8) Illuminates the LCD panel. (p.23)
- AE Lock button ( (AE-L)) Locks the exposure value before shooting. (p.50) In playback mode, the JPEG image that was just taken is also saved in RAW format. (p.39)
- AF button (AF) Available for adjusting focus, instead of pressing the shutter release button halfway. (p.44)
- OK button (OR) When a menu or the control panel is displayed, press this button to confirm the selected item.
- Four-way controller (A V < ») Displays the Drive Mode, Flash Mode, White Balance, or Custom Image setup menu. (p.41) When a menu or the control panel is displayed, use this to move the cursor or change the item to set. Press v in the single image display of the playback mode to display the playback mode palette. (p.72) When selecting the area of an image to magnify or to use as a focusing area, you can move the area diagonally by pressing two keys at the same time.
- AF point change/Card slot switching button (® / C Press this button to enable changing the AF point. (p.45) In playback mode, press this button to switch between the memory cards for playback that are inserted in the two slots, SD1 and SD2. (p.39)
- The green button (O) Resets the values being adjusted. Switches to ISO AUTO when adjusting the sensitivity. (p.47)
- Live View/REC/Delete button (L/O/®) Displays the Live View image. (p.39) Starts/stops recording a movie in si mode. (p.51) In playback mode, press to delete images. (p.73)
- INFO button ( (NFO) Changes the style of the display on the monitor. (p. 15, p. 19)
- MENU button ( MENUDisplays a menu. Press this button while the menu is displayed to return to the previous screen. (p.42)
- Playback button (E) Switches to playback mode. Press the button again to switch to capture mode. (p.39)
Button and Dial Operations
You can operate both a button and e-dial, such as @ and S or @ and all, to change the settings using either of the following methods.
- Operation Turn the dial while pressing the button. Press the button, take your finger off the button, and then turn the dial.
- Confirming the Setting Take your finger off the button. Press the button again or wait until the exposure metering timer goes off.
Hereafter, this Operating Manual explains by using the “Turn the dial while pressing the button” operation. For the Lock and fEw buttons, only the operation of turning while pressing the button is available.
Adjusting the Angle of the Monitor
- Hold the camera grip with your right hand and hold the top of the monitor with your left hand.
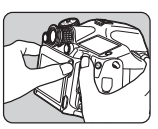
- Slowly lower until it stops.

- Hold the bottom of the monitor and lift it upward.

- Adjust the angle. Perform Step 3 and then Step 2 to retract the monitor.
Caution
- Do not twist or apply strong force to the movable section.
- Be careful not to hit the viewfinder part with the monitor.
Display Indicators
Monitor
The various indicators appear on the monitor depending on the camera settings and shooting conditions.
Capture Mode
With this camera, you can take pictures while looking through the viewfinder or while viewing the image on the monitor. When using the viewfinder, you can take pictures while checking the status screen displayed on the monitor and the viewfinder. When not using the viewfinder, you can take pictures while viewing the Live View image displayed on the monitor. The camera is in “standby mode when it is ready to shoot, such as when the status screen or Live View image is displayed. Press (NFO in standby mode to display the “control panel” and change settings. (p. 17) You can change the type of information displayed in standby mode by pressing (NFO while the control panel is displayed. (p.18)

Viewfinder
- AF frame
- Spot metering frame (p.47)
- AF point (p.45)
- EV bar scale: Displays the exposure compensation value or the difference between the proper and current exposure values in M or X mode. Displays the camera angle when [Electronic Level] is set to on.
- Focus indicator
- Shutter speed
- Aperture Value
- Sensitivity (p.47): Displays the difference between the proper and current exposure values in M or X mode when [Electronic Levell is set to on.
- Flash: Appears when the flash is available. Blinks when the flash is recommended or is being charged.
- Flash Exposure Compensation (p.65)
- SD1 file format (£ p.R15)
- SD1 slot
- SD2 file format (0 p.R15)
- SD2 slot
- AE Lock (p.50)
- Tethered shooting
- Shake Reduction (p.63)
- Enable/Disable Controls (0 p.R43)
- Change AF Point (p.45)
- Metering mode (p.47)
- ISO/ISO AUTO
- EV bar scale Shows the difference between the proper and current exposure values in %roPies 125 F56 +03 M or X mode. If the value exceeds the range of the EV bar scale, the “+” or “-” blinks.
- Exposure Warning When the proper exposure cannot be 125 F56 obtained with the values set in P, Sv, 200 ww.Se1 503 Tv, Av, or TAv mode, the values beyond the range of automatic adjustment blink.
Memo
- The AF point appears in red (Superimpose AF Area when the shutter release button is pressed halfway. To turn off the red light of the superimposed AF point, set [14. Superimpose AF Area] to off in the C2 menu. (£D p.R40)
- Item 16 appears when the camera is connected to a computer using optional tethered shooting software
Getting Started
Attaching the Strap
- Pass the end of the strap through the triangular ring.

- Secure the end of the strap on the inside of the clasp.

Attaching a Lens
- Make sure that the camera is turned off.

- Remove the body mount cap (1) and lens mount cap ((2)). Hold down the lens unlock button (3) and remove the body mount cap.

- Align the lens mount index (red dots; ) on the camera and the lens, and turn the lens clockwise. Do not press the lens unlock button at this time.
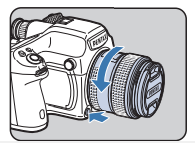
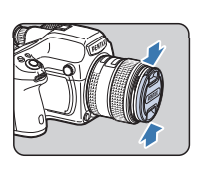
To remove the lens Turn the lens counterclockwise while holding down the lens unlock button. - Remove the front lens cap by pushing the top and bottom portions as indicated in the illustration.
Caution
- When attaching or removing the lens, choose an environment that is relatively free of dirt and dust.
- Keep the body mount cap attached to the camera when a lens is not attached.
- Be sure to attach the lens mount cap and lens cap to the lens after removing it from the camera.
- Do not insert your fingers inside the lens mount of the camera or touch the mirror.
- The camera body and lens mount incorporate lens information contacts. Dirt, dust, or corrosion may damage the electrical system. Please contact your nearest service center for professional cleaning.
- We assume no responsibility nor liability for accidents, damages, and malfunctions resulting from the use of lenses made by other manufacturers.
Using the Battery and Charger
Use the battery D-LI90 and battery charger D-BC90 exclusively developed for this camera.
Charging the Battery
- Connect the AC plug cord to the battery charger.
- Plug the AC plug cord into the power outlet.
- Face the A mark on the battery up, and insert it into the battery charger. The indicator lamp is lit while charging and turns off when the battery is fully charged.
- Remove the battery from the battery charger.
Inserting/Removing the Battery
Caution
- Insert the battery correctly. If the battery is inserted incorrectly, it may not be removed.
- Wipe the electrodes of the battery with a soft dry cloth before inserting.
- Do not open the battery cover or remove the battery while the power is on.
- Be careful as the camera or battery may become hot after the camera is used continuously for a long period.
- Remove the battery when you will not use the camera for a long time. The battery may leak and damage the camera if left installed during prolonged periods of non-use. If the removed battery will not be used for six months or longer, charge the battery for about 30 minutes before storing it, and after that, recharge the battery every six to twelve months.
- Store the battery in a location where the temperature will remain at or below room temperature. Avoid locations with high temperatures.
- The date and time may be reset if you leave the battery out of the camera for long periods. If this happens, set the current date and time again. (L p.R28)
- Open the battery cover. Lift the battery cover unlock knob, turn it towards OPEN to unlock, and then pull the cover open.
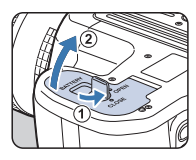
- Face the A mark on the battery towards the outside of the camera, and insert the battery until it locks into place. To remove the battery Push the battery lock lever in the direction of 3.

- Close the battery cover. Turn the battery cover unlock knob towards CLOSE to lock.

Battery Level Indicator
You can check the remaining battery level with the battery level indicator on the monitor (when the monitor is in standby mode) or on the LCD panel.
Memo
- The battery level may not be displayed properly if the camera is used at low temperatures or when performing Continuous Shooting for a long time.
- Battery performance temporarily decreases as the temperature decreases. When using the camera in cold climates, have extra batteries at hand and keep them warm in your pocket. Battery performance will return to normal at room temperature.
- Have extra batteries ready when traveling overseas, or taking a lot of pictures.
- Use the optional AC adapter kit when using the camera for a prolonged period. (p.32)
- The battery level is not displayed when using the AC adapter.
Using the AC Adapter
We recommend using the optional AC adapter kit K-AC132 when using the monitor for a long time or when connecting the camera to a computer or AV device.
- Make sure that the camera is turned off, and open the terminal cover.
- Align the A marks on the DC terminal of the AC adapter and the DC input terminal of the camera, and connect.
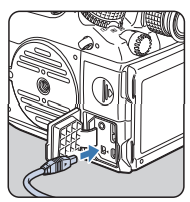
- Connect the AC adapter to the AC plug cord, and plug the cord into the power outlet.
Inserting a Memory Card
The following memory cards can be used with this camera.
- SD Memory Card, SDHC Memory Card, and SDXC Memory Card
- Eve-Fi card
- Flucard is compatible with this camera In this manual, these cards are referred to as memory cards. Ideally, you should use a high-speed, large-capacity memory card.
Caution A memory card must be formatted with this camera before use. (1 “Formatting a Memory Card” p.36)
- Make sure that the camera is turned off.
- Slide the card cover in the direction of (1)
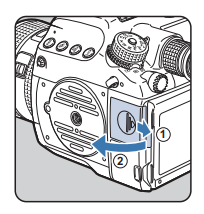
- Insert the card into the memory card slot with the memory card label facing toward the monitor. Insert a memory card into one or both of the SD1 and SD2 slots. To use an Eye-Fi card or a Flucard, insert the card in the SD2 slot.

To remove the memory card Push the card in again. - Close the card cover, and slide it in the opposite direction of 1.
Caution
- Be sure to fully close the card cover. The camera will not turn on if the card cover is open.
- Do not turn off the power or remove the memory card while the card access lamp is lit.
- Use a high-speed memory card when recording movies. If the write speed cannot keep up with the recording speed, the writing may stop during recording.
Memo
- For details on how the data is recorded when two memory cards are inserted, refer to “Memory Card Options” (£0 p.R15).
- When using an Eye-Fi card or a Flucard, refer to “Wireless Memory Card” (£ p.R34).
How to Change Function Settings
The camera functions and their settings can be selected and changed by using the following ways.
Connecting the Camera to an AV Device
DIo Connect to an AV device, such as a TV, equipped with an HDMI terminal to display Live View images while shooting or to play back images in playback mode. Make sure to have a commercially available HDMI cable equipped with an HDMI terminal (type D).
- Turn the AV device and camera off.
- Open the terminal cover of the camera, and connect the HDMI cable to the HDMI terminal.

- Connect the HDMI cable to the input terminal on the AV device.
- Turn the AV device and camera on. The camera turns on in HDMI mode, and the camera information is displayed on the screen of the connected AV device.
Caution
- While the camera is connected to an AV device, nothing is displayed on the camera monitor. Also, you cannot adjust the volume on the camera Adiust the volume on the AV device
Memo
- Check the operating manual of the AV device and select a suitable input terminal for connecting the camera.
- If you intend to use the camera continuously for a long period, the use of the optional AC adapter kit is recommended.
- By default, the maximum resolution supported by both the AV device and camera is automatically selected. If it fails to play back images properly, change the setting in [HDMI Out] of the 42 menu. (£ p.R30)
Error Messages


Troubleshooting
In rare cases, the camera may not operate correctly due to static electricity. This can be remedied by taking the battery out and putting it back in again. When the mirror remains in the UP position, take the battery out and put it back in again. Then, the mirror will retract when the camera is turned on again. If, after performing these procedures, the camera operates correctly, it does not require any repairs. We recommend checking the following items before contacting a Corvico Contor

WARRANTY POLICY
All our cameras purchased through authorized bona fide photographic distribution channels are guaranteed against defects of material or workmanship for twelve months from the date of your purchase. Service will be rendered, and defective parts will be replaced without cost to you within that period, provided the camera does not show evidence of impact, sand or liquid damage, mishandling, tampering, battery or chemical corrosion, operation contrary to operating instructions, or modification by an unauthorized repair shop. The manufacturer or its authorized representatives shall not be liable for any repair or alterations except those made with its written consent and shall not be liable for damages from delay or loss of use or any other indirect or consequential damages of any kind, whether caused by defective material or workmanship or otherwise and it is expressly agreed that the liability of the manufacturer or its representatives under all guarantees or warranties, whether expressed or implied, is strictly limited to the replacement of parts as hereinbefore provided. No refunds will be made on repairs by non-authorized service facilities. Procedure During 12-month Warranty Period Any camera that proves defective during the 12-month warranty period should be returned to the dealer from whom you purchased the camera or to the manufacturer. If there are no representatives of the manufacturer in your country, send the camera to the manufacturer, with postage prepaid. In this case, it will take a considerable length of time before the camera can be returned to you owing to the complicated customs procedures required. If the camera is covered by warranty, repairs will be made and parts replaced free of charge, and the camera will be returned to you upon completion of servicing. If the camera is not covered by warranty, regular charges of the manufacturer or its representatives will apply. Shipping charges are to be borne by the owner. If your camera was purchased outside of the country where you wish to have it serviced during the warranty period, regular handling and servicing fees may be charged by the manufacturer’s representatives in that country. Notwithstanding this, your camera returned to the manufacturer will be serviced free of charge according to this procedure and warranty policy. In any case, however, shipping charges and customs clearance fees are to be borne by the sender. To prove the date of your purchase when required, please keep the receipt or bills covering the purchase of your camera for at least a year. Before sending your camera for servicing, please make sure that you are sending it to the manufacturer’s authorized representatives or their approved pair shops unless you are sending it directly to the manufacturer. Always obtain a quotation for the service charge, and only after you accept the quoted service charge, instruct the service station to proceed with the servicing.
- This warranty policy does not affect the customer’s statutory rights.
- The local warranty policies available from our distributors in some countries can supersede this warranty policy. Therefore, we recommend that you review the warranty card supplied with your product at the time of purchase, or contact our distributor in your country for more information and to receive a copy of the warranty policy.
For customers in the USA STATEMENT OF FCC COMPLIANCE
This device complies with Part 15 of the FCC Rules. Operation is subject to the following two conditions:
- This device may not cause harmful interference, and
- this device must accept any interference received, including interference that may cause undesired operation. Changes or modifications not approved by the party responsible for compliance could void the user’s authority to operate the equipment.
This equipment has been tested and found to comply with the limits for a Class B digital device, under part 15 of the FCC Rules. These limits are designed to provide reasonable protection against harmful interference in a residential installation. This equipment generates, uses, and can radiate radio frequency energy and, if not installed and used by the instructions, may cause harmful interference to radio communications. However, there is no guarantee that interference will not occur in a particular installation. If this equipment does cause harmful interference to radio or television reception, which can be determined by turning the equipment off and on, the user is encouraged to try to correct the interference by one or more of the following measures:
- Reorient or relocate the receiving antenna.
- Increase the separation between the equipment and the receiver.
- Connect the equipment to an outlet on a circuit different from that to which the receiver is connected. Consult the dealer or an experienced radio/TV technician for help
For customers in Canada
This Class B digital apparatus complies with Canadian ICES-003.
Declaration of Conformity
- Product Name: Lens-interchangeable medium-format digital SLR (Single Lens Reflex) Camera
- Model Number: PENTAX 645Z
- Contact person: Customer Service Manager
- Date and Place: March 2014. Colorado
FAQS About Ricoh PENTAX 645Z Digital SLR Camera
What is the Pentax 645Z’s shutter speed?
1/4000 to 30 seconds in stages of 1/3 or 1/2EV
The Pentax 645Z is full-frame, right?
Compared to full-frame 35mm digital cameras, it is still significantly larger.
The Pentax 645Z’s sensor size is what?
43.8 x 32.8 mm
What lenses can I use with my Pentax 645Z?
Pentax DFA 645 25mm F4, Pentax DFA 645 55mm F2, and Pentax-DFA645 35mm F3 lenses.
What is the Pentax 645Z’s ISO range?
100 to 204,800
What is the Pentax 645Z’s focal length?
90mm
What is the Pentax 645Z’s aspect ratio?
4:3
What is full frame’s resolution?
6K
The Pentax 645Z was released when?
April 15, 2014
Pentax 645Z video has what resolution?
60i, 50i, 30p, 25p, and 24p in Full HD and 60p, 50p, 30p, 25p, and 24p in 1280×720.
How is the Pentax 645Z mounted?
Mount PENTAX 645AF2
For more manuals by Ricoh, Visit Manualsdock
[embeddoc url=”https://manualsdock.com/wp-content/uploads/2023/09/Ricoh-PENTAX-645Z-Digital-SLR-Camera-Operating-Manual.pdf” download=”all”]

