
ViewSonic PS600X 3500 Lumens XGA HDMI Projector
About ViewSonic
ViewSonic is a global company that specializes in visual display solutions, including monitors, projectors, digital signage, and interactive displays. Founded in 1987, ViewSonic has established itself as a leading provider of innovative and high-quality display products for both consumer and professional markets.
The company offers a wide range of display solutions to cater to various needs and environments. Their product lineup includes computer monitors for gaming, business, and home entertainment purposes, interactive flat panel displays for education and collaboration, projectors for classrooms and conference rooms, and digital signage solutions for advertising and information displays.
Introduction
Projector features
The projector integrates high-performance optical engine projection and a user-friendly design to deliver high reliability and ease of use.
Some of the features may not be available on your projector. Actual performance may vary and is subject to model specifications.
- The power saving function decreases the power consumption of the lamp by up to 70% when no input signal can be detected for a set period.
- Presentation timer for better control of time during presentations
- LAN Settings allow management of projector status from a remote computer
- Supports 3D display
- Color Management allowing color adjustments to your liking
- Less than 0.5W power consumption when power saving mode is turned on
- Screen Color correction allows projection on surfaces of several predefined colors
- Quick auto search speeding up the signal-detecting process
- Color modes provide choices for different projection purposes
- One-key auto-adjustment to display the best picture quality (only for analog signal)
- Digital keystone correction and/or 4 corner adjustment to correct distorted images
- Adjustable color management control for data/video display
- Ability to display 1.07 billion colors
- Multi-language On-Screen Display (OSD) menus
- Switchable normal and economic modes to reduce power consumption
- Component HDTV compatibility (YPbPr)
- HDMI CEC (Consumer Electronics Control) function allows synchronized power ON/ OFF operation between the projector and a CEC-compatible DVD player device connected to the HDMI input of the projector
The apparent brightness of the projected image will vary depending on the ambient lighting conditions, and selected input signal contrast/brightness settings, and is directly proportional to projection distance.
The lamp brightness will decline over time and may vary within the lamp manufacturer’s specifications. This is normal behavior.
Shipping contents
- Projector

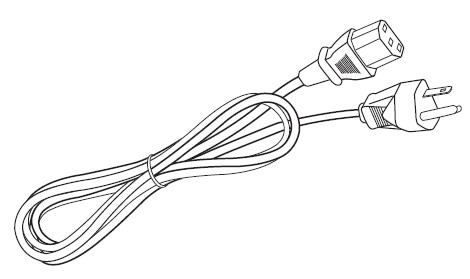
- Power Cord
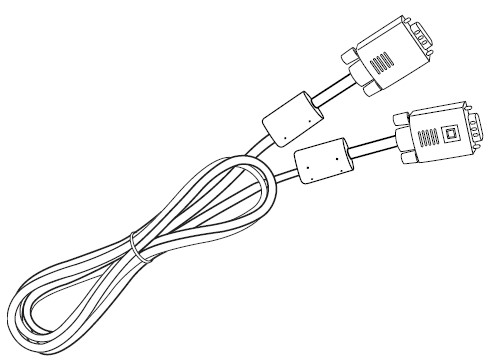
- VGA Cable
- Quick Start Guide

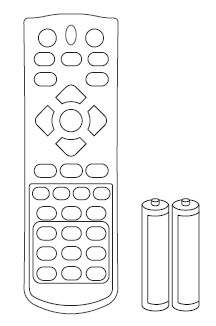
- Remote Control & Batteries
- Replacement lamp (optional) (Please contact qualified service personnel for changing the lamp)
- Dust filter (optional)
Controls and functions
Projector
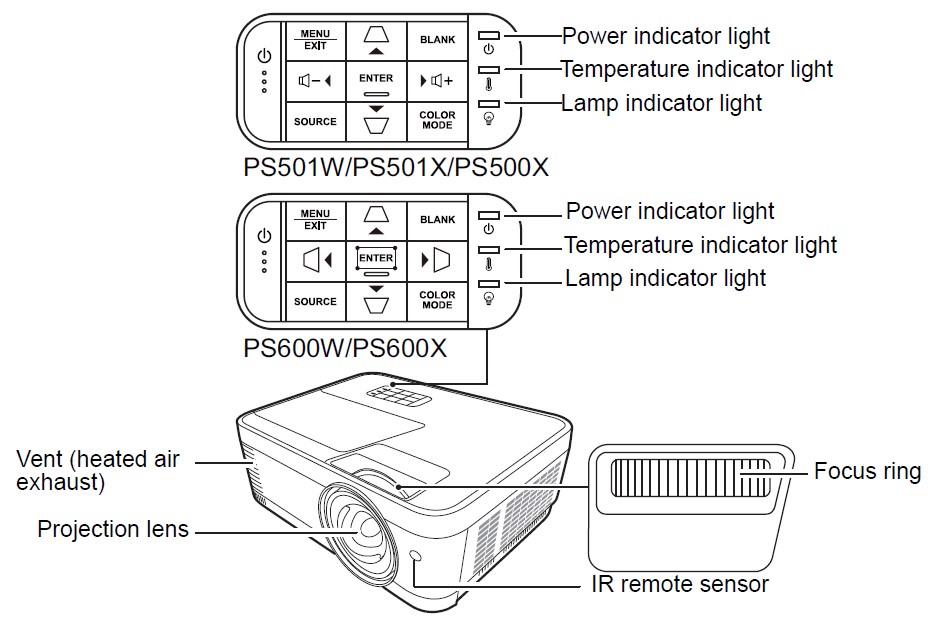
- Power
Toggles the projector between standby mode and Power ON. - Keystone keys
Manually corrects distorted images resulting from an angled projection. - Left/ Right/ Up/ Down
Select the desired menu items and make adjustments when the On-Screen Display (OSD) menu is activated. - Menu
Turns on the On-Screen Display (OSD) menu. - Exit
Goes back to the previous OSD menu, exits, and saves menu settings. - Source
Displays the source selection bar. - Blank
Hides the screen picture. - Enter
Enacts the selected On-Screen Display (OSD) menu item when the On-Screen Display (OSD) menu is activated. - Displays the Corner Adj. page.
- Color Mode
Selects an available picture setup mode. - (Volume Up)
Increases the volume level. - (Volume Down)
Decreases the volume level.
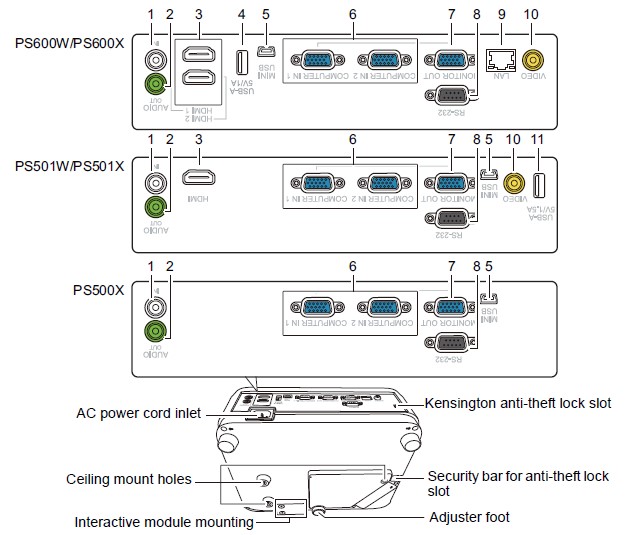
- AUDIO IN
Audio signal input socket. - AUDIO OUT
Audio signal output socket. - HDMI
HDMI port. - USB 5V/1A Out
USB Type-A port for power supply. - Mini USB
Mini USB port. - COMPUTER
RGB (PC)/Component video (YPbPr/YCbCr) signal input socket. - MONITOR OUT
RGB signal output socket. - RS-232
RS-232 control port. - LAN
RJ45 LAN port. - VIDEO
Video input socket. - USB 5V/1.5A Out
USB Type-A port for power supply.
Remote control

To use the remote mouse control keys (Page Up, Page Down), see “Using the remote PgUp/PgDn function” on page 11 for details.
- On/ Off
Toggles the projector between standby mode and Power ON. - COMP
Select source from COMPUTER port for display. - HDMI
Select the source from the HDMI port for display. - HDMI 1
Select the source from the HDMI 1 port for display. - HDMI 2
Select the source from the HDMI 2 port for display. - VIDEO
Select source from VIDEO or S-VIDEO port for display. - Auto Sync
Automatically determines the best picture timings for the displayed image. - Source
Displays the source selection bar. - (Keystone keys)
Manually corrects distorted images resulting from an angled projection. - Enter
Enacts the selected On-Screen Display (OSD) menu item. - Displays the Corner Adj. page.
- Left/ Right/ Up/ Down
Select the desired menu items and make adjustments. - Menu
Turns on the On-Screen Display (OSD) menu. - Exit
Exits and saves menu settings. - (Laser)
Emits visible laser pointer light for presentation purposes. - Aspect
Displays the aspect ratio selection bar. - Freeze
Freezes the screen picture. - Pattern
Displays embedded test pattern. - Blank
Hides the screen picture. - PgUp (Page Up)/PgDn (Page Down)
Operates your display software program (on a connected PC or USB reader) which responds to page up/down commands (like Microsoft PowerPoint).
Only available when a PC input or USB Reader signal is selected. - (Presentation Timer)
Displays the presentation timer settings menu. - Eco Mode
Displays the lamp mode selection bar. - (Volume Up)
Increases the volume level. - (Volume Down)
Decreases the volume level. - (Mute)
Toggles the projector audio between on and off. - (Information)
Displays the INFORMATION menu. - (Zoom In)
Magnifies the projected picture size. - (Zoom Out)
Reduces the projected picture size. - Color Mode
Displays the color mode selection bar. - Network
Displays the LAN Control Settings menu.
Operation
Starting up the projector
- Plug the power cord into the projector and a wall socket. Turn on the wall socket switch (where fitted).
- Press Power to start the projector. As soon as the lamp lights up, a “Power On Ring Tone” will be heard. The Power indicator light stays blue when the projector is on. (If necessary) Rotate the focus ring to adjust the image’s clearness.

• If the projector is still hot from the previous activity, it will run the cooling fan for approximately 90 seconds before energizing the lamp.
• To maintain the lamp life, once you turn the projector on, wait at least 5 minutes before turning it off.
• To turn off the ring tone, see “Turning off the Power On/Off Ring Tone” on page 43 for details. - If the projector is activated for the first time, select your OSD language following the on-screen instructions.
- Switch all of the connected equipment on.
- The projector will start to search for input signals. The current input signal being scanned appears in the bottom right corner of the screen. If the projector doesn’t detect a valid signal, the message ‘No Signal’ will continue to be displayed until an input signal is found.
• You can also press Source to select your desired input signal. See “Switching input signal” on page 25 for details.
If the frequency/resolution of the input signal exceeds the projector’s operating range, you will see the message ‘Out of Range’ displayed on a blank screen. Please change to an input signal that is compatible with the projector’s resolution or set the input signal to a lower setting.
Adjusting the projected image
Adjusting the projection angle
The projector is equipped with an adjuster’s foot. It changes the image height and vertical projection angle. Screw the adjuster foot to fine-tune the angle until the image is positioned where you want it.
If the projector is not placed on a flat surface or the screen and the projector are not perpendicular to each other, the projected image becomes trapezoidal. To correct this situation, see “Correcting keystone” on page 26 for details.
- Do not look into the lens while the lamp is on. The strong light from the lamp may cause damage to your eyes.
Auto-adjusting the image
In some cases, you may need to optimize the picture quality. To do this, press Auto Sync on the remote control. Within 5 seconds, the built-in Intelligent Auto Adjustment function will re-adjust the values of Frequency and Clock to provide the best picture quality.
The current source information will be displayed in the upper left corner of the screen for 3 seconds.
- The screen will display the ViewSonic logo while the auto adjustment is functioning.
- This function is only available when the PC D-Sub input signal (analog RGB) is selected.
Fine-tuning the image clarity
If necessary, sharpen the image by rotating the focus ring.

Correcting keystone
Keystoning refers to the situation where the projected image becomes a trapezoid due to angled projection.
To correct this, besides adjusting the height of the projector, you will need to manually correct it by following one of these steps.
- Using the remote control
- Press to display the Keystone correction page.
- Press to correct key stoning at the top of the image. Press to correct key stoning at the bottom of the image. Press to correct key stoning at the right side of the image. Press to correct key stoning at the left side of the image.
- Using the OSD menu
- Open the OSD menu and go to the DISPLAY > Keystone menu.
- Press Enter.
- Press to correct key stoning at the top of the image or press to correct key stoning at the bottom of the image. Press to correct key stoning at the right side of the image. Press to correct key stoning at the left side of the image.

Maintenance
Care of the projector
You need to keep the lens and/or filter (optional accessory) clean regularly. Never remove any parts of the projector. Contact your dealer when any part of the projector needs replacing.
Cleaning the lens
Clean the lens whenever you notice dirt or dust on the surface.
- Use a canister of compressed air to remove dust.
- If there is dirt or smears, use lens-cleaning paper or moisten a soft cloth with lens cleaner and gently wipe the lens surface.
CAUTION: Never rub the lens with abrasive materials.
Cleaning the projector case
Before you clean the case, turn the projector off using the proper shutdown procedure as described in “Shutting down the projector” on page 44 and unplug the power cord.
- To remove dirt or dust, wipe the case with a soft, lint-free cloth.
- To remove stubborn dirt or stains, moisten a soft cloth with water and a neutral pH detergent. Then wipe the case.
CAUTION: Never use wax, alcohol, benzene, thinner, or other chemical detergents. These can damage the case.
Storing the projector
If you need to store the projector for an extended time, please follow the instructions below:
- Make sure the temperature and humidity of the storage area are within the recommended range for the projector. Please refer to “Specifications” on page 61 or consult your dealer about the range.
- Retract the adjuster’s foot.
- Remove the battery from the remote control.
- Pack the projector in its original packing or equivalent.
Transporting the projector
It is recommended that you ship the projector with its original packing or equivalent
Using the dust filter (optional accessory)
CAUTION
- It is recommended to clean the dust filter every 100 hours after the dust filter is installed.
- Be sure to turn off the projector and unplug it from the power source before installing or detaching the filter.
- If your projector is ceiling-mounted or is not easily accessible, pay special attention to your safety when replacing the dust filter.
Troubleshooting
The projector does not turn on.

No picture

Blurred image

The remote control does not work

Specifications
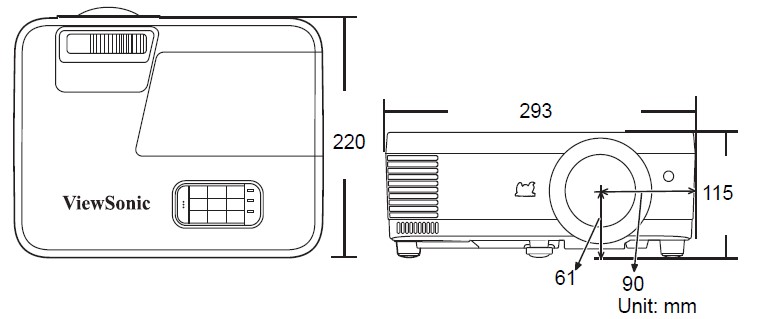
Dimensions
293 mm (W) x 115 mm (H) x 220 mm (D) (Excluding extrusions)
Ceiling mount installation

For users in Europe and Russia, full details of the warranty provided can be found at www.viewsoniceurope.com under Support/Warranty Information.
FAQS About ViewSonic PS600X 3500 Lumens XGA HDMI Projector
How long is the lifespan of a ViewSonic projector?
30,000 hours maximum
How long does a ViewSonic projector take to charge?
around two hours
How long can a projector be used?
1,000-5,000 hours.
Are ViewSonic projectors a reliable product?
2022 Very Recommendable
Is ViewSonic a reliable company?
ViewSonic is another company that produces excellent gaming displays at an affordable price.
What is the ViewSonic projector’s refresh rate?
Refresh rate of 240Hz
How is a Viewsonic projector cleaned?
To eliminate dust, use a compressed air canister.
Can I turn on my projector at night?
There are a few reasons why you wouldn’t want to leave a perfectly optimized projector on.
What is the closest a projector can be?
The distance to the projector must be 2 feet.
For more manuals by ViewSonic, Visit Manualsdock
[embeddoc url=”https://manualsdock.com/wp-content/uploads/2023/09/ViewSonic-PS600X-3500-Lumens-XGA-HDMI-Projector-User-Guide.pdf” download=”all”]


I think the admin of this web site is in fact working hard in support of his web page, as here every stuff is quality based stuff.