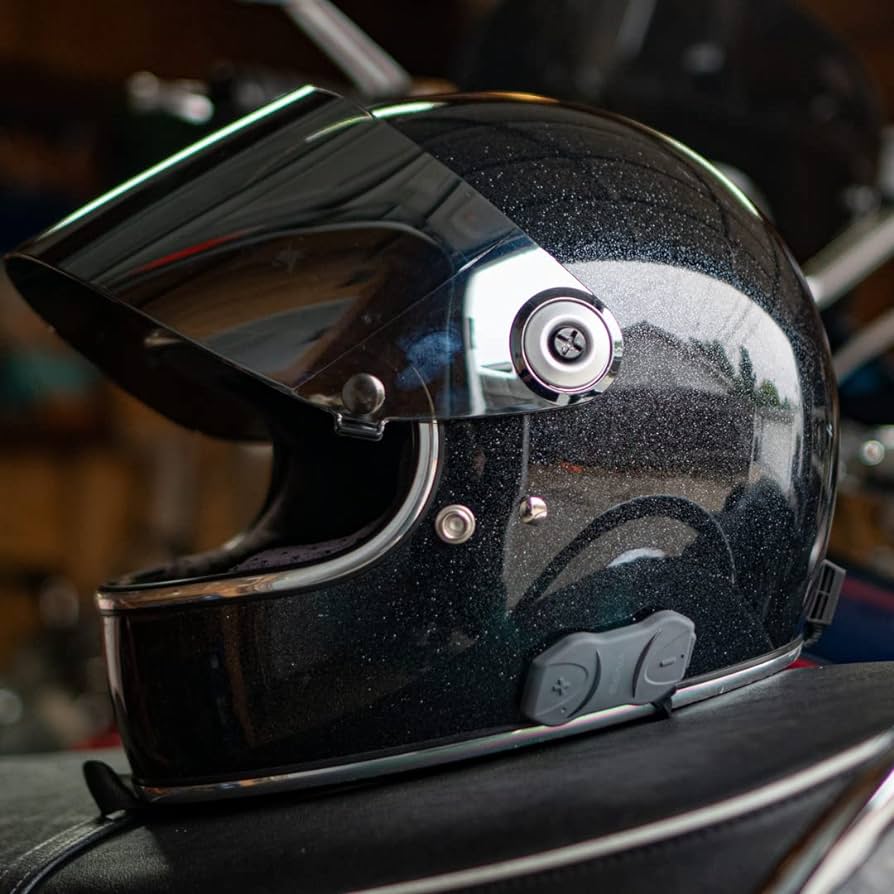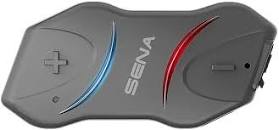
Sena SMH10R Low Profile Motorcycle Bluetooth Headset
About Sena
Sena is a well-known brand in the motorcycle and outdoor sports communication industry, particularly for their Bluetooth communication systems and accessories. Sena Technologies, Inc. specializes in creating wireless communication devices designed to enhance the experience of motorcyclists, cyclists, and other outdoor enthusiasts.
Sena Bluetooth communication systems allow riders to stay connected while on the road. These systems typically consist of helmet-mounted devices that enable riders to communicate with each other via intercom, make and receive phone calls, listen to music, get GPS navigation instructions, and even connect with other devices like smartphones and GPS units.
WARNING
To minimize the risk of serious injury, death, or product damage, read this User’s Guide and the Quick Start Guide before using the product for the first time. Go to sena.com to access these documents if they are missing or unreadable. Keep both Guides for future reference.
Sena Technologies, Inc. reserves the right to make any changes and improvements to its product without providing prior notice.
GoPro® is a registered trademark of Woodman Labs of San Mateo, California. Sena Technologies, Inc. (“Sena”) is not affiliated with Woodman Labs. The Sena Bluetooth Pack for GoPro® is an after-market accessory specially designed and manufactured by Sena Technologies, Inc. for the GoPro® Hero3 and Hero4, allowing Bluetooth capabilities.
The Bluetooth® word mark and logos are owned by the Bluetooth SIG, Inc. and any use of such marks by Sena is under license. iPhone and iPod touch are registered trademarks of Apple Inc. Zumo™ is a trademark of Garmin Ltd. or its subsidiaries. TomTom™ is the trademark or registered trademark owned by TomTom International B.V. Other trademarks and tradenames are those of their respective owners.
Safety Precautions
Please ensure that the product is properly used by observing the safety precautions below to prevent any risk of serious injury, death, and/or property damage.
Hazard alert signal words
The following safety symbols and signal words are used in this manual.
WARNING Indicates a potentially hazardous situation that, if not avoided, could result in death or serious injury.
CAUTION Indicates a potentially hazardous situation that, if not avoided, could result in minor or moderate injury.
NOTICE Indicates information considered important, but not hazard-related. If not avoided, it could cause damage to your product.
Product Use
Observe the following precautions to avoid injury or damage to your product while using the product.
WARNING
- Use of the product at a high volume for a long period may damage your eardrums or hearing ability.
- When relevant, follow all regulations regarding the use of the camera.
- Do not use your camera in an aircraft, unless permitted.
- Turn off the camera when you are near medical equipment. Your camera can cause interference with medical devices in hospitals or healthcare facilities.
- The camera generates a low-level magnetic field. Keep a safe distance between the camera and cardiac pacemakers to avoid potential interference. Turn off the camera immediately if your camera indicates interference with a pacemaker and contact the manufacturer or a physician.
- Avoid interference with other electronic devices. Your camera generates a low-level magnetic field that may interfere with unsealed or improperly shielded electronic equipment in homes or vehicles. Consult the manufacturers of your electronic devices to resolve any interference problems you experience.
- Never use a damaged memory card. This may result in electric shock, camera malfunction, or fire.
- Careless use of the product on the road is risky and may result in serious injury, death, or damage. You must heed all safety precautions in all documents that come with this product. This will help minimize the chance these risks may occur while riding.
- In any place where wireless communication is prohibited, such as hospitals or airplanes, turn off the power. In a place where wireless communication is prohibited, electromagnetic waves may cause hazards or accidents.
- Before riding, fasten the product from the helmet, and double-check that it is properly fastened. Separation of the product while riding will cause damage to the product and may result in an accident.
- When you use the product while you operating any vehicle or equipment such as motorcycles, scooters, mopeds, ATVs, or quadbikes (hereinafter called “transportation means”), you need to follow the safety precautions provided by the manufacturer of the vehicle.
- When you use the product, use good judgment; never use it under the influence of alcohol or drugs or when you are extremely tired.
CAUTION
- If the product emits an unusual smell, feels hot, or appears abnormal in any other way while using or charging, stop using it immediately. It may cause damage, explosion, or fire. Contact your sales location if any of these problems are observed.
- Do not use the product in an explosive atmosphere. If you are in such a location, turn off the power and heed any regulations, instructions, and signs in the area.
NOTICE
- Attaching the product to the helmet is considered a modification to the helmet and may void your helmet’s warranty or compromise your helmet’s functionality. This may entail risks during an accident, so be fully aware of this fact before using the product. Should you not accept this fact, you may return the product for a full refund.
- In some regions, it is prohibited by law to ride motorcycles while wearing headsets or earbuds. Therefore be certain you are aware of all relevant laws in the region where you are using the product and are sure to comply with them.
- The headset is for motorcycle helmets only. To install the headset, you must follow the installation instructions shown in the User’s Guide.
- Do not impact the product with sharp tools as this may damage the product.
- Keep products away from pets or small children. They may damage the product.
- Any changes or modifications to the equipment not expressly approved by the party responsible for compliance could void the limited warranty to operate the equipment.
- The high internal temperature may result in noisy photos. This is not a malfunction and does not affect your camera’s overall performance.
- Check that the camera is operating properly in advance. Any file loss or camera damage caused by camera malfunction or improper use is not covered under warranty.
Battery
Your product has a built-in battery. Be careful to heed all safety information in this guide. Failure to carefully observe the safety precautions can cause battery heat generation, bursting, fire, and serious personal injury.
WARNING
- Do not use the product in direct sunlight for a long period. Doing so can damage the product and generate heat that can cause burns.
- Do not use or store the product inside cars in hot weather. It may cause the battery to generate heat, rupture, or ignite.
- Do not continue charging the battery if it does not recharge within the specified charging time. Doing so may cause the battery to become hot, explode, or ignite.
- Do not leave the product near open flames. Do not dispose of the product in a fire. It may cause the battery to become hot, explode, or ignite and cause serious injury.
- Never attempt to charge a battery with a charger that has been physically damaged. It may cause explosions and/or accidents.
NOTICE
- Battery life may vary depending on conditions, environmental factors, functions of the product in use, and devices used with it.
Product Storage and Management
Take the following precautions to avoid personal injury or damage to your product while storing and maintaining the product.
CAUTION
- Do not dispose of the product with household waste. The built-in battery is not to be disposed of in the municipal waste stream and requires separate collection. Disposal of the product should be done by the local regulations.
NOTICE
- Keep the product free of dust. Dust may damage the mechanical and electronic parts of the product.
- The product should be stored at room temperature. Do not expose the product to extremely high or low temperatures as this may reduce the life span of electronic devices, damage the battery, and/or melt plastic parts of the product.
- Do not clean the product with cleaning solvents, toxic chemicals, or strong detergents as this may damage the product.
- Do not paint the product. Paint may obstruct moving parts or interfere with the normal operation of the product.
- Do not drop or otherwise shock the product. It may damage the product or its internal electronic circuits.
- Do not disassemble, repair, or modify the product as this may damage the product and invalidate the product warranty.
- Do not store the product in humid environments, especially for long periods. It may damage the internal electronic circuits.
- Battery performance will deteriorate over time if stored for a long period without being used.
- Do not store the camera in proximity to magnetic fields. Doing so may result in camera malfunction.
- Be careful to protect the lens by avoiding rough handling or physical shock.
- Wipe the surface of the lens with a soft cloth in the following situations:
- When there are fingerprints on the lens surface.
- When the lens is used in hot or humid environments, such as near oceans or rivers.
- Store the product in a well-ventilated room to protect the lens from dirt and dust.
INTRODUCTION
Thank you for choosing the Sena 10R, Low Profile Bluetooth Stereo Headset and Intercom. With the 10R, you can call hands-free on your Bluetooth mobile phone, listen to stereo music or voice instructions of GPS navigations wirelessly, and have intercom conversations in a full duplex with a passenger or other motorcycle rider.
The 10R is compliant with Bluetooth 4.1 supporting the following profiles: Headset Profile, Hands-Free Profile (HFP), Advanced Audio Distribution Profile (A2DP), and Audio Video Remote Control Profile (AVRCP). Please check with the manufacturers of another device to determine their compatibility with this headset.
Please read this User’s Guide carefully before using the headset. Also, check www.sena.com for the latest version of the User’s Guide and additional information related to Sena Bluetooth products.
The 10R features:
- Lightweight and ultra-slim profile
- Bluetooth intercom up to 900 meters (980 yards)*
- Four-way intercom
- Three-way conference phone call with intercom participant
- Universal Intercom™
- Voice prompts
- Smartphone App for iPhone and Android
- Built-in FM radio tuner with a station scan and save function
- Music Sharing
- Advanced Noise Control™
- Sidetone
- Speed Dialing
- Firmware upgradeable
Key Specifications:
- Bluetooth 4.1
- Supporting profiles: Headset Profile, Hands-Free Profile (HFP), Advanced Audio Distribution Profile (A2DP), and Audio Video Remote Control Profile (AVRCP).
PACKAGE CONTENTS
- Headset Main Unit

- Hook and Loop Fasteners for Main Unit (2)
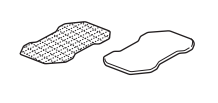
- Double Sided Adhesive Tapes for Main Unit (2)

Speaker
- Speakers (2)
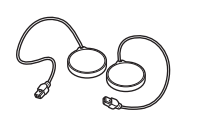
- Hook and Loop Fasteners for Speakers (4)

- Foam Speaker Covers (2)

- Speaker Pads (Thick) (2)

- Speaker Pads (Thin) (2)

Wired Boom Microphone
- Wired Boom Microphone
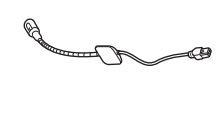
- Hook and Loop Fastener for Wired Boom Microphone
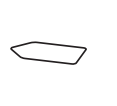
- Microphone Sponges (2)

- Boom Microphone Holder
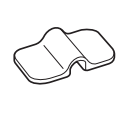
- Hook and Loop Fastener for Boom Microphone Holder

Wired Microphone
- Wired Microphone

- Hook and Loop Fastener for Wired Microphone

Battery Pack
- 10R Battery Pack

- Battery Pack Holder

- Double Sided Adhesive Tapes for Battery Pack Holder
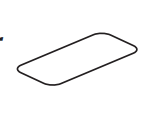
Others
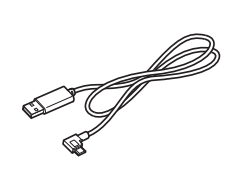
- USB Power & Data Cable
INSTALLING THE 10R ON YOUR HELMET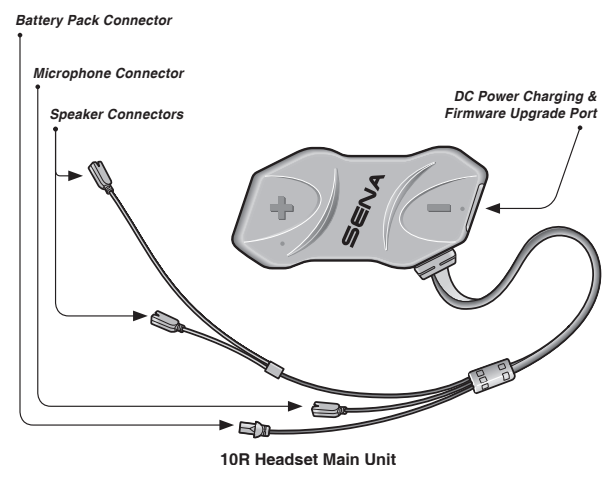
Installing the Main Unit
Using the Hook and Loop Fasteners for the Main Unit
- Clean the area on the left side of the helmet where you will attach the hook and loop fasteners for the main unit with a moistened towel and dry thoroughly
- Peel off the cover of the adhesive tape of the loop fastener for the main unit and attach it to the helmet.

- Peel off the cover of the adhesive tape of the hook fastener for the main unit and attach it to the back plate of the main unit.
- Attach the main unit using the hook and loop fasteners that you fitted. Make sure that the main unit is firmly attached to the helmet.
Using the Double Sided Adhesive Tapes for the Main Unit
If you cannot attach the hook and loop fasteners to the helmet, you can use double-sided adhesive tape.
- Clean the area on the left side of the helmet where you will attach the double-sided adhesive tapes with a moistened towel and dry thoroughly.
- Peel off the cover from one side of the double-sided adhesive tapes for the main unit and attach it to the back plate of the main unit.
- Peel off the cover from the other side of the double-sided adhesive tapes and attach the main unit on the left side of your helmet.
- Make sure that the main unit sticks to the helmet firmly. Maximum adhesion occurs after 24 hours.
CAUTION: Sena recommends using the hook and loop fasteners for the main unit. The double-sided adhesive tape is provided for convenience but is not the recommended mounting method. Sena is not responsible for its use.
Installing the Speakers
- Peel off each cover of the hook and loop fasteners for speakers to expose the adhesive surface. Then, attach the fasteners to the ear pockets inside the helmet

- Align the arrows on the main unit and speaker cables and insert speaker cables into each speaker connector.
- Align the arrows on the main unit and speaker cables and insert speaker cables into each speaker connector.
Note:
- Three cables connect to the main unit. The longest is the cable for the speakers. The second longest cable has a male connector and is for the battery pack. The shortest cable is for the microphone.
- The cable for the speakers has two leads. The longer lead is for the right speaker and the shorter lead is for the left speaker.
- If the helmet has deep ear pockets, you can use the speaker pads to bring the speakers closer to your ears.
Installing the Microphones
Using the Wired Boom Microphone
- Peel off the cover of the hook and loop fastener for the wired boom microphone to expose the adhesive tape. Then, attach the hook and loop fastener on the inside surface of the left external shell.

- Attach the wired boom microphone’s mounting plate to the hook and loop fastener.
- Make sure that the microphone’s receiver is located near your mouth.
- Adjust the head of the microphone so that the tab is facing away from your mouth.
- Align the arrows on the main unit and microphone cables and insert the microphone cable into the microphone connector.
Note: Three cables connect to the main unit. The longest is the cable for the speakers. The second longest cable has a male connector and is for the battery pack. The shortest cable is for the microphone.
Using the Wired Microphone
If you have a full-face helmet, you can use the wired microphone.
- Peel off the cover of the hook and loop fastener for the wired microphone to expose the adhesive tape. Then, attach the hook and loop fastener on the inside of the helmet’s chin guard.
- Attach the wired microphone to the hook and loop fastener for the wired microphone.
- Align the arrows on the main unit and microphone cables and insert the microphone cable into the microphone connector.
Note: Three cables connect to the main unit. The longest is the cable for the speakers. The second longest cable has a male connector and is for the battery pack. The shortest cable is for the microphone.
Installing the Battery Pack
- Clean the area on the back side of the helmet where you will attach the double-sided adhesive tapes with a moistened towel and dry thoroughly.
- Peel off the cover from one side of the double-sided adhesive tape for the battery pack holder and attach it to the back plate of the battery pack holder.
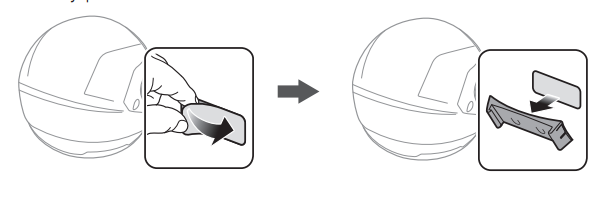
- Peel off the cover from the other side of the double-sided adhesive tape and attach the battery pack holder on the back side of your helmet.
- Make sure that the double-sided adhesive tape sticks to the helmet firmly. Maximum adhesion occurs after 24 hours.
- To secure the battery pack, slide the battery pack into the battery pack holder until you hear it click.
- Align the arrows on the main unit and battery pack cables and insert the battery pack cable into the battery pack connector.
Note:
- Three cables connect to the main unit. The longest is the cable for the speakers. The second longest cable has a male connector and is for the battery pack. The shortest cable is for the microphone.
- To remove the battery pack from the battery pack holder, slide the battery pack upward.
- After connecting all the cables, store any excess cable behind the internal padding of the helmet to prevent wires from becoming damaged.
GETTING STARTED
Button Operation
Powering On and Off
To power on the headset, press the Center Button and the (+) Button at the same time while hearing ascending beeps and a voice prompt, “Hello”. To power off the headset, press the Center Button and the (+) Button at the same time while hearing descending beeps and a voice prompt, “Goodbye”.
Charging
WARNING When charging the battery, use only the approved charger provided by the manufacturer. Use of a non-approved charger may cause fire, explosion, leakage, and other hazards which may also reduce the lifetime or performance of the battery.
You can charge the headset by connecting the supplied USB power & data cable to a computer’s USB port or USB wall charger. You can use any standard micro USB cable to charge the unit. The charging LED turns red while charging and turns blue when fully charged. It takes about 2.5 hours to be completely charged.
Note: Any 3rd party USB charger can be used with Sena products if the charger is approved by either the FCC, CE, IC, or other locally approved agencies that Sena accepts.
CAUTION Please make sure to take off your 10R-installed helmet while charging. The headset automatically turns off during charging.
Checking the Battery Level
LED Indicator When the headset is powered on, the red LED flashes rapidly indicating the battery level.
- 4 flashes = High, 70 ~ 100%
- 3 flashes = Medium, 30 ~ 70%
- 2 flashes = Low, 0 ~ 30%
Note:
- The battery performance may be reduced over time with usage.
- Battery life may vary depending on conditions, environmental factors, functions of the product in use, and devices used with it.
Voice Prompt Indicator
When you power on the headset, keep pressing the Center Button and the (+) Button simultaneously for about 3 seconds until you hear three, high-toned beeps. Then you will hear a voice prompt indicating the battery level. However, if you release the buttons as soon as the headset turns on, you will not hear a voice prompt for the battery level indication.
Volume Adjustment
You can easily adjust the volume by tapping the (+) Button or the (-) Button. You will hear a beep when the volume reaches the maximum or minimum level. The volume is set and maintained independently at different levels for each audio source even when you reboot the headset. For example, once you set the volume for your mobile phone hands-free, it will not change even if you adjust the volume for your Bluetooth MP3 music. However, if you adjust the volume during standby mode, it will affect the volume levels of every audio source.
REMOTE CONTROL
You can remotely control the 10R via Bluetooth using the Handlebar Remote (sold separately). This eliminates the need to take off your hand for button operations. Your 10R and the Handlebar Remote must be paired together before use.
Pairing with the Handlebar Remote
- Turn on the 10R and the Handlebar Remote.
- Press the Center Button for 10 seconds to enter the configuration menu. Tap the (+) Button until you hear a voice prompt saying, “Remote control pairing”. Press the Center Button to enter into Remote Control Pairing mode and the red LED will flash rapidly and you will hear multiple beeps.
- On the Handlebar Remote, press the Rear Button for 5 seconds until its LED flashes red and blue. The 10R will automatically perform pairing with the Handlebar Remote in pairing mode. You will hear a voice prompt, “Remote control connected” when they are successfully connected.
Using the Handlebar Remote
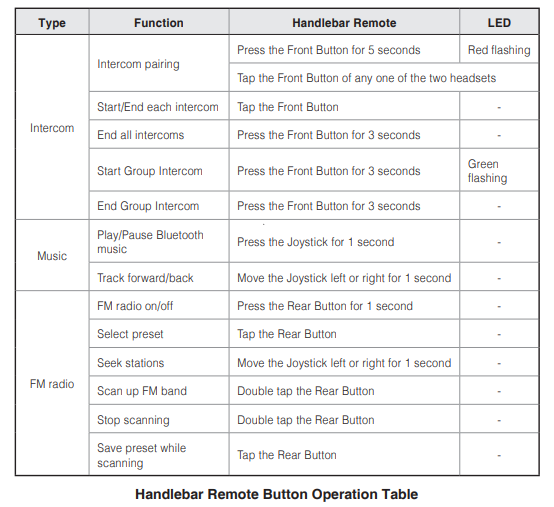
Handlebar Remote button operations on various functions are described in the table below.
FIRMWARE UPGRADE
The 10R supports firmware upgrades. You can update the firmware using the Sena Device Manager (please refer to section 4.6.1, “Sena Device Manager”). Please visit the Sena Bluetooth website at www.sena.com to check the latest software downloads.
TROUBLESHOOTING
Intercom Failure
When you try to start an intercom conversation with an intercom friend who is unavailable within range or already having a conference intercom with other riders or a mobile phone call, you will hear a low-tone double beep signifying an intercom busy signal. In this case, you have to try again later.
Intercom Reconnection
If your intercom friend goes out of range while having an intercom conversation, you may hear static noise and eventually the intercom will be disconnected. In this case, the 10R automatically tries to reconnect the intercom every 8 seconds and you will hear high-tone double beeps until the intercom is reestablished. If you do not want to make a reconnection, tap the Center Button to stop the attempt.
Fault Reset
When the 10R is not working properly or is in faulty status for any reason, you may reset it by pushing the pin-hole reset button below the (+) Button. Insert a paper clip into the reset pin-hole and press the reset button for a second with light pressure. The 10R will be switched off. Restart the system and try again. This will not restore the headset to the factory default settings.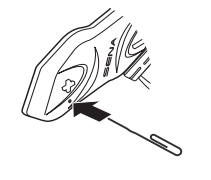
Factory Reset
If you want to restore the headset to the factory default settings, use the Factory Reset in the configuration menu. The headset automatically restores the default settings and turns off. Please refer to section 14.1, “Headset Configuration Setting” for more details.
FAQS About Sena SMH10R Low Profile Motorcycle Bluetooth Headset
1. Q: What makes the Sena SMH10R Low Profile Motorcycle Bluetooth Headset stand out?
2. Q: How do I pair the SMH10R with my smartphone?
3. Q: Can I connect the SMH10R to multiple devices simultaneously?
4. Q: What is the range of the SMH10R Bluetooth connection?
5. Q: How do I charge the SMH10R headset?
6. Q: Can I use the SMH10R while it’s charging?
7. Q: Is the SMH10R water-resistant?
8. Q: How do I perform a firmware update on the SMH10R?
9. Q: Can I use the SMH10R with other Sena Bluetooth headsets?
10. Q: What is the warranty period for the Sena SMH10R?
For more manuals by Sena, Visit Manualsdock

