
Olympus OM-D E-M5 Mark III Camera
About Olympus
Olympus Corporation is a Japanese multinational corporation specializing in manufacturing and selling optical and imaging products, medical equipment, and scientific equipment. The company has a long history and has significantly contributed to various fields, including photography, medical imaging, and scientific research.
Names of parts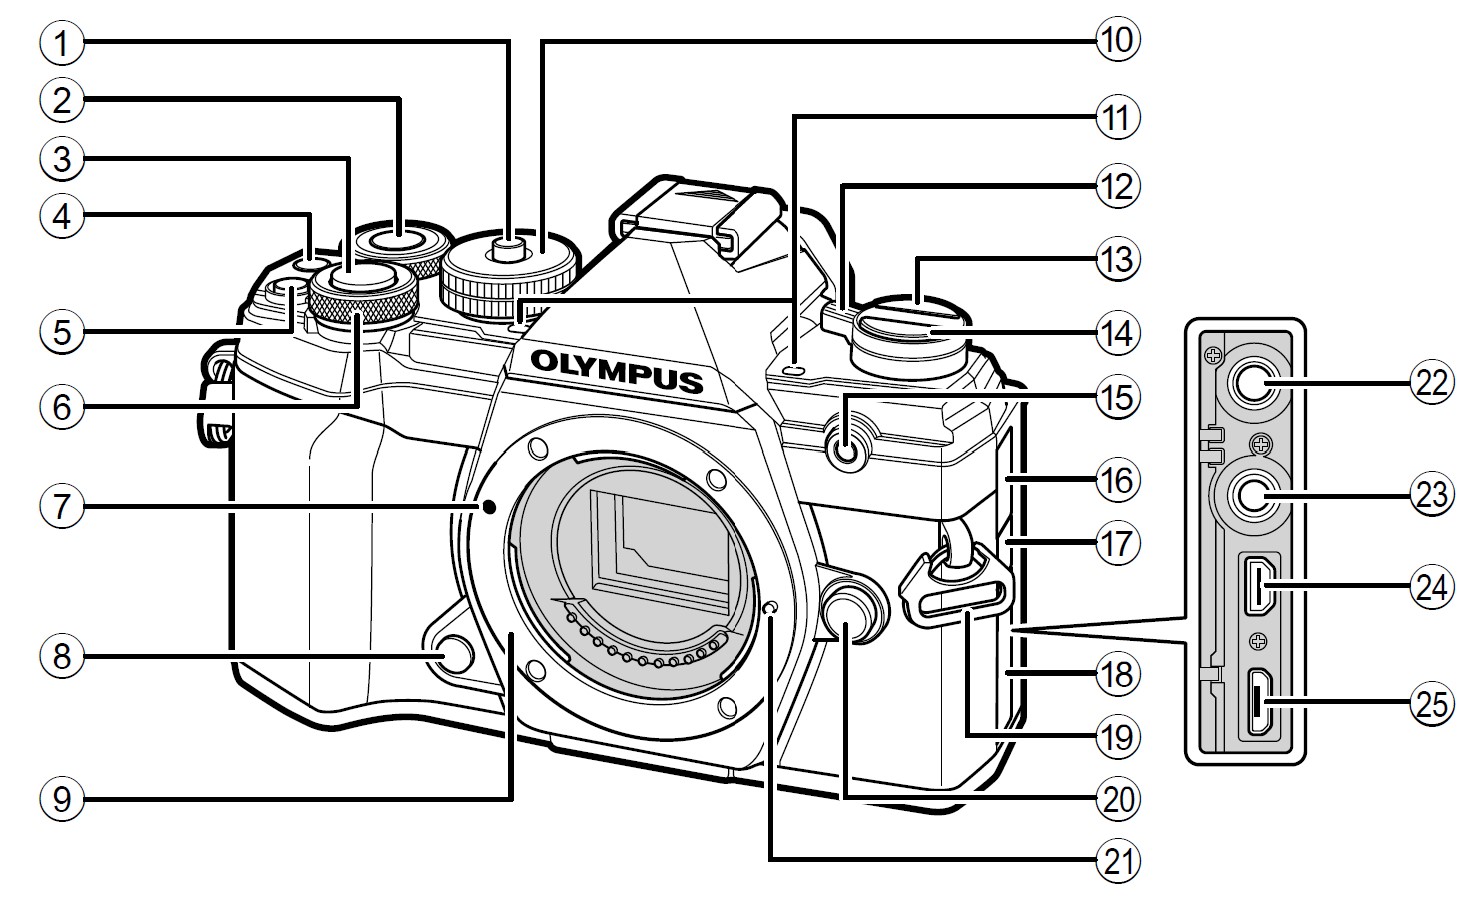
- Mode dial lock
- Rear dial*

- Shutter button
 (Movie)/
 button
 (Exposure compensation) button
- Front dial*

- Lens attachment mark
- Preview button
- Mount (Remove the body cap before attaching the lens.)
- Mode dial
- Stereo microphone
- ON/OFF lever
 (LV) button
 (Sequential shooting/Self-timer/ HDR button)
- Self-timer lamp/AF illuminator
- Microphone jack cover
- Remote cable terminal cover
- Connector cover
- Strap eyelet
- Lens release button
- Lens lock pin
- Microphone jack (A commercially available microphone can be connected. ø3.5 stereo mini plug)
- Remote cable terminal
- HDMI connector (type D)
- Micro-USB connector
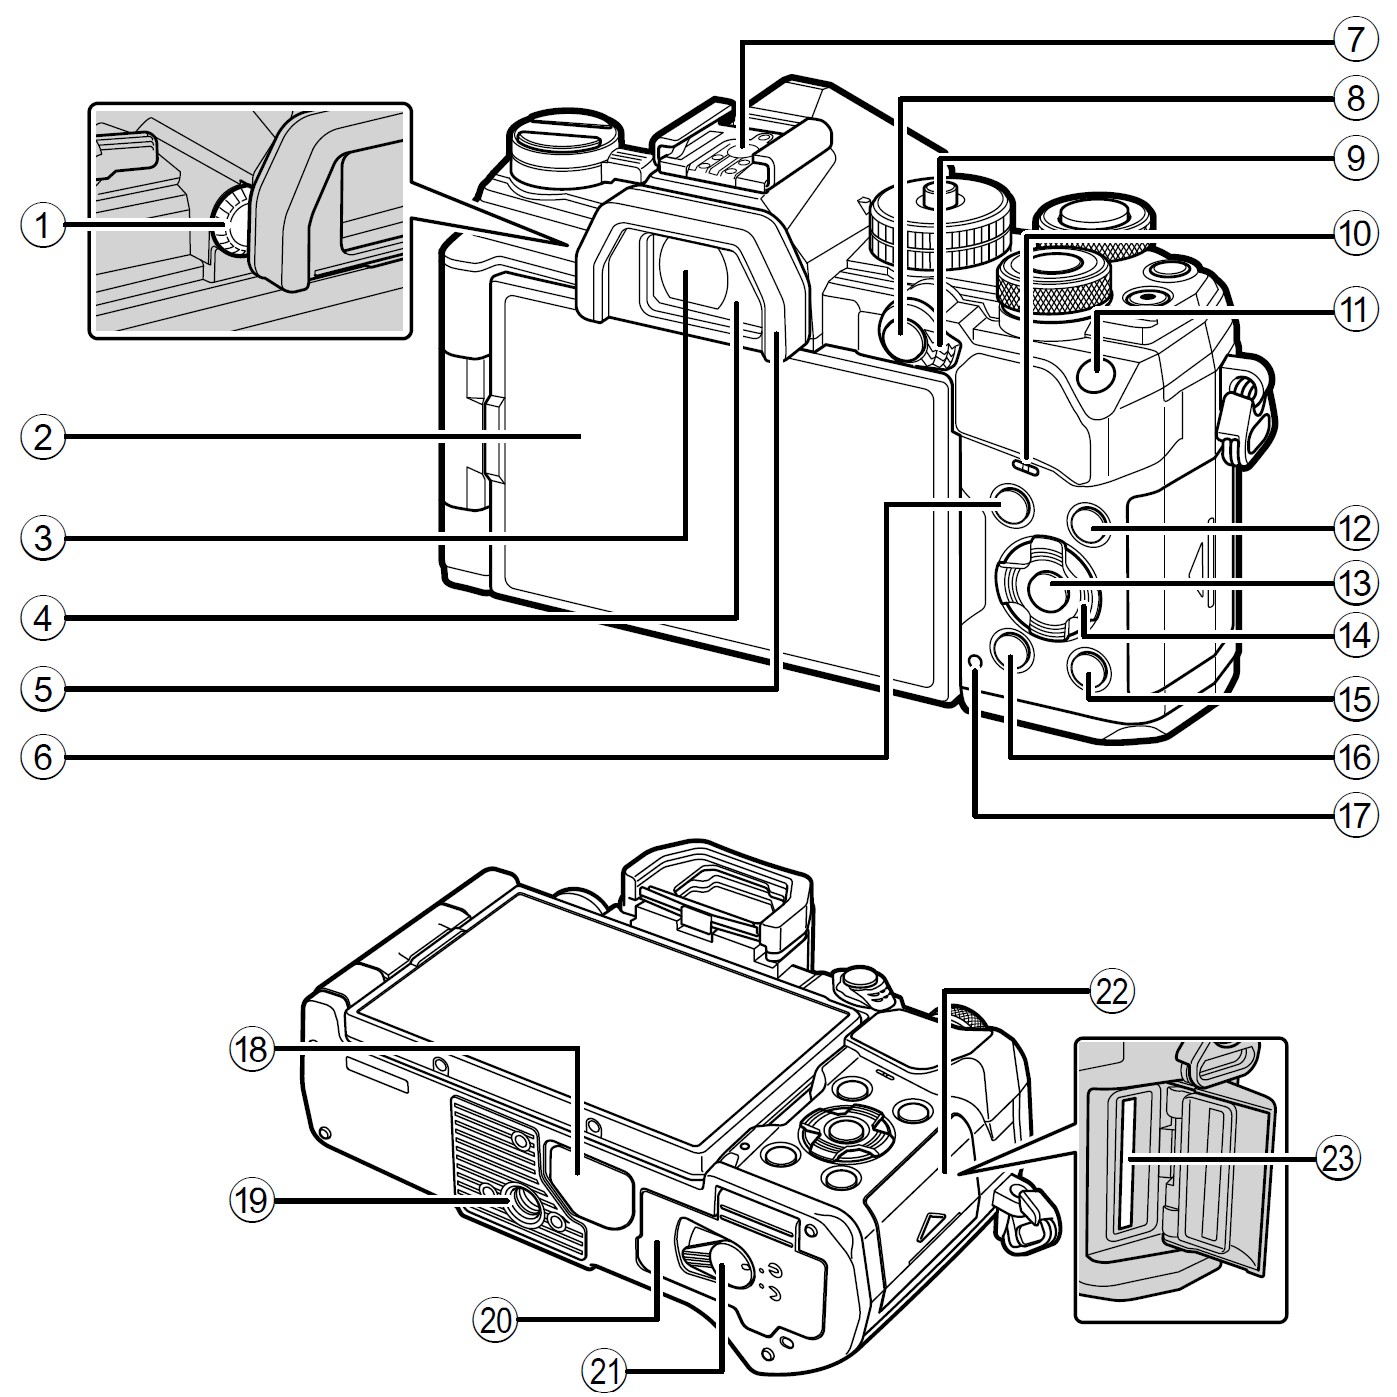
- Diopter adjustment dial
- Monitor (Touch screen)
- Viewfinder
- Eye sensor
- Eyecup
- MENU button
- Hot shoe
- AEL/AFL /
 (Protect) button
 - Fn lever
- Speaker
- ISO button
- INFO button
 button
- Arrow pad*
 (Playback) button
 (Erase) button
- CHARGE (battery charge) lamp
- Connector cover
- Tripod socket
- Battery compartment cover
- Battery compartment lock
- Card compartment cover
- Card slot
Unpacking the box contents
At purchase, the package contains the camera and the following accessories.
If anything is missing or damaged, contact the dealer from whom you purchased the camera.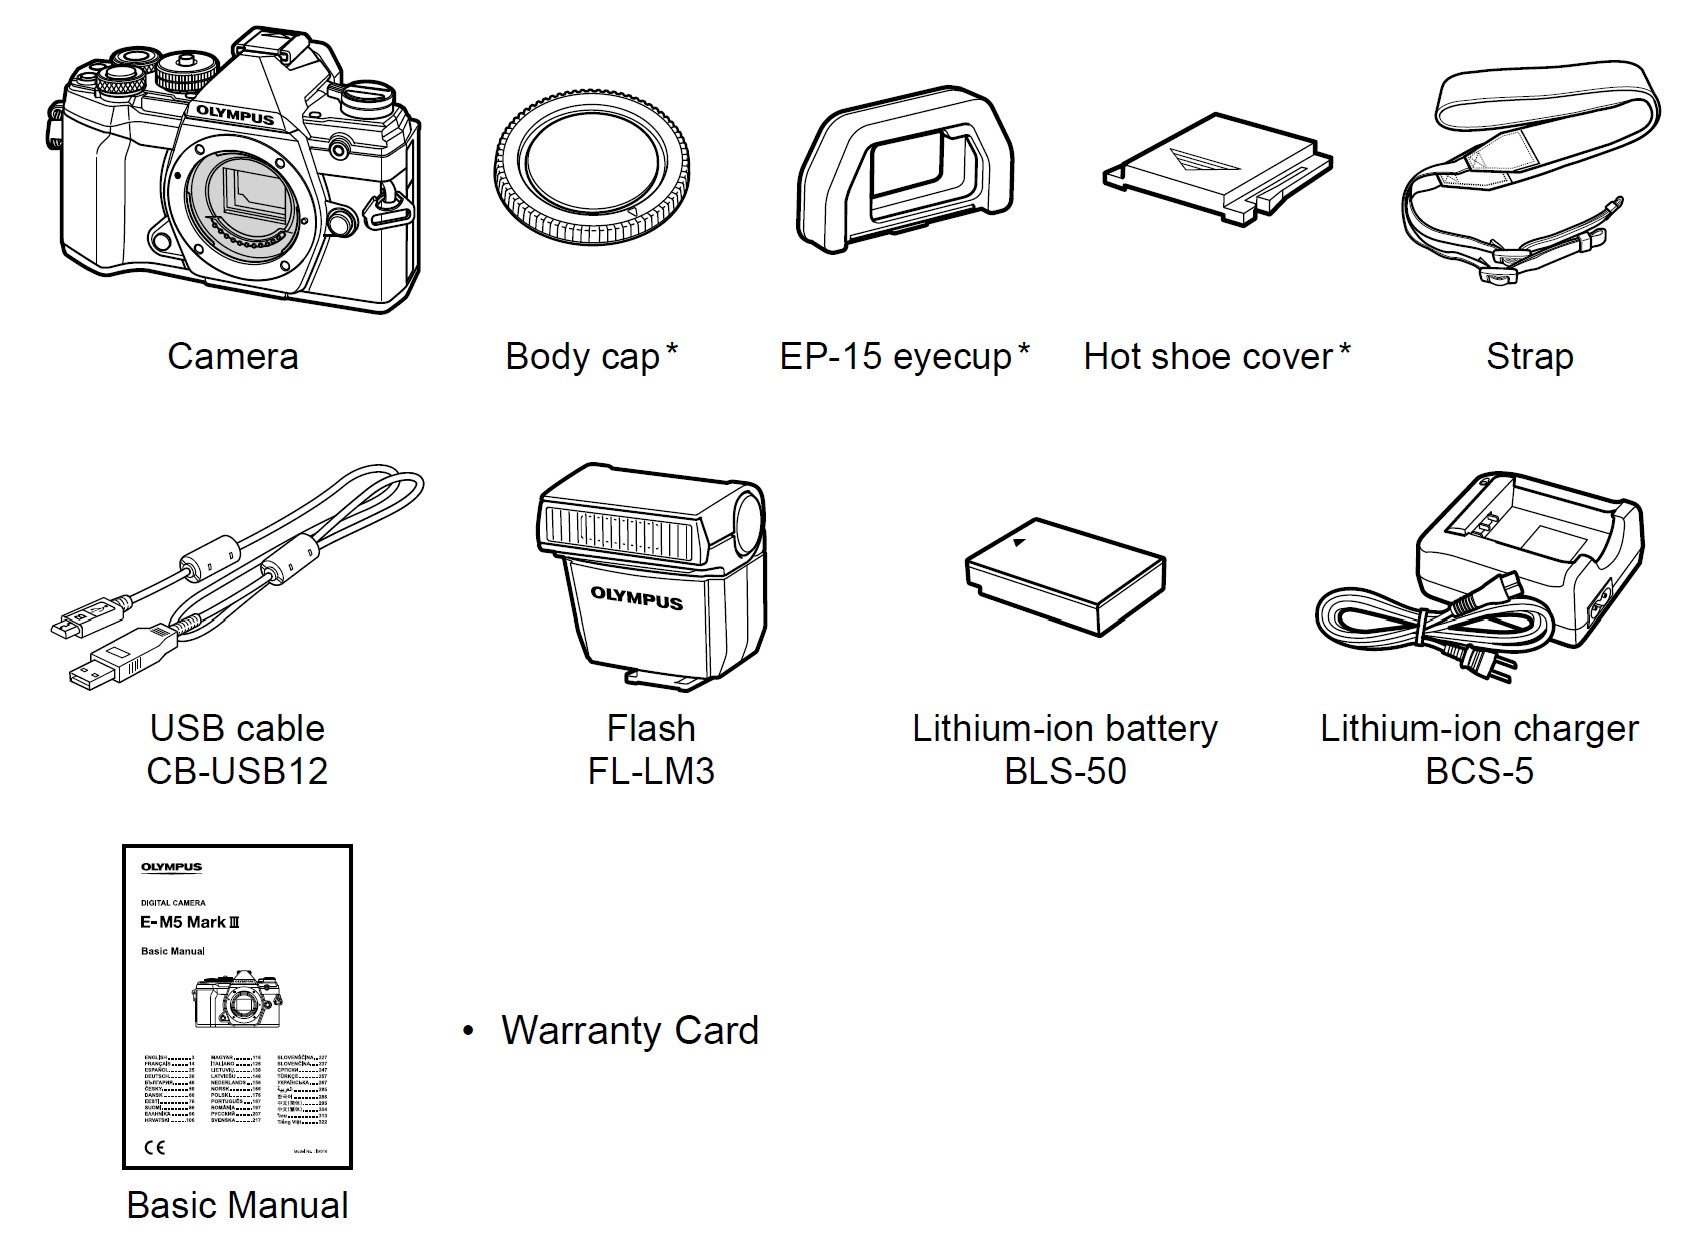
* The body cap, eyecup, and hot shoe cover are attached to or inserted into the camera.
Attaching the Strap
- Before attaching the strap, remove the end from the keeper loop and loosen the strap as shown.

- Pass the end of the strap through the strap eyelet and back through the keeper loop.

- Pass the end of the strap through the buckle and tighten as shown.

- Attach the other end of the strap to the other eyelet.
- After attaching the strap, pull on it firmly to ensure that it will not come loose.
Charging and inserting the battery
- Charge the battery.

- Unplug the charger when charging is complete.
- Batteries inserted in the camera will charge when the camera is connected to an optional USB-AC adapter.
- Confi rm that the ON/OFF lever is in the OFF position.

- Open the battery compartment cover.
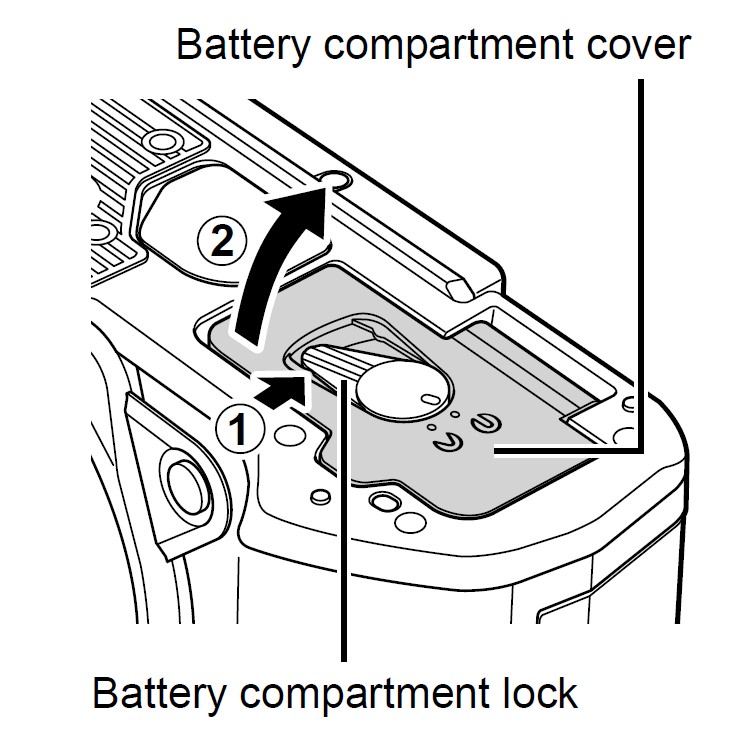
- Loading the battery.
Use only BLS-50 batteries
- Close the battery compartment cover.
- It is recommended to set aside a backup battery for prolonged shooting in case the battery in use drains.
Removing the battery
Turn off the camera before opening or closing the battery compartment cover. To remove the battery, first push the battery lock knob in the direction of the arrow and then remove it.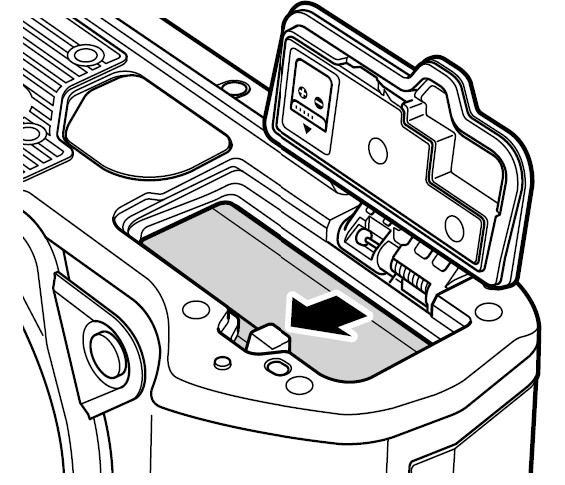
- Contact an authorized distributor or service center if you are unable to remove the battery. Do not use force.
- Never remove batteries or memory cards while the memory card access indicator (P. 31) is displayed.
On-board charging Using an Optional USB-AC Adapter (the F-5AC)
- Read the documentation provided with the F-5AC before use.
- Confirm that the ON/OFF lever is in the OFF position.

- Confirm that the battery is inserted in the camera.

- Connect the camera and USB-AC adapter via USB.

- The CHARGE lamp light during charging. Charging takes about 4 hours. The lamp goes out as the batteries reach full charge.

- The CHARGE lamp light during charging. Charging takes about 4 hours. The lamp goes out as the batteries reach full charge.
- Charging stops when the camera is turned on.
- The USB-AC adapter cannot be used to charge the batteries when the camera is on.
- If a charging error occurs, the CHARGE lamp will blink. Disconnect and reconnect the USB cable.
- USB charging is available when the battery temperature is between 0 and 40 °C.
Inserting the card
The camera uses third-party SD, SDHC, or SDXC memory cards conforming to the SD (Secure Digital) standard. Read “Usable cards” (P. 211) before use.
- Confi rm that the ON/OFF lever is in the OFF

- Open the card compartment cover.

- Slide the card in until it locks into place.
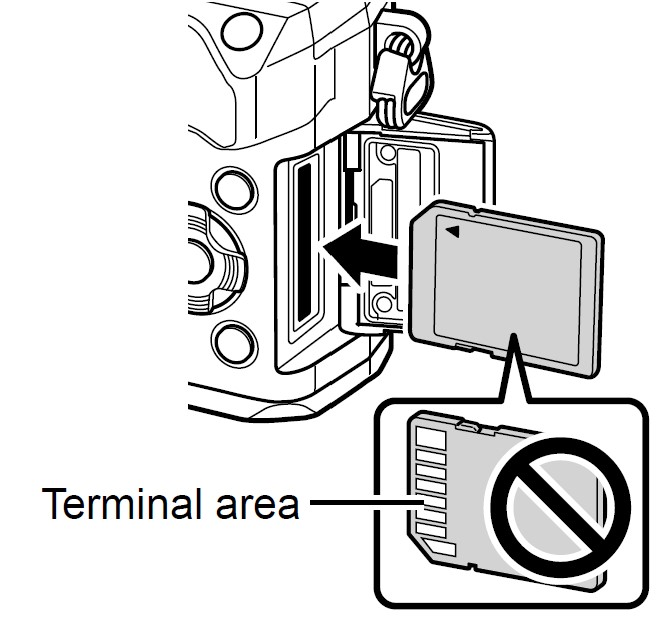
- Turn off the camera before loading or removing the card.
- Do not forcibly insert a damaged or deformed card. Doing so may damage the card slot.
- Close the card compartment cover.
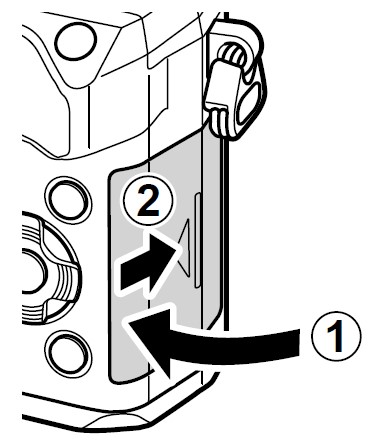
- Close it securely until you hear it click.
- Be sure the card compartment cover is closed before using the camera.
Cards must be formatted with this camera before first use
Removing the card
Press the card in to eject it. Pull out the card.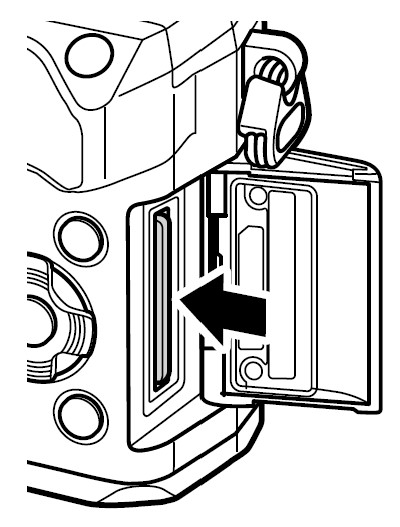
- Never remove batteries or memory cards while the memory card access indicator is displayed.
Attaching a lens to the camera
- Confi rm that the ON/OFF lever is in the OFF position.
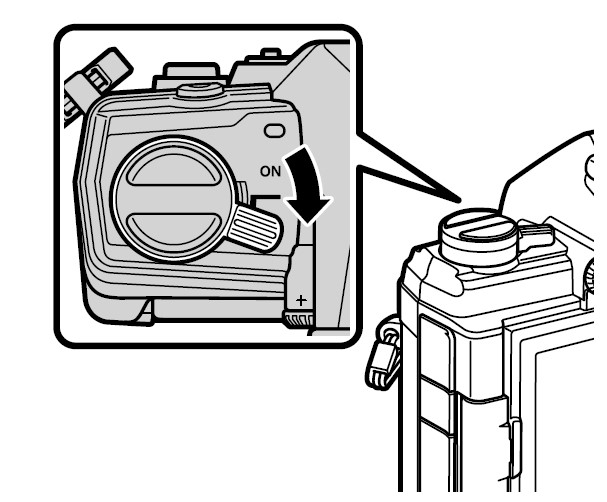
- Remove the rear cap of the lens and the body cap of the camera.

- Align the lens attachment mark (red) on the camera with the alignment mark (red) on the lens, then insert the lens into the camera’s body.

- Rotate the lens clockwise until you hear it click (direction indicated by arrow 3).
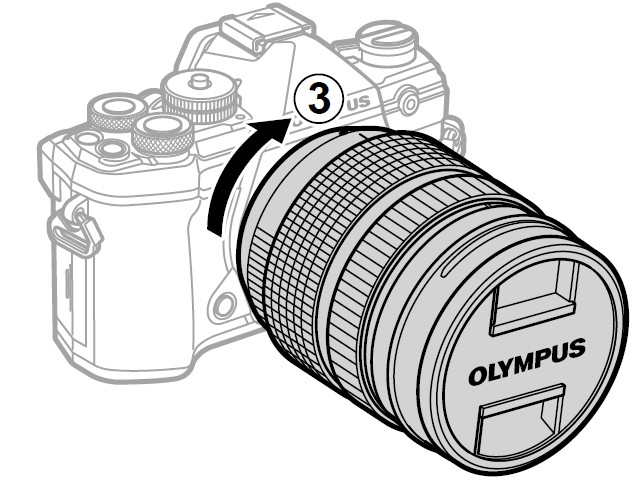
- Do not press the lens release button.
- Do not touch internal portions of the camera.
- Remove the front lens cap.

- Before attaching or removing lenses, confi rm that the camera ON/OFF lever is in the OFF position.
Removing Lenses
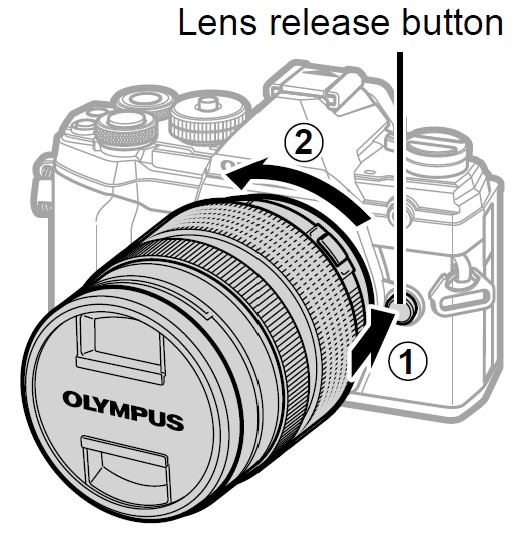
- Confi rm that the ON/OFF lever is in the OFF position.

- Hold the lens release button and rotate the lens as shown.
Using the monitor
- Rotate the monitor for ease of viewing. The angle of the monitor can be adjusted according to conditions at the time of shooting.

- Gently rotate the monitor within its range of motion. Attempting to rotate the monitor beyond the limits shown below could damage the connectors.

- The camera can be confi gured to display a mirror image of the view through the lens or automatically zoom power zoom lenses all the way out when the monitor is rotated for self-portraits. “Selfi e Assist (Selfi e Assist)”
Specifications
Camera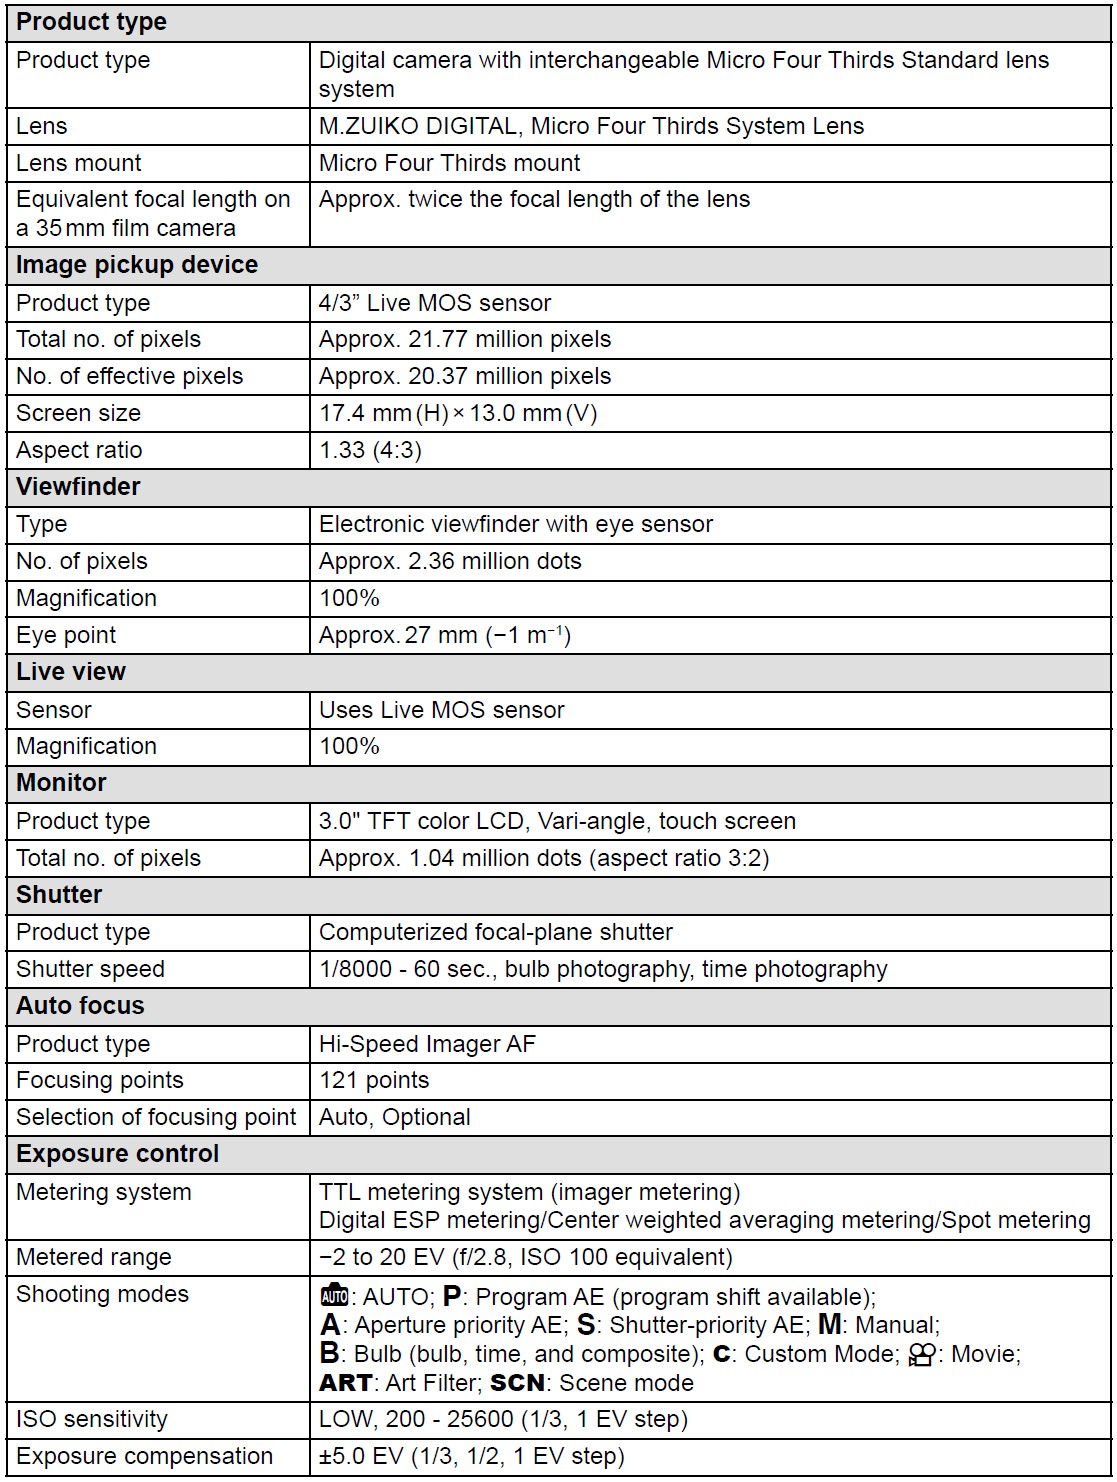

Flash
Lithium-ion battery
Lithium-ion charger
The supplied power cable is for use exclusively with this camera. Do not use it with other equipment. Do not use the camera with cables for other equipment.
FAQS About Olympus OM-D E-M5 Mark III Camera
How long does the Olympus e-M5 Mark III’s battery last?
310 shots
What is the Olympus E-M5’s shutter speed?
1/4000 – 60 sec
What is the Olympus OM-D E-M5 video resolution?
Full HD (1,920 × 1,080 pixels in 1080i)
Why aren’t Olympus cameras more well-known?
Micro-four-thirds camera sensor
How long does it take to charge an Olympus battery?
about three hours
How much time does it take an Olympus camera to charge?
four hours or so
What is the faster shutter speed?
a time value of 1/250 or less
Which shutter speed is the highest?
A thousandth of a second
What does OM in Olympus cameras mean?
Olympus Maitani is referred to as OM.
What is the Olympus sensor size?
17.40mm x 13.00mm
For more manuals by Olympus, Visit Manualsdock


