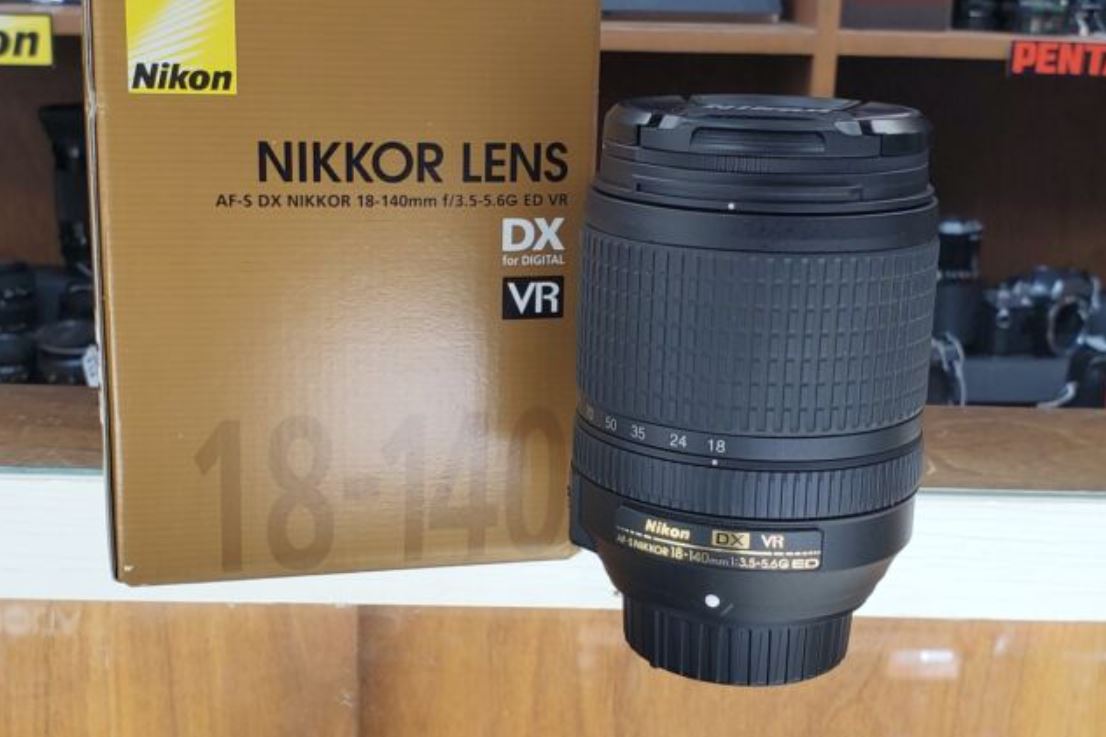
Nikon AF-S DX NIKKOR 18-140mm ED Zoom Lens
About Nikon
Nikon Corporation is a multinational corporation based in Tokyo, Japan, and is known for its expertise in imaging and optics. The company was founded on July 25, 1917, as Nippon Kōgaku Kōgyō Kabushikigaisha (Japan Optical Industries Corporation). It later changed its name to Nikon Corporation in 1988.
Nikon is renowned for its high-quality cameras, camera lenses, and other imaging products. The company’s cameras are widely used by amateur and professional photographers and are well-regarded for their exceptional image quality and reliability. Nikon’s camera lineup includes DSLRs (digital single-lens reflex), mirrorless cameras, and compact digital cameras.
Thank you for your purchase of a DX NIKKOR lens. Before using this product, please carefully read both these instructions and the camera manual.
Note: DX lenses are for use with DX-format digital single-lens reflex cameras such as the D7100 or D5200. The angle of view of a lens on a DX-format camera is equivalent to that of a lens with a focal length about 1.5 x longer mounted on a 35 mm format camera.

For Your Safety
CAUTIONS
- Do not disassemble. Touching the internal parts of the camera or lens could result in injury. In the event of a malfunction, the product should be repaired only by a qualified technician. Should the product break open due to a fall or other accident, remove the camera battery disconnect the AC adapter, and then take the product to a Nikon-autho-rized service center for inspection.
- Turn the camera off immediately in the event of malfunction. Should you notice smoke or an unusual smell coming from the equipment, immediately unplug the AC adapter and remove the camera battery, taking care to avoid burns. Continued operation could result in fire or injury. After removing the battery, take the equipment to a Nikon-authorized service center for inspection.
- Do not use it in the presence of flammable gas. Operating electronic equipment in the presence of flammable gas could result in an explosion or fire.
- Do not look at the sun through the lens or the camera viewfinder. Viewing the sun or other bright light sources through the lens or viewfinder could cause permanent visual impairment.
- Keep out of reach of children. Failure to observe this precaution could result in injury.
- Observe the following precautions when handling the lens and camera:
- Keep the lens and camera dry. Failure to observe this precaution could result in fire or electric shock.
- Do not handle the lens or camera with wet hands. Failure to observe this precaution could result in electric shock.
- Keep the sun well out of the frame when shooting backlit subjects. Sunlight focused on the camera when the sun is in or close to the frame could cause a fire.
- If the lens will not be used for an extended period, attach the front and rear lens caps and store the lens out of direct sunlight. If left in direct sunlight, the lens could focus the sun’s rays onto flammable objects, causing fire.
- Do not carry tripods with a lens or camera attached. You could trip or accidentally strike others, resulting in injury.
- Do not leave the lens where it will be exposed to extremely high temperatures, such as in an enclosed automobile or direct sunlight. Failure to observe this precaution could adversely affect the lens’s internal parts, causing a fire.
Notice for customers in Canada
CAN ICES-3 B / NMB-3 B
Parts of the Lens (Figure)
- Lens hood *
- Lens hood lock mark
- Lens hood alignment mark
- Lens hood mounting mark
- Zoom ring
- Focal length scale
- Focal length mark
- Focus ring
- Lens mounting mark
- Rubber lens-mount gasket
- CPU contacts
- A-M mode switch
- Vibration reduction ON/OFF switch
* Optional.
Focus
Focus mode is determined by the camera focus mode and the position of the lens A-M mode switch. See the camera manual for information on camera focus mode selection.

* Available only when single-servo AF (AF-S) is selected as the camera focus mode.
Autofocus
- Set the camera to AF (autofocus).
- Slide the lens A-M mode switch to A.
- Focus.
Press the shutter-release button halfway to focus. In single-servo AF (AF-S), focus can be adjusted by keeping the shutter-release button pressed halfway after the autofocus operation is complete and manually rotating the focus ring. Do not rotate the focus ring until the autofocus operation is complete. To refocus using autofocus, press the shutter release button halfway or press the AF-ON button again.
Manual Focus
- Slide the lens A-M mode switch to M.
- Focus.
Focus manually using the lens focus ring.
A Note on Wide- and Super Wide-Angle Lenses
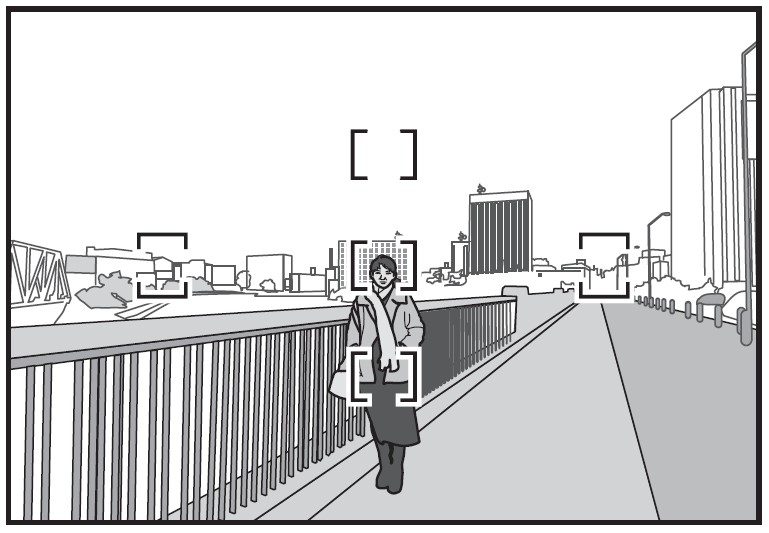
Autofocus may not provide the desired results in situations like those shown below. In these cases, use manual focus, or use focus lock to focus on another subject at the same distance and then recompose the photograph.

- Objects in the background occupy more of the focus point than the main subject: If the focus point contains both foreground and background objects, the camera may focus on the background, and the subject may be out of focus.

- The subject contains many fine details: The camera may have difficulty focusing on subjects that lack contrast or appear smaller than objects in the background.
For more information, see “Getting Good Results with Autofocus” in the camera manual.
Zoom and Depth of Field
Before focusing, rotate the zoom ring to adjust the focal length and frame the photograph. If the camera offers depth-of-field preview (stop-down), depth-of-field can be previewed in the viewfinder.
Note: Focal length decreases as the focus distance shortens.
Aperture
The aperture is adjusted using camera controls.
- Zoom and Maximum Aperture: Changes to zoom can alter the maximum aperture by up to 1½ EV. The camera however automatically takes this into account when setting exposure, and no modifications to camera settings are required following adjustments to zoom.
Built-in Flash Units
When using the built-in flash on cameras equipped with a built-in flash unit, shoot at ranges of 0.6 m (2 ft) or more and remove the lens hood to prevent vignetting (shadows created where the end of the lens obscures the built-in flash).

Vibration Reduction (VR)
Vibration reduction (VR) reduces blur caused by camera shake, allowing shutter speeds up to 4 stops slower than would otherwise be the case (measured at 140 mm with a D300s camera according to Camera and Imaging Products Association [CIPA] standards; effects vary with the photographer and shooting conditions). This increases the range of shutter speeds available and permits hand-held, tripod-free photography in a wide range of situations.
Using the Vibration Reduction ON/OFF Switch

- Select ON to enable vibration reduction. Vibration reduction is activated when the shutter-release button is pressed halfway, reducing the effects of camera shake for improved framing and focus.
- Select OFF to turn vibration reduction off.
Using Vibration Reduction: Notes
- When using vibration reduction, press the shutter-release button halfway and wait for the image in the viewfinder to stabilize before pressing the shutter-release button the rest of the way down.
- When vibration reduction is active, the image in the viewfinder may be blurred after the shutter is released. This does not indicate a malfunction.
- When the camera is panned, vibration reduction applies only to motion that is not part of the pan (if the camera is panned horizontally, for example, vibration reduction will be applied only to vertical shake), making it much easier to pan the camera smoothly in a wide arc.
- Do not turn the camera off or remove the lens while vibration reduction is in effect. If power to the lens is cut while vibration reduction is on, the lens may rattle when shaken. This is not a malfunction and can be corrected by reattaching the lens and turning the camera on.
- If the camera is equipped with a built-in flash, vibration reduction will be disabled while the flash charges.
- Select OFF when the camera is mounted on a tripod unless the tripod head is unsecured or the camera is mounted on a monopod, in which case ON is recommended.
The Lens Hood
The lens hoods protect the lens and block stray light that would otherwise cause flare or ghosting.
Attaching the Hood

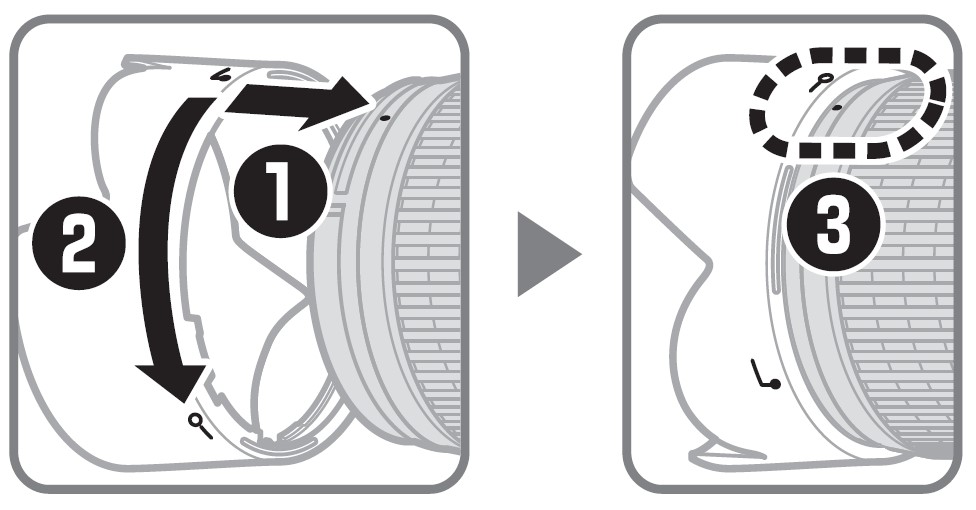
Align the lens hood mounting mark (•) with the lens hood alignment mark (a) and then rotate the hood (2) until the (•) mark is aligned with the lens hood lock mark (- O).
When attaching or removing the hood, hold it near the symbol on its base and avoid gripping it too tightly. Vignetting may occur if the hood is not correctly attached.
The hood can be reversed and mounted on the lens when not in use.
Lens Care
- Do not pick up or hold the lens or camera using only the lens hood.
- Keep the CPU contacts clean.
- Should the rubber lens-mount gasket be damaged, cease use immediately and take the lens to a Nikon-authorized service center for repair.
- Use a blower to remove dust and lint from the lens surfaces. To remove smudges and fingerprints, apply a small amount of ethanol or lens cleaner to a soft, clean cotton cloth or lens-cleaning tissue and clean from the center outwards using a circular motion, taking care not to leave smears or touch the glass with your fingers.
- Never use organic solvents such as paint thinner or benzene to clean the lens.
- The lens hood or NC filters can be used to protect the front lens element.
- Attach the front and rear caps before placing the lens in its flexible pouch.
- If the lens will not be used for an extended period, store it in a cool, dry location to prevent mold and rust. Do not store in direct sunlight or with naphtha or camphor moth balls.
- Keep the lens dry. Rusting of the internal mechanism can cause irreparable damage.
- Leaving the lens in extremely hot locations could damage or warp parts made from reinforced plastic.
Supplied Accessories
- 67 mm snap-on Front Lens Cap LC-67
- Rear Lens Cap LF-4
Compatible Accessories
- 67 mm screw-on filters
- Bayonet Hood HB-32
- Flexible Lens Pouch CL-1018
Specifications

Nikon reserves the right to change the specifications of the hardware described in this manual at any time and without prior notice.
FAQS About Nikon AF-S DX NIKKOR 18-140mm ED Zoom Lens
What is the purpose of the Nikon 18-140mm lens?
anything from telephoto close-ups on the sports field to wide-angle family pictures.
What is the purpose of an 18-140mm lens?
landscape, group, and portrait photography.
Is the Nikon 18/140 lens good?
The 18-140mm’s results are extremely sharp, at least as sharp as those of its more current competitors and sharper than those of earlier models in the same focal length range.
What does AF on a Nikon lens mean?
Automatic Focus
Why is the name of Nikon lenses Nikkor?
The company’s prior brand name Nikk (), an acronym for its original full name Nippon Kgaku (“Japan Optics”; ), was Westernized and renamed Nikkor in 1932.
What is the Nikon 18-140mm lens’s diameter?
around 3.1 x 3.8 in. /78 x 97 mm.
The Nikon 18 140 is weatherproof.
It has weatherproofing.
DX lens: what is it?
The smaller sensor is the DX format, measuring 24x16mm.
How do AF lenses function?
A beam of light, usually red, is used by active auto focus to communicate information about the object’s distance from the camera.
What year did the Nikon 18 140 launch?
July 2013
For more manuals by Nikon, Visit Manualsdock
[embeddoc url=”https://manualsdock.com/wp-content/uploads/2023/09/Nikon-AF-S-DX-NIKKOR-18-140mm-ED-Zoom-Lens-User-Manual.pdf” download=”all”]


I blog quite often and I really appreciate your content. Your article has truly peaked my interest. I am going to book mark your blog and keep checking for new details about once per week. I opted in for your Feed too.