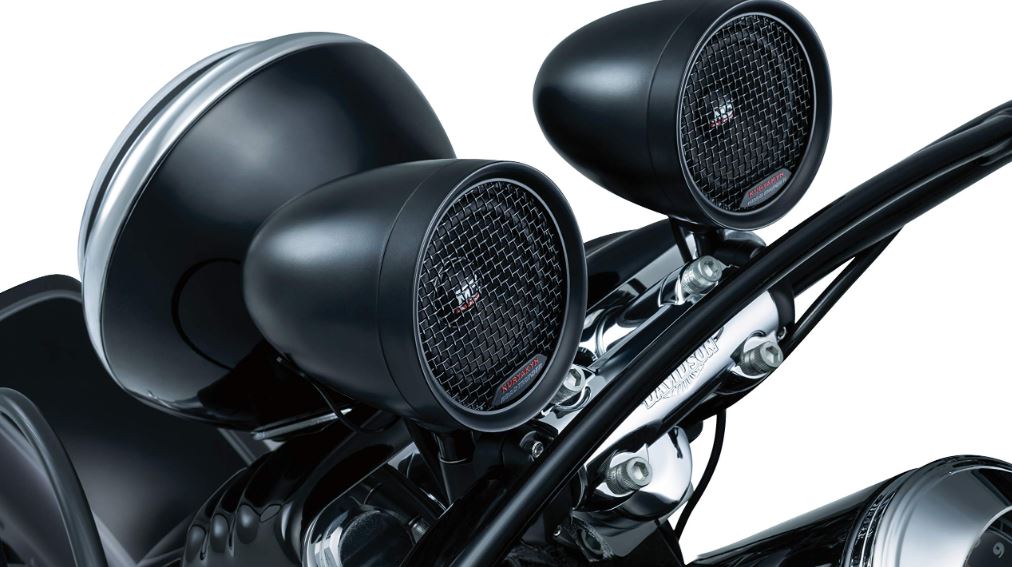
Kuryakyn 2713 MTX Road Thunder Motorcycle Speakers
About Kuryakyn
Kuryakyn is a well-known brand in the motorcycle aftermarket industry. The company specializes in producing a wide range of aftermarket accessories and parts for motorcycles, particularly those from Harley-Davidson and other cruiser-style bikes. Kuryakyn offers a variety of products designed to enhance the aesthetics, comfort, performance, and functionality of motorcycles.
INSTALLATION INSTRUCTIONS
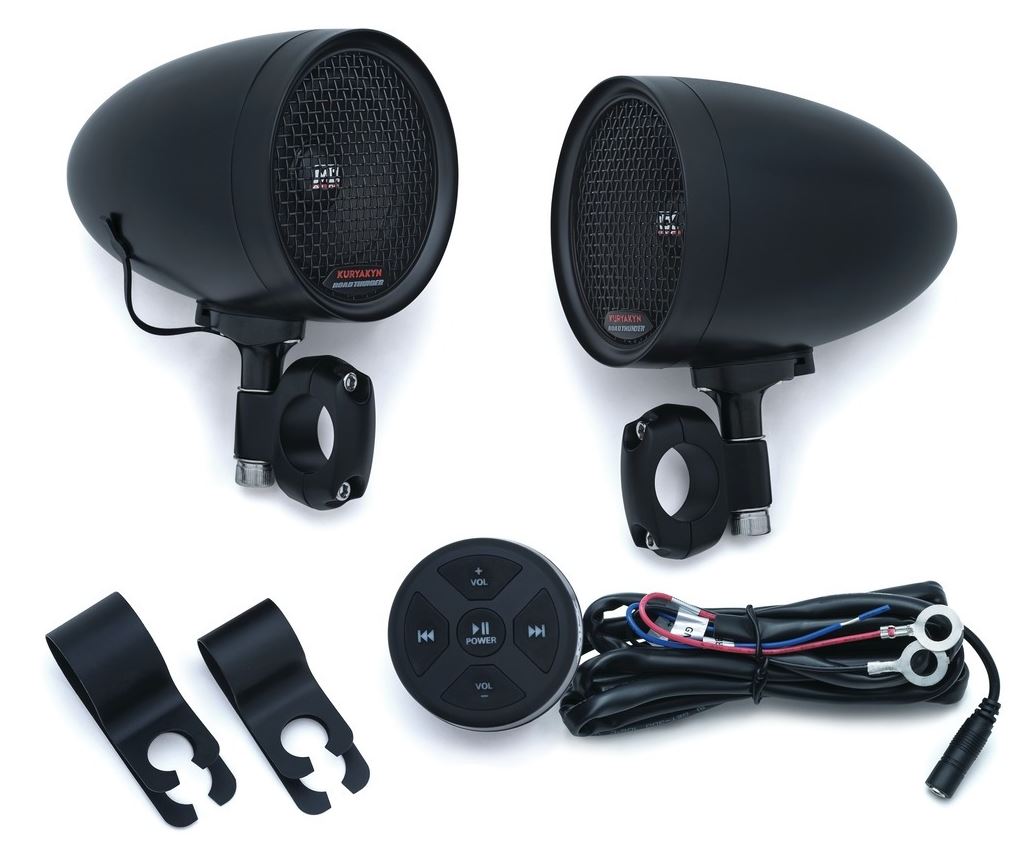
ENSURE THAT THE FOLLOWING PARTS HAVE BEEN INCLUDED IN THE KIT:
YOU WILL ALSO NEED:
Metric Hex, Allen wrenches, Pliers
FEATURES
BLUETOOTH CONTROLLER SPECS:
- Compatible with most Bluetooth devices, including Android and iPhone
- Easy to install with hassle-free auto pairing and five front-panel touch controls
- Durable, weather-proof design
- Includes two adjustable bar mount brackets: 7/8” through 1” and 1-1/8” through 1-1/4”
- Includes power, ground, and output connections
3” SPEAKER PODS SPECS:
- High-impact ABS enclosures in chrome or satin black finish
- Low current draw: 5 amps
- Overall height when mounted is 4.8”
- Includes 3.5 mm input and output connectors
- 1-1/4” handlebar clamp mount available separately, P/N 1468 Chrome, 2792 Satin Black
- 100W Peak Music Power
INSTALLATION
The RoadThunder Speaker Pods & Bluetooth Audio Controller can be used with any 12-volt battery and can be mounted to a variety of bars using the included hardware. Mount the speakers where they have sufficient clearance, and position the speakers so the speakers are directly at the rider.
MOUNT BRACKETS TO HANDLEBAR FIRST, THEN INSTALL SPEAKER PODS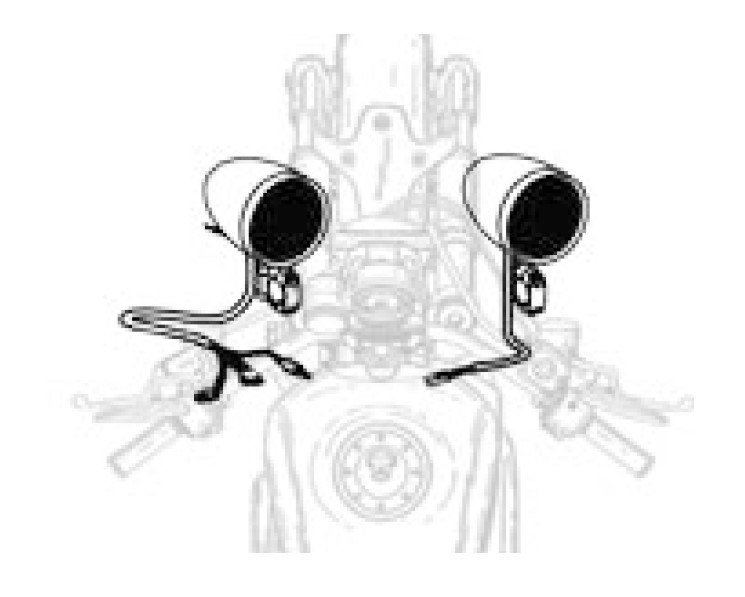
STEP 1: Determine the diameter of the handlebar and use either the 7/8” Adaptor with 1” Bracket or just the 1” Bracket
Note: If you have a 1-1/4” diameter handlebar you can purchase that bracket separately on the Kuryakyn website.
STEP 2: Install brackets on handlebars where Sound Bars do not obstruct the rider’s view. Use hardware that is included with the brackets.
STEP 3: Once brackets are installed, add the Speaker Pods with the hardware provided:
- Add the 3” Amp Speaker POD to the left side of the rider’s perspective & 3” Speaker POD to the right side of the rider
Use one of the M8 1-1/4” x 45 Cap Screws provided on each bracket along with two M8 Internal Tooth Lock Washers to add to the top and bottom surface of the bracket, and do the same on the other bracket.
STEP 4: Adjust the speaker pods so the speakers are directed at the rider’s head. To adjust and align the logo on the Speaker Pods mesh screen there is a very small pin-size hole located at the bottom of the front ring. Use a small pin or paper clip, press in, and turn the ring. Rotate the trim counterclockwise to remove the trim ring. Once the ring has been removed, adjust the mesh screen accordingly, then reinstall. Make sure all screws are securely fastened and tightened.
STEP 5: Connect Speaker Pods to the Wire Harness.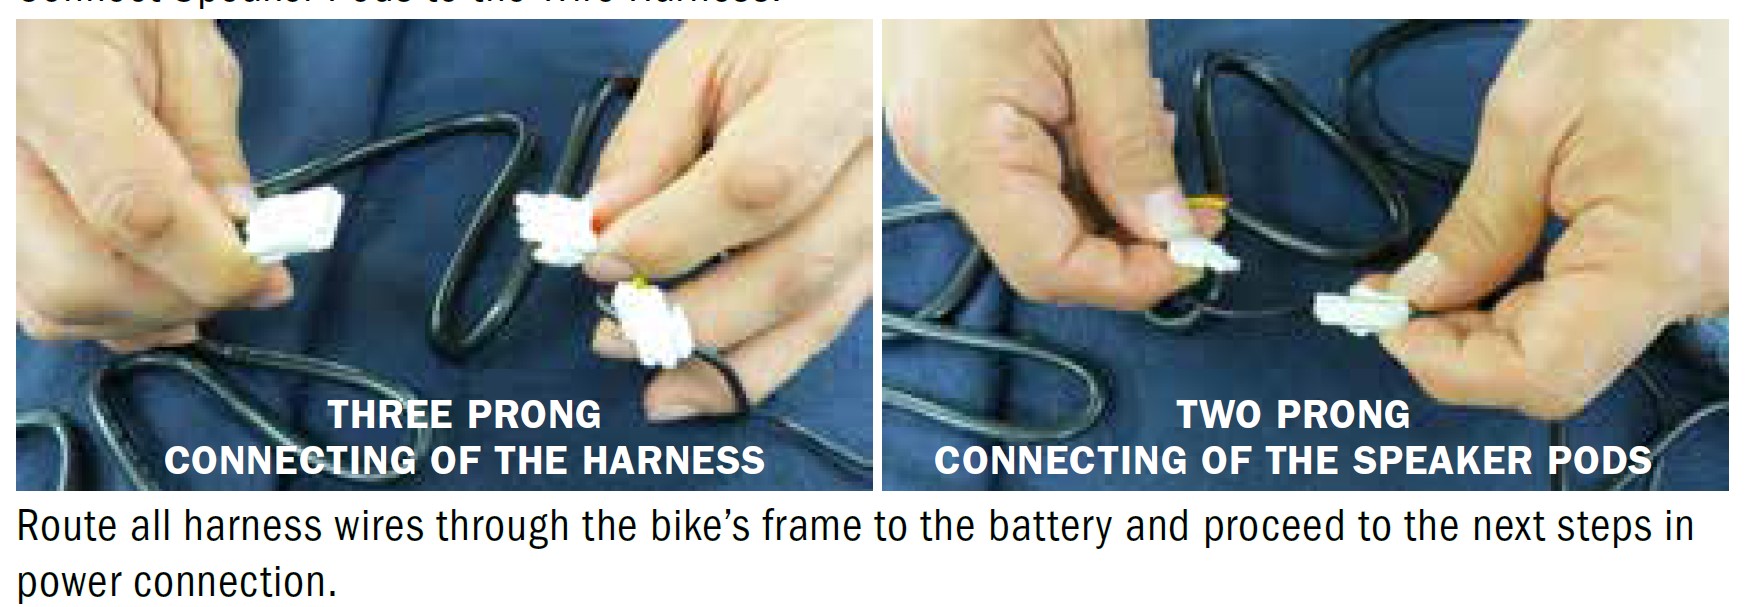
NOTICE: SECURE THE WIRING AWAY FROM MOVING PARTS, PINCH POINTS, OR EXTREME HEAT. KURYAKYN WILL NOT PROVIDE WARRANTY COVERAGE ON ANY ELECTRICAL COMPONENT THAT FAILS DUE TO PINCHED, CRIMPED, BROKEN ABRADED, MELTED, OR FRAYED WIRES.
POWER CONNECTION
SPEAKER PODS WIRE HARNESS CONNECTION
(RECOMMENDED INSTALLATION)
STEP 1: Connect the Red wire (with the in-line fuse) power wire from the wire harness to the positive terminal on the battery. The Black wire is a ground wire and needs to be attached to the negative terminal on the battery.
Note: Keep the included fuse off the fuse holder until all wiring connections have been made and secured.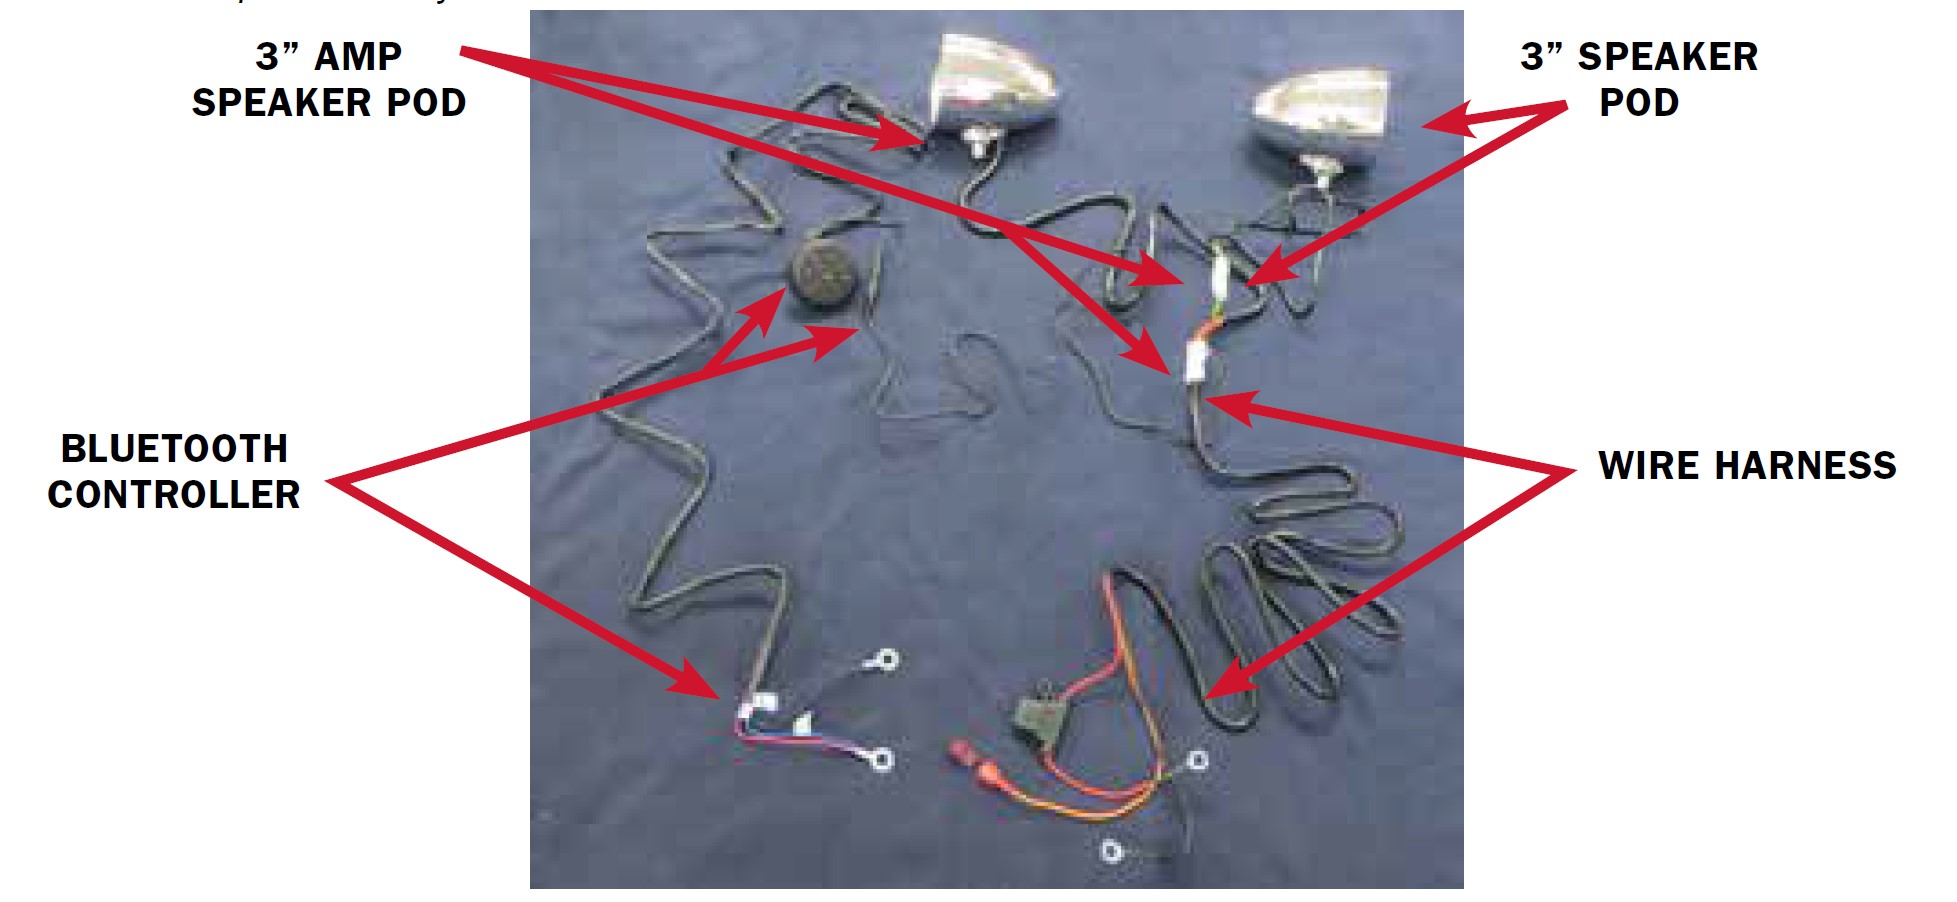
BLUETOOTH AUDIO CONTROLLER POWER CONNECTION
(RECOMMENDED INSTALLATION)
STEP 1: Connect the red power wire from the wire harness to the positive terminal on the battery. The Black wire is a ground wire and needs to be attached to the negative terminal on the battery.
STEP 2: Extend and connect the Blue 12V output wire from the Bluetooth Audio Controller to the Orange wire on the POD wire harness. This will allow the Bluetooth Audio Controller to turn on and off the Speaker Pods. In this installation you will need to tap into the side of the blue wire from the Bluetooth Audio Controller with the T-Tap Quick Connect Female provided and then connect the orange wire terminal from the Speaker Pods to this T-Tap connector.
Note: The blue wire on the Bluetooth Audio Controller should not be connected to any positive or negative 12V source. This wire will energize when the unit is turned on and will turn off when the unit is turned off. It should only be connected to a 12V turn-on circuit. Do not connect it to the main power of any device.
BLUETOOTH AUDIO CONTROLLER POWER CONNECTION
(OPTIONAL INSTALLATION)
STEP 1: Use the included T-Tap Quick Connect Female connector and install it directly onto the ACC/Key ignition wire on the motorcycle using a pair of pliers. Then once the T-Tap female connector is installed, connect the Orange wire with the red male connector to this T-Tap female connector.
NOTICE: IF THE ORANGE WIRE ON THE SPEAKER PODS IS CONNECTED TO THE ACC/KEY OF THE BIKE, THE BLUE WIRE FROM THE BLUETOOTH AUDIO CONTROLLER SHOULD NOT BE CONNECTED TO THE ORANGE WIRE.
STEP 2: The blue wire on the Bluetooth Audio Controller can be left disconnected. This will allow the ACC/Key ignition to turn on the Speaker Pods.
BLUETOOTH AUDIO CONTROLLER POWER CONTROL
(OPTIONAL INSTALLATION)
STEP 1: Connect the RED wire directly to the ACC/Key ignition. This will allow the Bluetooth unit to be turned on and off with the Bike electrical system. In this installation, you will need a Quick Connect Male connector (same as what is on the existing POD’s orange wire) and merge both Red (Bluetooth Audio Controller) and Orange (Speaker Pods) wires together.
STEP 2: Connect the Black wire directly to the negative terminal on the battery.
AUDIO CONNECTION
WITH BLUETOOTH AUDIO CONTROLLER
STEP 1: Use the included 3.5mm male connector on the Speaker Pods and connect directly to the 3.5mm female connector on the Bluetooth Audio Controller. Route and secure the wiring away from any moving parts, pinch points, or extreme heat.
DIRECT CONNECTION FROM AUDIO SOURCE
STEP 1: Use the included 3.5mm male connector on the Speaker Pods and connect directly to an audio source.
Note: Please note with this type of connection, the audio source will control the volume of the pods.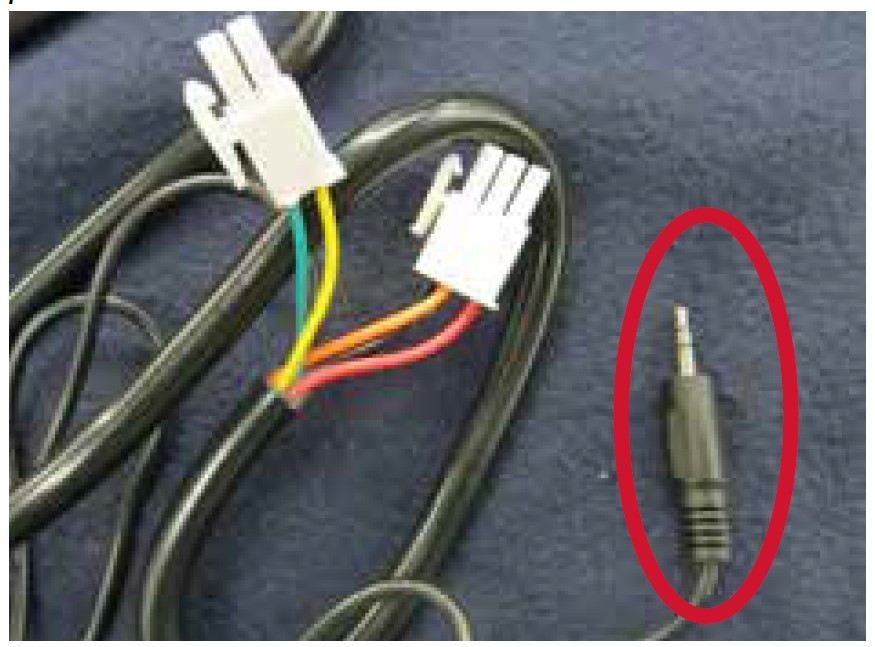
BLUETOOTH AUDIO CONTROLLER AND SPEAKER PODS AUDIO OPERATION
STEP 1: Play/Pause – The Play/Pause button gives you the ability to play or pause the current track with a single press. Holding the Play/Power button for 2 seconds will turn the unit On if currently Off or Off if currently powered On. The unit will beep to indicate when the power is turned Off.
Note:
- The unit will stay on indefinitely as long as a Bluetooth device is actively paired to the Bluetooth Audio Controller.
- The unit will turn Off after 5 minutes when there is no active Bluetooth device connection.
- The Play/Pause button will illuminate when the unit is powered On.
- The Play/Pause button will blink when the music track is paused.
STEP 2: Track Forward and TrackBack – The unit will switch audio tracks being played by pressing the track forward and track back buttons. Pressing and holding these buttons for 2 seconds will fast forward or rewind the audio track that is being played.
STEP 3: Volume Up and Volume Down – These buttons will turn up or turn down the output connected to the Speaker Pods controlling the system volume. When the unit has reached the minimum or maximum output level, the unit will beep to indicate that no further adjustment is possible.
BLUETOOTH AUTO-PAIR MODE
STEP 1: Turn the unit On.
STEP 2: Search for MTX REMOTE from your device’s Bluetooth menu
STEP 3: Select Pair
AUDIO OUTPUT ON SPEAKER PODS
The 3.5mm audio output on the Speaker Pods can be connected to a second Speaker Pods system or any other audio device.
If connected to a second Speaker pod system, the second set of powered pods will be controlled by the volume setting of the connected Bluetooth Audio Controller or audio source. Both sets of Speaker Pods will play at the same volume.
This equipment has been tested and found to comply with the limits for a Class B digital device, pursuant to Part 15 of the FCC rules. These limits are designed to provide reasonable protection against harmful interference in a residential installation. This equipment generates, uses, and can radiate radio frequency energy and, if not installed and used in accordance with the instructions, may cause harmful interference to radio communications.
However, this is no guarantee that interference will not occur in a particular installation. If this equipment does cause harmful interference to radio or television reception, which can be determined by turning the equipment off and on, you are encouraged to try to correct the interference by one or more of the following measures:
- Reorient or relocate the receiving antenna.
- Increase the separation between the equipment and the receiver.
- Connect the equipment to an outlet on a different circuit than the one to which the receiver is connected.
- Consult the dealer or an experienced radio/TV technician for help.
This device complies with part 15 of the FCC Rules. Operation is subject to the following two conditions:
- This device may not cause harmful interference, and
- this device must accept any interference received, including interference that may cause undesired operation.
LIMITED WARRANTY
Kuryakyn warrants that any Kuryakyn products sold hereunder shall be free of defects in materials & workmanship for a period of one (1) year from the date of purchase by the consumer excepting the following provisions:
- Kuryakyn shall have no obligation in the event the customer is unable to provide a receipt showing the date the customer purchased the product(s).
- The product must be properly installed, maintained & operated under normal conditions.
- Kuryakyn shall not be liable for any consequential & incidental damages, including labor & paint, resulting from the failure of a Kuryakyn product, failure to deliver, delay in delivery, delivery in nonconforming condition, or for any breach of contract or duty between Kuryakyn & a customer.
- Kuryakyn products are often intended for use in specific applications. Kuryakyn makes no warranty if a Kuryakyn product is used in applications other than intended.
- Kuryakyn electrical products are warranted for one (1) year from the date of purchase by the consumer. L.E.D. contained in components of Kuryakyn products will be warranted for defects in materials & workmanship for 3 years from the date of purchase whereas all other components shall be warranted for one (1) year.
- All warranty claims must be directed to the place of purchase. Merchandise sold through internet auction sites or any other unauthorized reseller shall not carry a Kuryakyn warranty. If unsure, please contact the place of purchase to verify they are an authorized Kuryakyn reseller.
RETURN POLICY
Merchandise determined to be defective may be returned up to one year from the date of purchase. Returns must be processed through the original seller. Returned merchandise for any other reason other than warranty claims must be in like new condition & subject to a 20% restocking fee. All returns are subject to inspection for determination of full or partial credit.
Any returned part that shows evidence of being used or installed contrary to the manufacturer’s instructions, &/or subjected to improper handling, packaging, or return shipping by the customer, will not be eligible for exchange, refund, or warranty consideration. All returned electrical items will be inspected & tested. If an electrical item is deemed functional, no credit will be issued & item will be returned. All sales are final on discontinued or closeout merchandise.
©2015 KURYAKYN HOLDINGS, LLC ALL RIGHTS RESERVED
KURYAKYN, KURYAKYN K logo, and the marks appearing on this instruction sheet are registered and common law trademarks of Kuryakyn Holdings except noted third-party trademarks. A full listing of trademarks and trademark registrations owned by Kuryakyn Holdings can be found at www.kuryakyn.com/legal-notice.
Emissions Notice: The California Air Resources Board (CARB) does not permit the use of aftermarket emission-related parts(s) that alter the performance of OEM emission-related devices unless CARB has issued an Executive Order, other than on racing vehicles on closed courses. Check your local laws and manufacturer’s information.
Listed Manufacturers and product model names are for reference only. All product and company names are trademarks or registered trademarks of their respective holders. Use of them does not imply any affiliation with or endorsement by them. All specifications are subject to change without notice.
For additional information on third-party products and company names, please consult our Web page at www.kuryakyn.com/legal-notice
FAQS About Kuryakyn 2713 MTX Road Thunder Motorcycle Speakers
What speakers are used by motorcycles?
Handlebar-mounted speakers and helmet speakers are the two most popular kinds of speakers.
How many watts are recommended for motorcycle speakers?
At least 300 watts RMS should be available on the best motorbike speakers.
Can speakers be mounted on a motorcycle?
Although they aren’t typically the first improvement you think about, motorcycle speakers are a terrific addition to larger motorcycles.
What frequency is noise from motorcycles?
200-400Hz
Why are there speakers on motorcycles?
With a motorbike sound system, you can enjoy your favorite music while riding and get a boost throughout a lengthy journey. Using a motorbike speaker system, create a fun, relaxing, upbeat, or romantic playlist to set the mood for a journey.
What wattage is ideal for speakers?
10W to 20W
How do I pick speakers for a motorcycle?
the strength, volume, power consumption, and simplicity of installation.
How many ohms are speakers on a motorcycle?
The two alternatives you are most likely to find while looking for motorbike speakers are 2-ohm and 4-ohm speakers.
Are amplifiers required for motorcycle speakers?
You will require a top-notch, powerful amplifier.
Does a speaker require drivers?
Speaker design is dependent on speaker drivers.
Why are motorcycles so loud?
On a motorcycle, the muffler and exhaust pipe are short, so there is less time and room for sound to be absorbed than in a car.
For more manuals by Ring, Visit Manualsdock
[embeddoc url=”https://manualsdock.com/wp-content/uploads/2023/08/Kuryakyn-2713-MTX-Road-Thunder-Motorcycle-Speakers-Installation-Manual.pdf” download=”all”]

