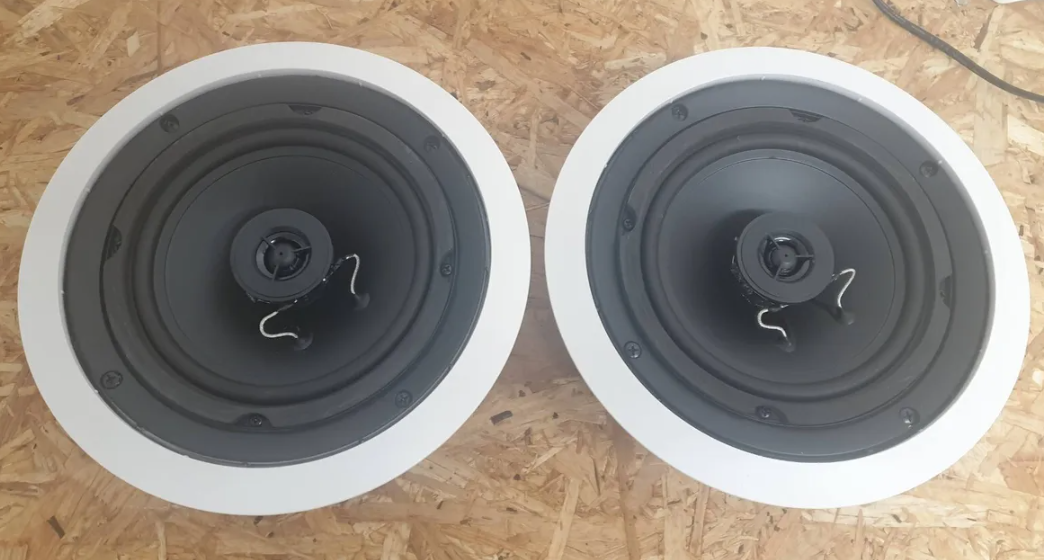
Cambridge Audio C155SS in-Ceiling Speaker
About Cambridge Audio
Cambridge Audio is a British audio equipment manufacturer that produces a range of high-quality audio products, including amplifiers, speakers, turntables, and more. The company was founded in 1968 and has a reputation for producing high-fidelity audio equipment that delivers exceptional sound quality.
Cambridge Audio’s product line includes both home and portable audio products, and the company has a strong focus on innovation and the use of advanced technology to deliver the best possible listening experience. Some of their popular products include the Edge amplifier, the CX series of CD players and amplifiers, and the Go portable Bluetooth speaker.
The crossed-out wheeled bin is the European Union symbol indicating separate electrical and electronic equipment collection. This product contains electrical and electronic equipment that should be reused, recycled, or recovered and should not be disposed of with unsorted regular waste. Please return the unit or contact the authorized dealer from whom you purchased this product for more information.
This guide is designed to make installing and using this product as easy as possible. Information in this document has been carefully checked for accuracy at the time of printing; however, Cambridge Audio’s policy is one of continuous improvement, therefore design and specifications are subject to change without prior notice.
- Secure all cables
- Avoid solvent-based cleaners
- Avoid extreme temperatures
- Avoid direct sunlight
- Avoid damp
- Read all instructions
Connection Steps
- Remove the round cardboard Pad from inside the supplied template
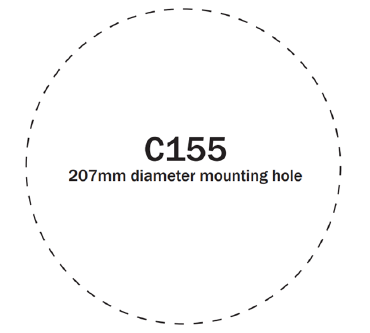
- Use the template to mark the position for the mounting hole at the selected location.
Before cutting ceiling speaker holes, it is suggested that the area is tested for clearance by making an L-shaped probe from strong wire (see illustration below), drilling a small hole in the target area, inserting the probe and slowly turning. Any obstructions will be immediately obvious, and the target area can be moved to a more suitable position.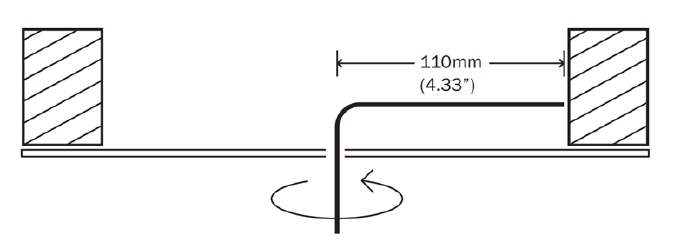
- Cut the mounting hole with a drywall or keyhole saw.
Be sure the mounting surface is between 10 and 30mm(0.39 – 1.18”) thick, and that there is at least 80mm(3.15”) of clearance behind the mounting surface.
Connecting the C155
Do not compromise the performance of your system by using inferior-quality speaker cables. We recommend that high-quality cables of 16 gauge or higher be used. Your professional dealer will give you good advice. Always unplug all A.C.-powered components before making any loudspeaker or component connections. This will avoid the risk of electric shock or damage to your equipment.
Follow these steps to connect the speaker to your amplification system:
- Route the speaker cable from your amplification system to the speakers.
- Avoid routing the speaker cable near electrical wires
- Do not nail or staple the cable
- Separate about 100mm of speaker cable at each end.
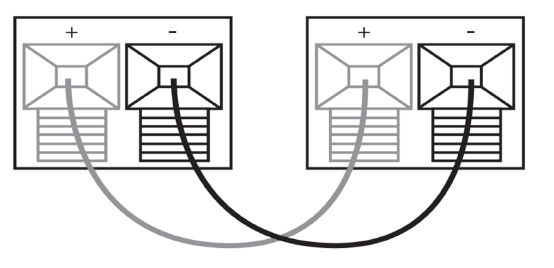
- Using a wire stripper, remove about 10mm of insulation from both ends of each conductor, and then twist the strands of each conductor.
- Observing polarity is of the utmost importance while connecting your speakers. Ensure that the red (+) terminals on your amplification system are connected to the red (+) on the speakers, and black (-) on your amplification system to black (-) on your speakers. The speaker cable is coded with a bead or stripe down one lead’s insulation or has differently colored wires. Press the spring-loaded red or black tab back to reveal the connecting hole. Insert the stripped end of the speaker wire, then release the tab.
- If your speakers are wired incorrectly they will be out of phase and sound hollow and indistinct, with a weak bass. Re-check your connections for correct polarity and reverse the connections if necessary.
Mounting the C155
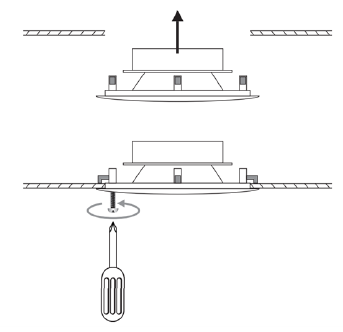
- Before mounting, ensure that the four fixing screws are slackened off so that the red mounting dog legs can move freely.
- Move each red dog-leg foot to the LEFT into its holding slot, and then insert the speaker into the mounting hole.
- Using a cross-head screwdriver, slowly turn each fixing screw clockwise. This will move the mounting dog legs out of their slots.
-
Tighten each fixing screw until the mounting dog legs grip the ceiling.
PAINTING THE FRAME AND GRILLE
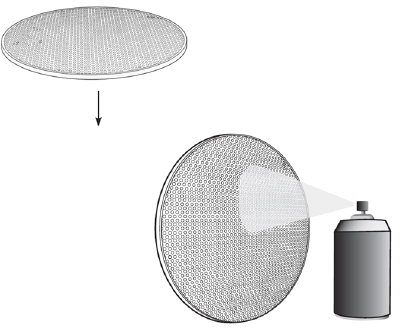
- Remove the grille by inserting a small hook or similar small implement into one of the grille openings, then pulling on the grille.
- Fit the clear plastic painting mask provided when painting the speaker surround to avoid getting paint on the speaker cone.
FAQs for Cambridge Audio C155SS in-Ceiling Speaker
Ceiling speakers model C155SS are they active or passive?
No, ceiling speakers typically function as passive speakers, which means they lack internal amplifiers and are powered by speaker cables connected to an external amplifier. Each ceiling speaker is connected to the binding posts on the amplifier to do this.
Do Cambridge Audio C155SS ceiling speakers need to be enclosed?
The sound quality of your in-ceiling speakers will be diluted if a back box is not installed, and this will cause noise pollution in other rooms in your house.
What are the purposes of ceiling speakers?
Ceiling speakers may communicate exquisitely detailed music from overhead and even improve the surround sound of your speakers, despite their comparatively small size. Why not add a few to your home? Theaters even employ them to enhance the surround sound experience.
Why are there four wires on the ceiling speakers?
For whole-house wiring (multi-room audio), a four-conductor wire is frequently utilized to cut down on the amount of cable and work needed. The ability to transport audio signals from the source to the destination without signal deterioration is considerably better achieved with high-quality equipment and cabling.
What kind of wire is used for C155SS speakers in the ceiling?
UL-rated speaker wire with the labels CL2 or CL3 is required if you plan to run speaker wire within your walls or ceiling.
Where should ceiling speakers be installed?
For optimum sound distribution, try to install a single stereo speaker in the middle of the ceiling, if at all possible.
Why are transformers used, in-ceiling speakers?
In a constant-voltage speaker system, the amplifier boosts the voltage of the audio signal using a transformer to lessen power loss along the speaker cable and transmit more power over a given wire diameter.
Are ceiling speakers necessary to have an amplifier?
The most popular ceiling speakers are passive, and you must first connect them via speaker cable to an external amplifier in order to play music.
How can I identify the positive or negative speaker wire?
Color-coding: You can remember which speaker wire is positive and which is negative because speaker cables are frequently coloured in a specific way. Red and black are the most typical color codes, with red denoting positivity and black denoting negativity.
What power output level should my ceiling speakers have?
You need a stereo with at least 25 watts per channel with effective speakers or 40 watts per channel with non-efficient speakers for a space that is 18 feet by 18 feet and has 9-foot ceilings.
Is a subwoofer necessary for Cambridge Audio C155SS in-Ceiling Speaker?
Even if ceiling speakers are capable of producing all the bass and low-end frequencies, a subwoofer will be helpful in handling them. Additionally, it significantly improves the overall sound quality of your sound system.

