
ASAKUKI AVIGATOR 410W Portable WiFi Movie Projector
About ASAKUKI
ASAKUKI is a brand that specializes in essential oil diffusers and related aromatherapy products. They are known for producing a variety of diffusers, including ultrasonic diffusers, which use water and ultrasonic vibrations to disperse essential oils into the air. These diffusers often come in stylish designs and are commonly used for relaxation, mood enhancement, and wellness.
ASAKUKI’s products typically feature LED lights that can change colors, providing a visually pleasing and calming ambiance in addition to the aromatherapy benefits. Some of their diffusers also incorporate advanced features such as timer settings and automatic shut-off functions for convenience and safety.
Contact Us
If you have any suggestions or if you run into any problems, please feel free to contact us.
- Tel: +1 626) 278-4691
- Email: support @ASAKUKI.COM
First Use
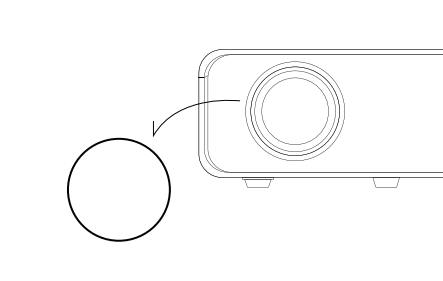
- Uncover the projector lens cap.
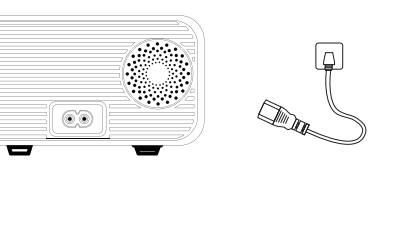
- Plug the power cord into the projector.
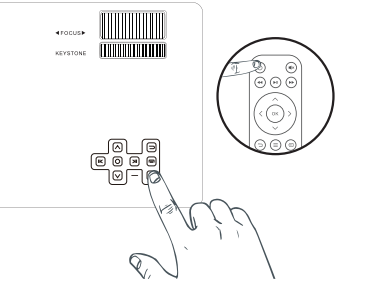
- Press the power button to turn on the projector.
- Connect the projector to the HD port support device.

- Select the input source.

- Adjust here accordingly.

- Adjust the keystone and focus ring to get the best image performance.

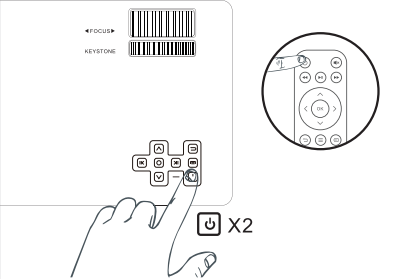
- Press the power button twice to turn off the projector.
Note: Each time you move the projector distance or adjust the projector angle, you need to adjust the keystone and focus manually again for the best image performance
Steps to Wireless Connection (Screen Mirroring)
iPhone/iPad (IOS system)
First-time connection Setting up the connection (may require cellular data for the first-time setup).
- Step 1. Turn on the projector and select “CAST” Screen Mirroring as the input source.

- Step 2. Go to “Settings” and connect to “WJ-XXXXXX” (password: 12345678) in Wi-Fi setup.
- Step 3. Exit the “Settings” and open “Screen Mirroring/Airplay Mirroring”. Click the “WJ-XXXXXX” to connect to the projector.

Note: After connecting, the mobile phone only can use cellular data.
- If you need to use home WI-FI, please follow the next step: Streaming with your Wi-Fi(wireless connection)
Streaming with your Wi-Fi (wireless connection)
- Step 1. Turn on the projector and select “CAST” Screen Mirroring as the input source.

- Step 2. Press the “OK” button on the remote control to search for Wi-Fi. Then select your Wi-Fi and enter the password. Tap “Connect”. Your Wi-Fi should be displayed on the projector’s interface of Screen Mirroring for the IOS System after a successful connection.

Note: The connection process takes 3-10 seconds, which is depending on the network speed.
- Step 3. Connect your iPhone/iPad to the same WI-FI. Open “Screen Mirroring” on your device and click “WJ-XXXXXX” to connect.

Android System (Wireless Connection)
To use this function, your Android device must support a Multi-screen/Wireless display.
- Step 1. Turn on the projector and select “CAST” Screen Mirroring as the input source.

- Step 2. Go to the “Settings” and open your Wi-Fi. (If you use your phone’s cellular data, please ignore Step 2)
- Step 3. Activate the Multi-screen function in your Android device and search for the projector, select “WJ-XXXXXX” and click to connect. Your Android device display will be projected to the wall/screen after a successful connection.
Please note
- a. Make sure your mobile device is within 3 ft distance from the projector when using the wireless connection.
- b. Some mobile devices do not support screen mirroring.
Example Connect to a SAMSUNG S7 Mobile Phone.
- Step 1. Turn on the projector and select “CAST” Screen Mirroring as the input source.
- Step 2. Go to the “Settings” and open your Wi-Fi.
- Step 3. Open the “Smart View” on your device, select “WJ-XXXXXX” and click to connect.
Steps to Connect through Charging Cable
iPhone/iPad (IOS system)
Screen Mirroring with the original lightning cable.
- Step 1. Turn on the projector and select “CAST” Screen Mirroring as the input source.

- Step 2. Connect your iPhone/iPad to the “USB-T” port of the projector with the original lightning cable.
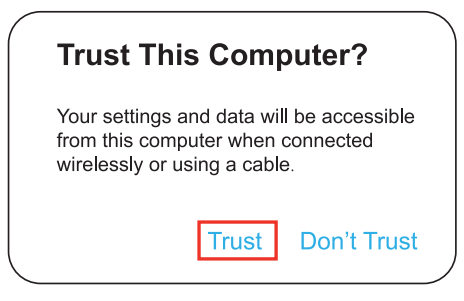
- Step 3. Select “Trust” in the pop-up window of “Trust This Computer?”. The display of your iPhone/iPad should be projected to the wall/screen after a few seconds.
For Android Phone (Android system)
App Installation and Download Guide
- Step 1. Turn on the projector and select Screen Mirroring as the input source.

- Step 2. Connect your Android mobile device to the USB-T port of the projector using the original charging cable. A window will pop up automatically and prompt you to download the App. Please select “VIEW” to finish the download and installation.
- Step 3. Unplug the original cable and reconnect the device. A window will pop up to start the App. Please select “START NOW”.
- Step 4. After starting the App, select “OK” in the pop-up windows of “RKCast”. Your device’s screen should be projected to the wall/screen in a few seconds.


Please note
- a. The charging cable must be the original cable or a compatible cable, or the screen mirroring may be unsuccessful.
- b. Some mobile devices may not support screen mirroring.
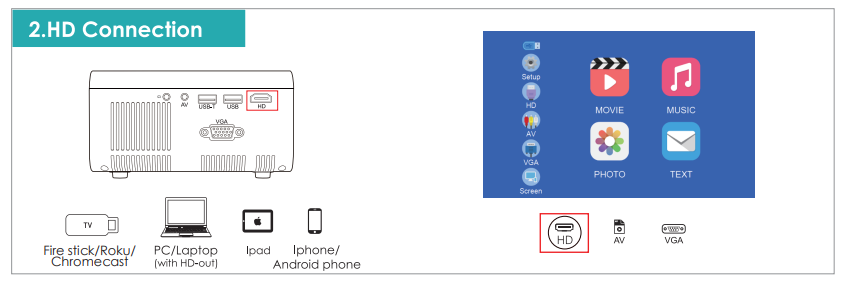
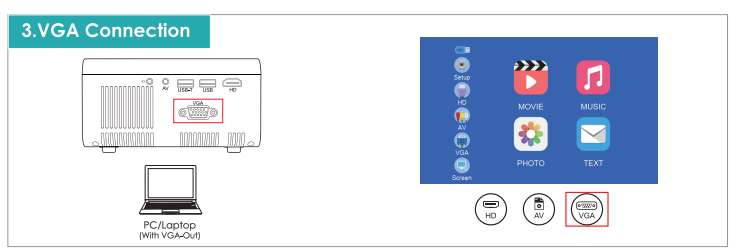
Input Source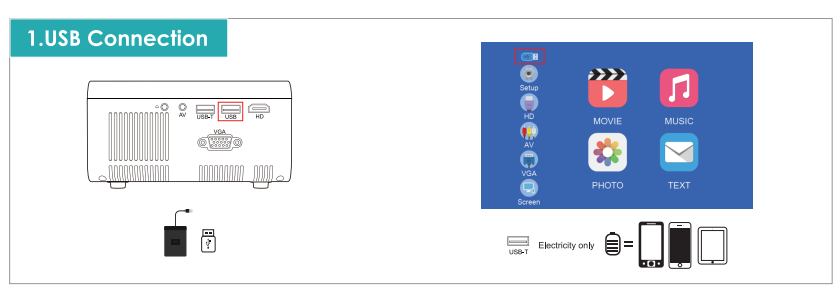

Package Include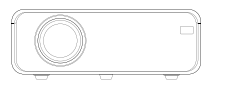
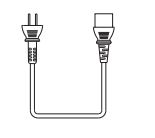
- Power Cable x1
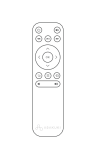
- Remote Control x1 Battery not Included)
- Adjustable Foot x1

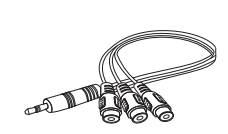
- 3 in 1 Video Cable x1
- HD Line xl

- Lens Cover x1

- Projector User Manual

- FAQ Card x1

- Dust Removal Kit x1

- Carrying Bag x1

Tips
- Blurry Image
- First, correct the keystone to a rectangle. 4-20 ft(Suggested projection distance: 5 ft-10 ft)
- ( Second, rotate the focus button to gain the best clarity.
Effective Projection Distance: 4-20 ft (Suggested projection distance: 5 ft-10 ft)
- Mounting
Hole Adopting a single mounting hole dual-use design, the projector is compatible with the standard camera tripod and 1/4 inch screw projector tripod stand. Meanwhile, you can rotate up and down the screw to meet different height needs. - Attention
There are various types of mobile phones on the market and the motherboard cannot support all models of mobile phones, so if you connect your phone to the projector via cable, the audio will be played on your phone, only connect your phone to the projector via wireless, the audio will be played on your projector.
Structure Diagram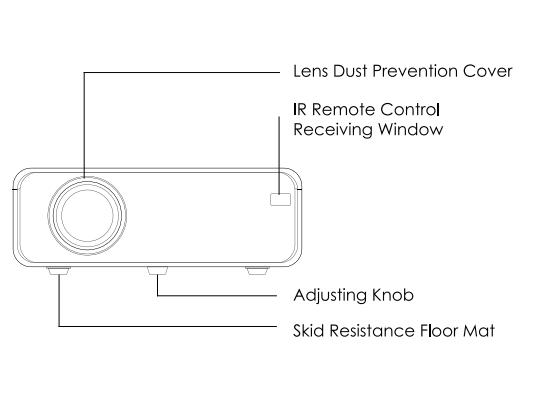


Install and Debug
1. Install the Projector
You can choose to place the projector on the horizontal plane or attach it to a hanging bracket.
Horizontal Placement
Hanging Bracket Installation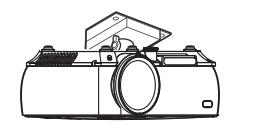
Attention: The hanging bracket is an accessory that is not included
2. Adjust the Focal Length
Distortion Image Diagram
- Keystone Distortion

- Blurred Image

- Blurred Image
Adjust the projector’s keystone correction ring and the focusing ring to obtain a satisfactory image. It is recommended to adjust the keystone correction ring in case of keystone distortion in the image(Figure 1 on the right). When the screen image is blurred (Figure 2 on the right), it is recommended to adjust the focus ring to improve the picture definition. Please move forward or backward proportionally in case the adjustment is unable to obtain a satisfactory definition.
3. Adjust the image projected on the screen
Check the horizontal and vertical screen settings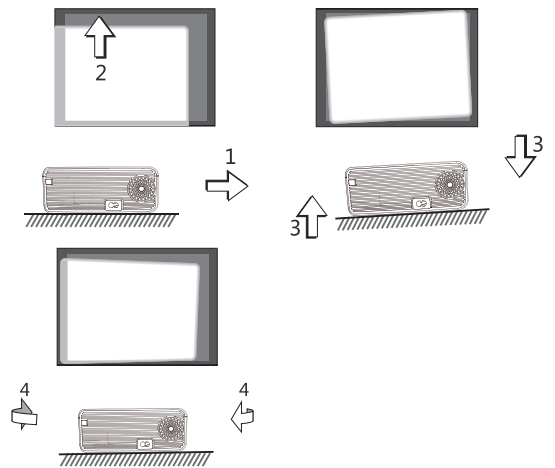
! Attentions: Change the projection mode in case the projector is hanging from the ceiling, or in a rear projection system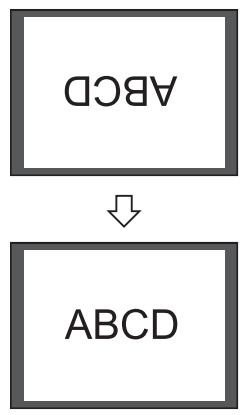
- Please move the project to one side in case of left or right screen offsets. (Align the screen center to the projector lens center)
- Please move the projector vertically up and down so that the projected image is in the middle of the screen.
- Please place the projector on a horizontal plane for angle offsets.
- The projection screen as shown in the figure indicates the projector is not aligned to the screen. Please adjust the projector’s location to align with the screen.
4. Safe Shutdown
- Tap the key twice © on the remote control to shut down the projector.
- Press and hold the key twice © on the control panel to shut down the projector.
- Please unplug the power cord after the projector shutdowns to save energy.
Projection Settings
- Options related to “Audio “are set on this screen.

- Options related to “Settings” are set on this screen.

Get a better viewing effect with appropriate settings. The main content of the projection can be set in the following steps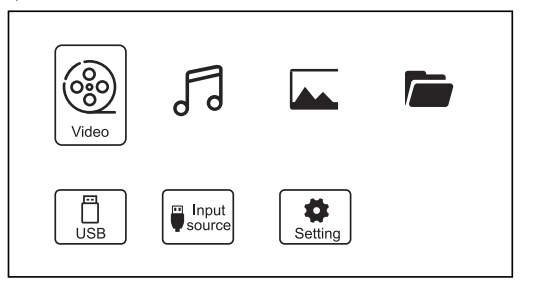
- Normal Installation

- Hanging Installation

- “Image”, “Sound”, “Time”, and “Settings” can be set. Press the <“and”>” on the operation panel to select the range of settings.
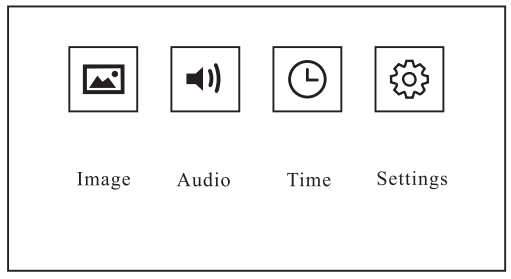
- Options related to “Image” are set on this screen.

Projection Distance & Size
Recommended Projection Distance: 5-10ft
Multimedia Support Play Format
Parameters
Important safety considerations
The following safety instructions ensure the long service life of the projector to avoid fire or electric shock. Make sure to carefully read them and pay attention to all the following warnings
- Do not install the projector in sites with improper ventilation.
- Do not block the ventilation holes (intake or exhaust)
- Do not install the projector near the temperature and smoke transducer. It may cause a sensor failure.
- Do not install the projector in hot and humid sites.
- Do not install the projector in dust and smoke sites.
- Do not install the projector in sites with the direct blowing of the warm and cool air-conditioned wind.
Troubleshooting Guide
- The content from Hulu, Netflix, and similar services can not be mirrored or cast
- Due to copyright restrictions of Hutu, Netflix, and similar services, the contents MAY NOT be mirrored or cast
- What should I do if I want to watch content from Hulu, Netflix, and similar services via the projector?
- Please prepare a Fire TV stick, Roku stick, or Chrome cast™m (not included, and then connect it to the projector to watch the contents.
- Blurry Image
- Adjust the focus ring/keystone.
- The projector and screen/wall must be an effective distance.
- Remote Unresponsive
- Make sure the remote points at the IR receiver directly.
- Do not cover the IR receiver.
- Try a new pair of AAA batteries.
- Upside Down Images
- Go to Menu > PICTURE > Projection Mode to flip the projection image.
FCC Statement
Any changes or modifications not expressly approved by the party responsible for compliance could void the user’s authority to operate the equipment. This device complies with part 15 of the FCC Rules. Operation is subject to the following two conditions:
- This device may not cause harmful interference, and \
- this device must accept any interference received, including interference that may cause undesired operation.
NOTE: This equipment has been tested and found to comply with the limits for a Class B digital device, under part 15 of the FCC Rules.
These limits are designed to provide reasonable protection against harmful interference in a residential installation. This equipment generates, uses, and can radiate radio frequency energy and, if not installed and used by the instructions, may cause harmful interference to radio communications. However, there is no guarantee that interference will not occur in a particular installation. If this equipment does cause harmful interference to radio or television reception, which can be determined by turning the equipment off and on, the user is encouraged to try to correct the interference by one or more of the following measures:
- Reorient or relocate the receiving antenna.
- Increase the separation between the equipment and the receiver.
- Connect the equipment to an outlet on a circuit different from that to which the receiver is connected.
- Consult the dealer or an experienced radio/TV technician for help.
This equipment complies with FCC radiation exposure limits set forth for an uncontrolled environment. This equipment should be installed and operated with a minimum distance of 20cm between the radiator& your body. This transmitter must not be co-located or operating in conjunction with any other antenna or transmitter.
ISEDC Warning
This device complies with Industry Canada license-exempt RSS standard(s). Operation is subject to the following two conditions:
- this device may not cause interference, and
- this device must accept any interference, including interference that may cause undesired operation of the device
CAUTION
To avoid replacement of a battery with an incorrect type. Don’t dispose of a battery in a fire or a hot oven, or mechanically crush or cut off a Battery. Don’t leave a battery in an extremely high-temperature surrounding environment. To avoid the battery being subjected to extremely low air pressure. The mains plug is used as the disconnect device, the disconnect device shall remain readily operable.
- The symbol indicates for indoor use only
- Class 11 equipment
- The symbol indicates the DC voltage
- The symbol indicates AC voltage
- RECYCLING
This product bears the selective sorting symbol for Waste electrical and electronic equipment (WEEE). This means that this product must be handled under European directive 2012/19/EU to be recycled or dismantled to minimize its impact on the environment. User has the choice to give this product to a competent recycling organization or the retailer when they buy new electrical or electronic equipment. This product can be used across EU member states. The device is a low-power device, it can meet the requirement of RF exposure. The mains plug is used as the disconnect device, the disconnect device shall remain readily operable.
FAQS About ASAKUKI NAVIGATOR 410W Portable WiFi Movie Projector
What does a portable projector do?
Mobile presentation delivery.
Is a screen required for portable projectors?
If you use a projector without a screen, your viewing experience won’t be as good as it could be.
What is a wireless projector’s benefit?
It is frequently quick and simple to set up and display straight away with a wireless projector because it makes it possible to connect to other devices without using many cords.
What is the lifespan of a portable projector?
Over 60,000 hours, or nearly seven years, can be achieved by LED bulbs.
Can a projector be used throughout the day?
If you plan to use the projector outside during the day, you should look for one with at least 4000 lumens.
How can I utilize a monitor with my portable projector?
Utilize an HDMI cable or wireless connection to connect it to a computer, laptop, or mobile device.
What purposes do projectors serve?
Playing video games on a large screen, creating murals on walls, bonding with your children, cooking, doing housework, or even projecting art on walls.
How much electricity is used by a tiny projector?
The smallest projectors need 50W, whereas the largest ones use 150–800 watts.
Do projectors require Internet access?
An internet connection is all that is required.
Are projectors bad for your eyes?
No, seeing a projector normally isn’t hazardous, but staring straight into the projector’s light can be harmful.
For more manuals by ASAKUKI, Visit Manualsdock
[embeddoc url=”https://manualsdock.com/wp-content/uploads/2023/09/ASAKUKI-AVIGATOR-410W-Portable-WiFi-Movie-Projector-User-Manual.pdf” download=”all”]


