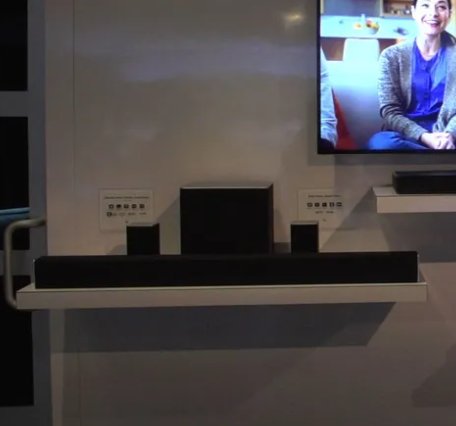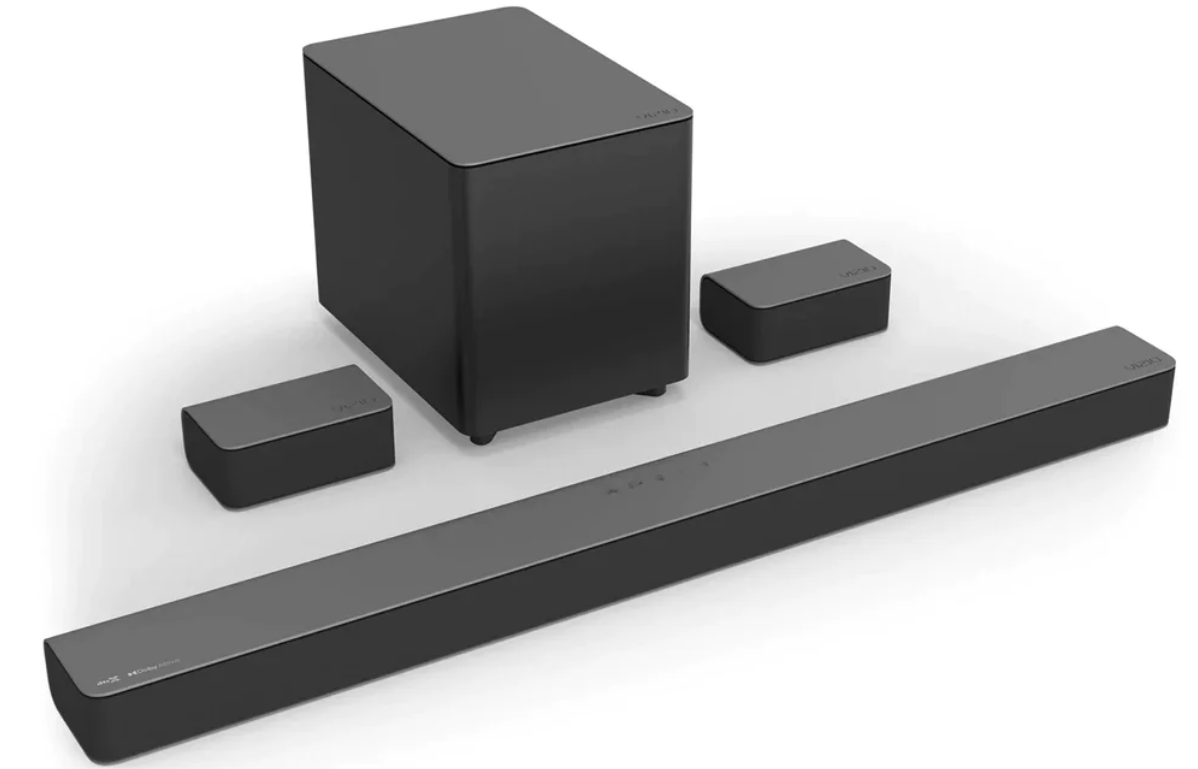
VIZIO M-Series M215a-J6 Sound Bar
SAFETY INSTRUCTIONS
Your Unit is designed and manufactured to operate within defined design limits, and misuse may result in electric shock or fire. To prevent your Unit from being damaged, the following rules should be observed for its installation, use, and maintenance. Please read the following safety instructions before operating your Unit. Keep these instructions in a safe place for future reference.
- Heed all warnings.
- Follow all instructions.
- Do not use this Unit near water.
- Clean only with a dry cloth.
- Do not block any ventilation openings. Install by the manufacturer’s instructions.
- Do not install near any heat sources such as radiators, heat registers, stoves, or other Units (including amplifiers) that produce heat.
- Do not defeat the safety purpose of the polarized or grounding-type plug. A polarized plug has two blades one wider than the other. A grounding-type plug has two blades and a third grounding prong. The wide blade or the third prong is provided for your safety. If the provided plug does not fit into your outlet, consult an electrician for the replacement of the obsolete outlet.
- Protect the power cord from being walked on or pinched particularly at the ends where the plug is located, near convenience receptacles, or where they exit from the Unit.
- Only use attachments/accessories specified by the manufacturer.
- Use only with the stand, tripod, or bracket specified by the manufacturer, or sold with the Unit. When a cart is used, use caution when moving the cart/Unit combination to avoid injury from tip-over.
- Unplug this Unit during lightning storms or when unused for long periods.
- Refer all servicing to qualified service personnel. Servicing is required when the Unit has been damaged in any way, such as when the power supply cord or plug is damaged, liquid has been spilled or objects have fallen into the Unit, the Unit has been exposed to rain or moisture, does not operate normally, or has been dropped.
- To reduce the risk of electric shock or component damage, switch off the power before connecting other components to your Unit.
- Unplug the power cord before cleaning your Unit. A damp cloth is sufficient for cleaning. Do not use a liquid or a spray cleaner on your Unit. Do not use abrasive cleaners.
- Always use the accessories recommended by the manufacturer to ensure compatibility.
- When moving your Unit from an area of low temperature to an area of high temperature, condensation may form in the housing. Wait before turning on your Unit to avoid causing fire, electric shock, or component damage.
- Slots and openings in the back and bottom of the Unit are provided for ventilation. To ensure reliable operation of your Unit and to protect it from overheating, be sure these openings are not blocked or covered. Do not place your Unit in a bookcase or cabinet unless proper ventilation is provided.
- Never push any object into the slots and openings on your Unit. Do not place any objects on the top of your Unit. Doing so could short-circuit parts causing a fire or electric shock. Never spill liquids on your Unit.
- Do not block the subwoofer ports. Allow for 1-2 inches of space around all sides for ventilation.
- WARNING: Exposure to loud sounds can damage your hearing causing hearing loss and tinnitus (ringing or buzzing in the ears). With continued exposure to loud noises, ears may become accustomed to the sound level, which may result in permanent damage to hearing without any noticeable discomfort.
- When connected to a power outlet, power is always flowing into your Unit. To disconnect the power, unplug the power cord.
- Do not overload power strips and extension cords. Overloading can result in fire or electric shock.
- The wall socket should be located near your Unit and be easily accessible.
- Keep your Unit away from moisture. Do not expose your Unit to rain or moisture. If water penetrates your Unit, unplug the power cord and contact your dealer. Continuous use in this case may result in fire or electric shock.
- Do not use your Unit if any abnormality occurs. If any smoke or odor becomes apparent, unplug the power cord and contact your dealer immediately. Do not try to repair your Unit yourself.
- Avoid using dropped or damaged appliances. If your Unit is dropped and the housing is damaged, the internal components may function abnormally. Unplug the power cord immediately and contact your dealer for repair. Continued use of your Unit may cause fire or electric shock.
- Do not install your Unit in an area with heavy dust or high humidity. Operating your Unit in environments with heavy dust or high humidity may cause fire or electric shock.
- Ensure that the power cord and any other cables are unplugged before moving your Unit.
- When unplugging your Unit, hold the power plug, not the cord. Pulling on the power cord may damage the wires inside the cord and cause fire or electric shock. When your Unit will not be used for an extended period, unplug the power cord.
- To reduce the risk of electric shock, do not touch the connector with wet hands.
- Insert the remote control batteries by the instructions. Incorrect polarity may cause the battery to leak which can damage the remote control or injure the operator.
- Read and follow all warnings printed on the Unit.
- WARNING: This equipment is not waterproof. To prevent a fire or shock hazard, do not place any container filled with liquid near the equipment (such as a vase or flower pot) or expose it to dripping, splashing, rain, or moisture.
- CAUTION: Danger of explosion or fire if batteries are mistreated. Replace only with the same or specified type.
- Do not leave the batteries exposed to direct sunlight for a long period with doors and windows closed. Do not disassemble the batteries or dispose of them in the fire.
- If the main wall plug or the appliance coupler is disconnected, the disconnected device will remain readily operable upon reconnection to an appropriate power source.
- No open flames, such as lighted candles, should be placed on the Unit.
- The ventilation should not be impeded by covering the ventilation openings with items, such as newspapers, tablecloths, curtains, etc.
- The equipment shall be used at a maximum of 35 degrees C ambient temperature.
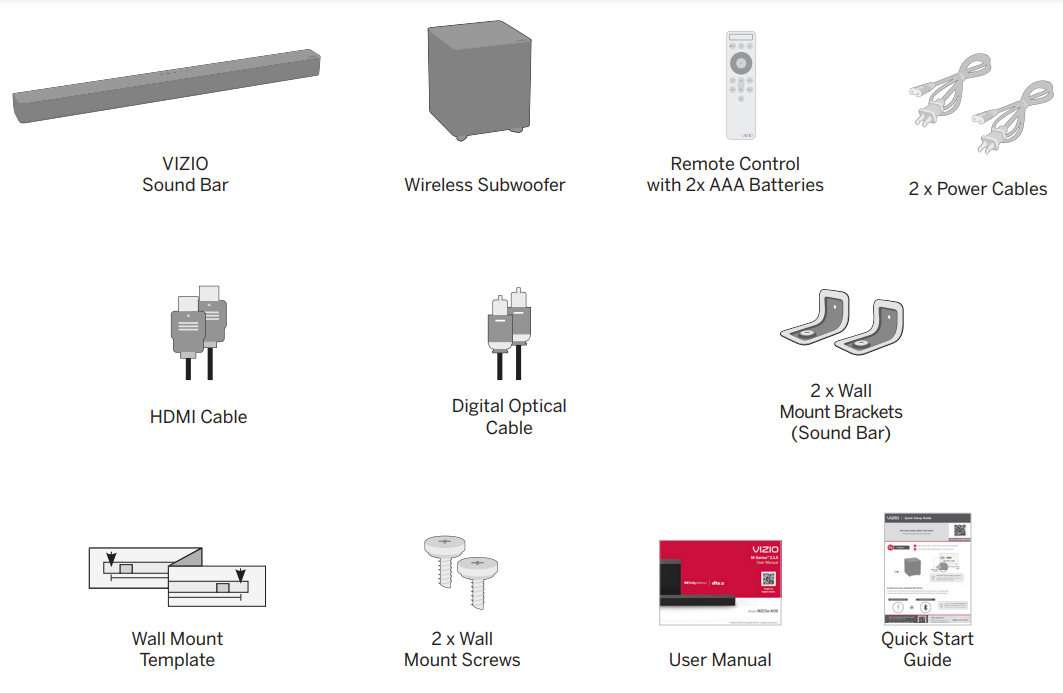
Package Contents
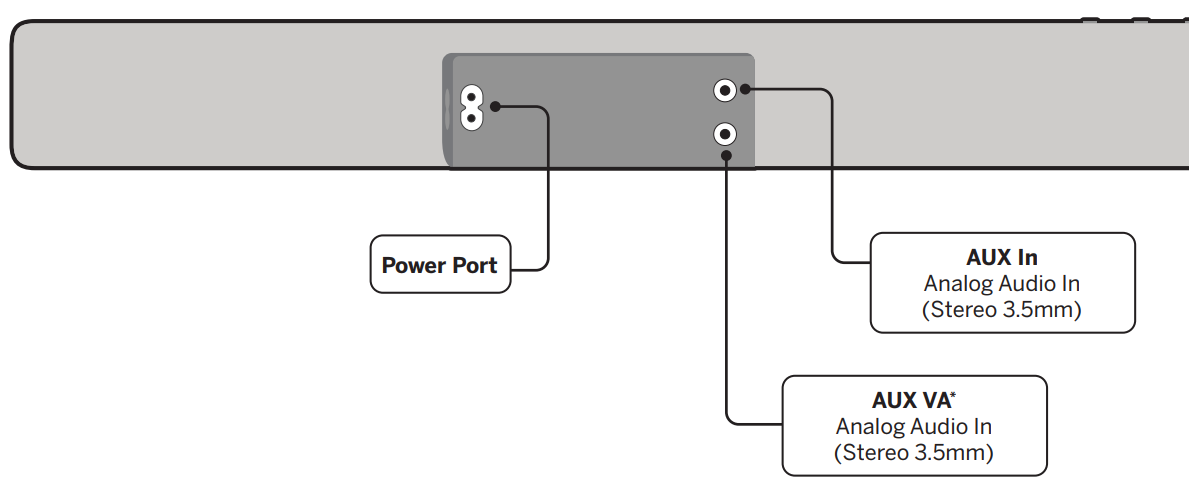
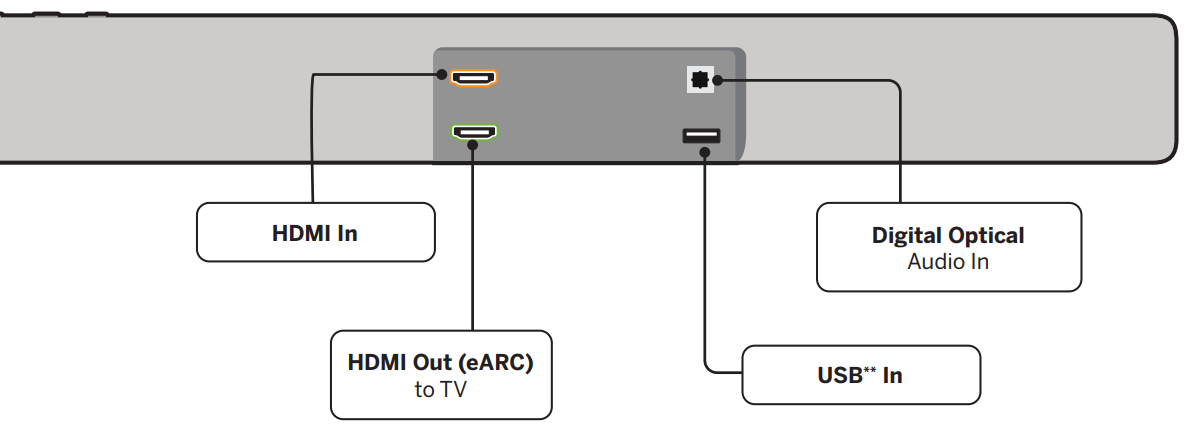
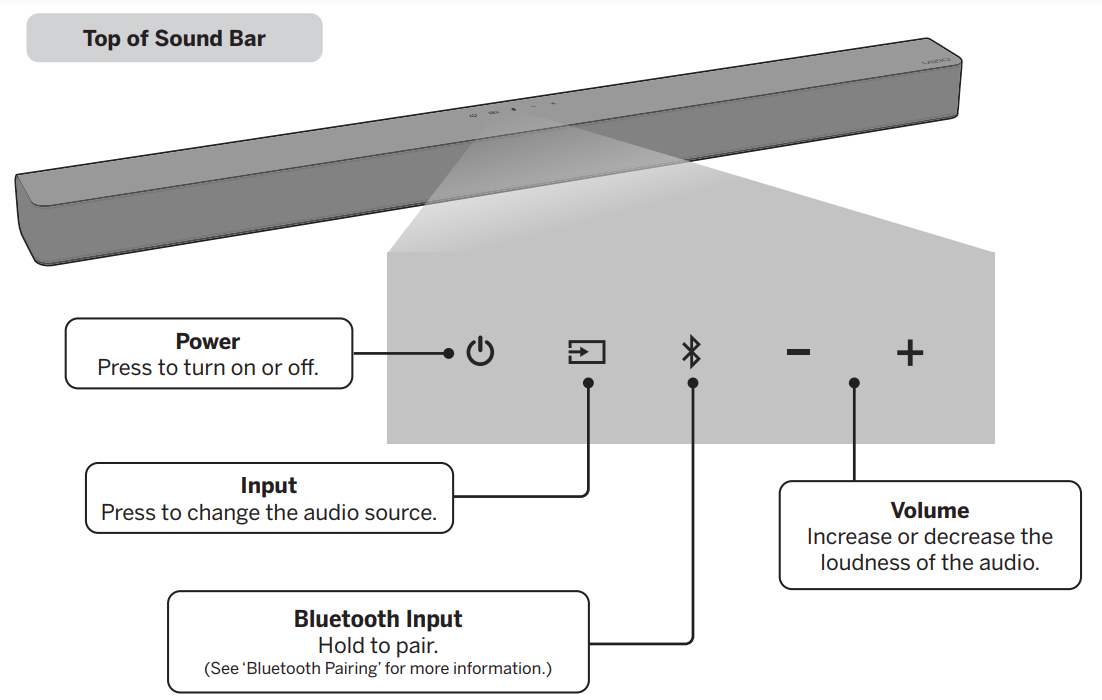
Controls & Connections
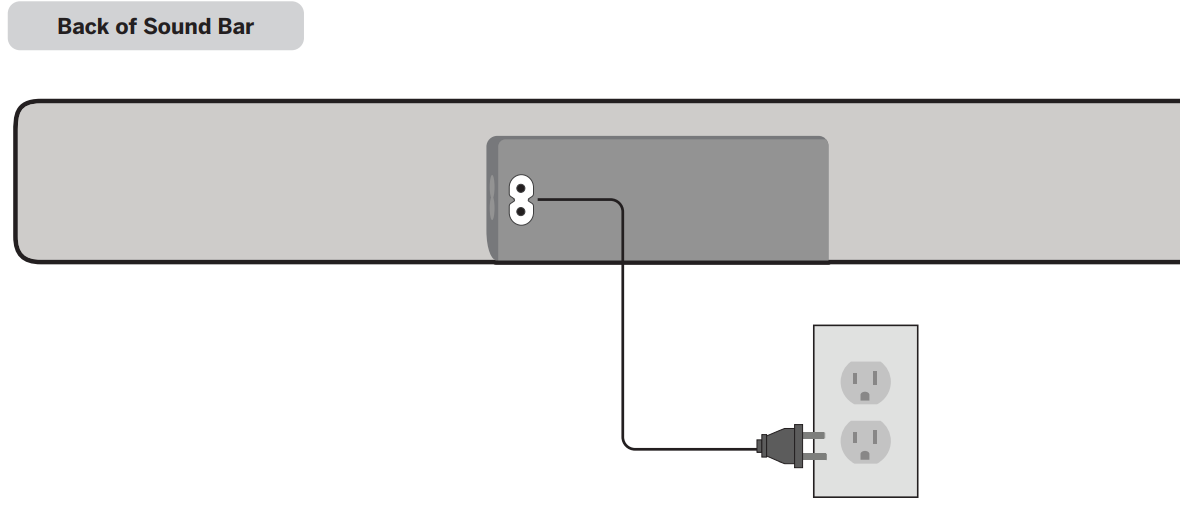
Back of Sound Bar
Top of Sound Bar
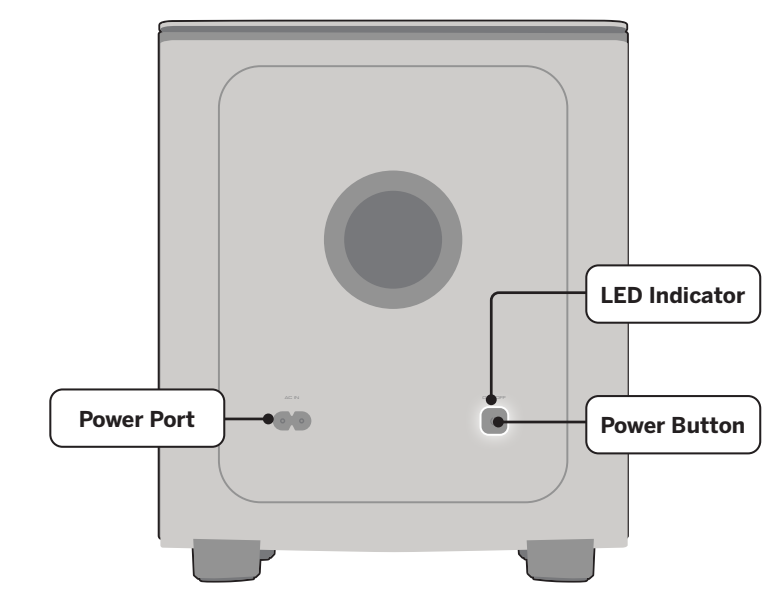
Back of Subwoofer
First-time Setup
- Choose the best possible connection cable type and connect it to your TV.* (Not all cables are included.)
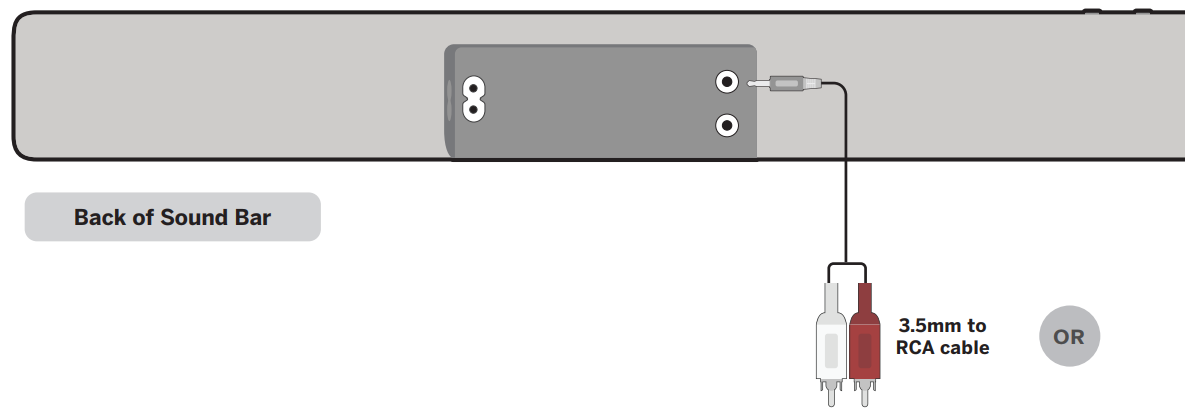
 Connect the power cable to the sound bar AC IN as shown. Plug the power cable into an electrical outlet.
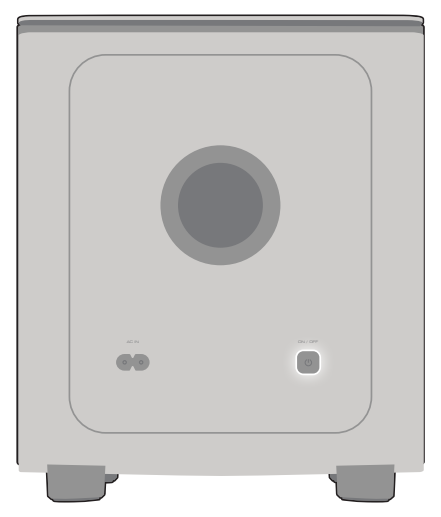 Connect the power cable to the subwoofer.
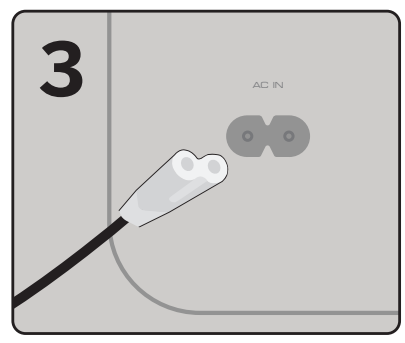 Plug the power cable into a power outlet.
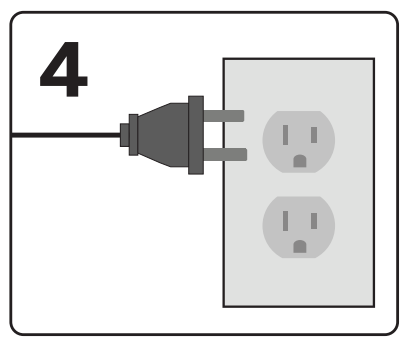 The subwoofer should automatically power on and link to the sound bar when plugged in. The LED will glow to solid to confirm.
 Remove the battery cover by gently sliding it away from the remote.
 Insert the included batteries and gently slide the battery cover back into place.
 After turning on both your TV and sound bar, it will automatically begin searching for an active input.* The LED indicator on the front of the soundbar will begin cycling in different colors through inputs until an audio source is detected.
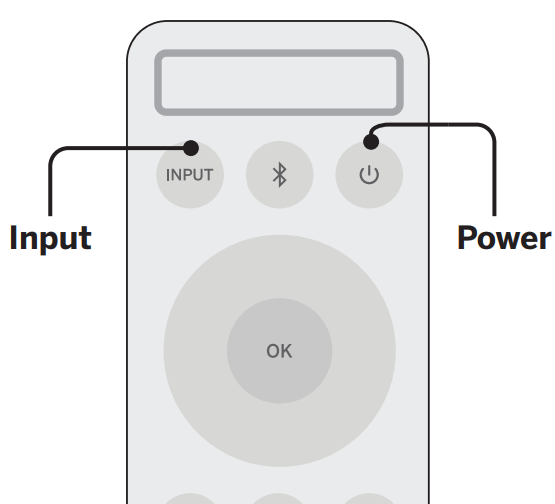
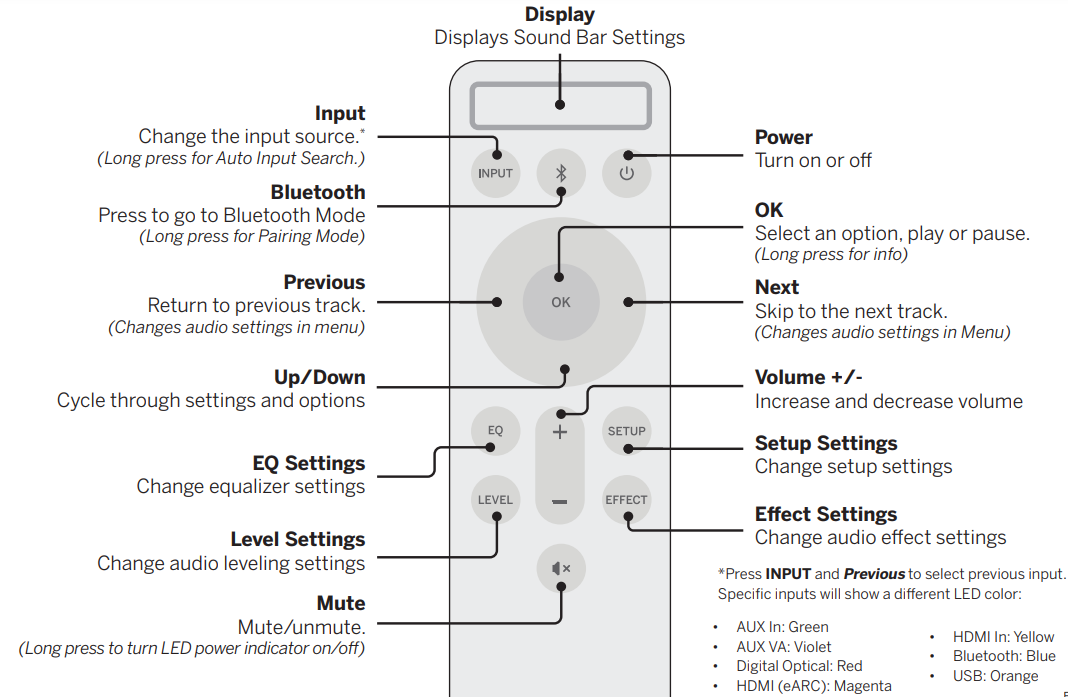
Using the Remote
Connecting a Subwoofer

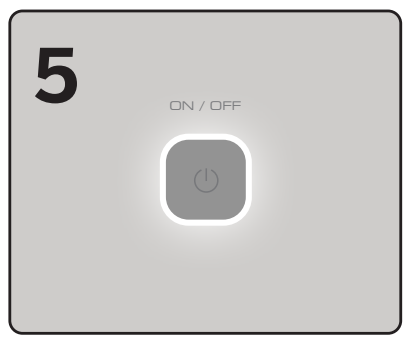
- First, confirm that the power LED is illuminated. Press and hold the ON/OFF button on the back of the subwoofer for 5 seconds. The LED on the back of the subwoofer will begin to blink.
- Press and hold the Power button on the top of the sound bar for 5 seconds. The LED indicators on the front will flash 3 times. The subwoofer is now linked to the soundbar.
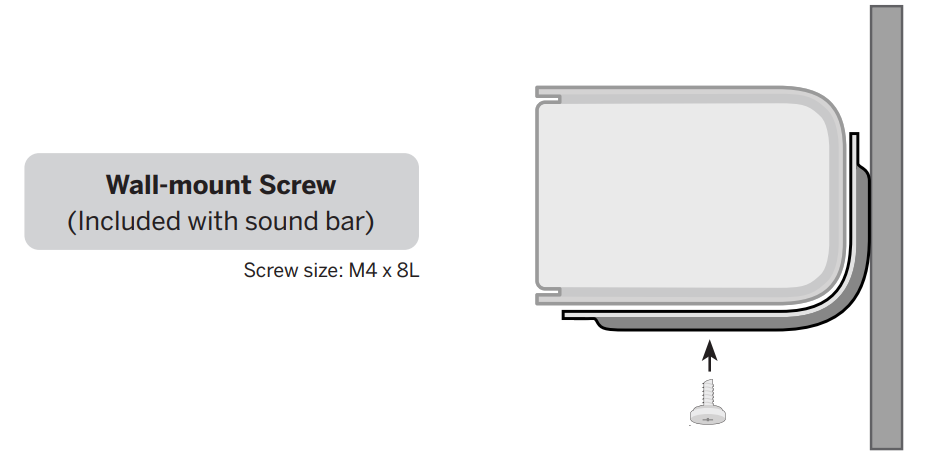
Wall-mounting
- Place the included wall mounting template against the wall under your TV. Mark the two bracket holes using a pencil.
 Then place the shorter end of the bracket on the two holes you just marked and screw it into the wall. Be sure your screws are attached to wood studs, drywall anchors (for drywall), or concrete anchors (for brick/concrete walls).
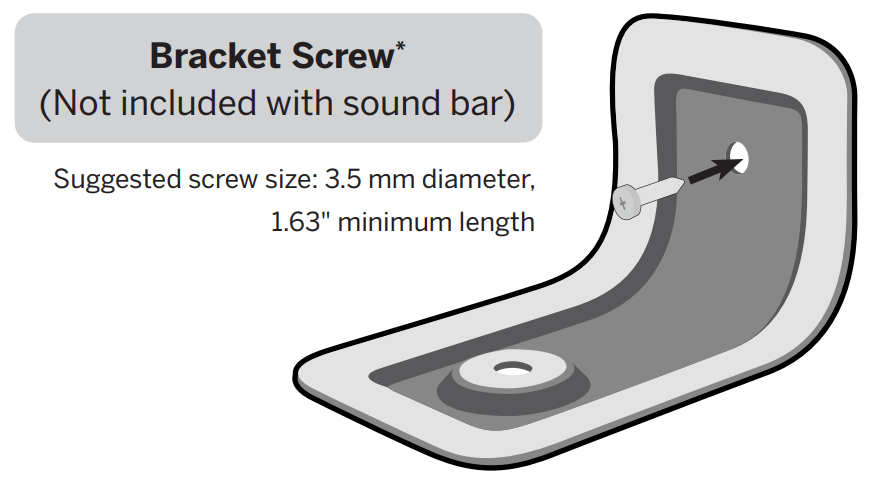 Place the soundbar onto the L-shaped bracket and use the included bracket screws to attach it.

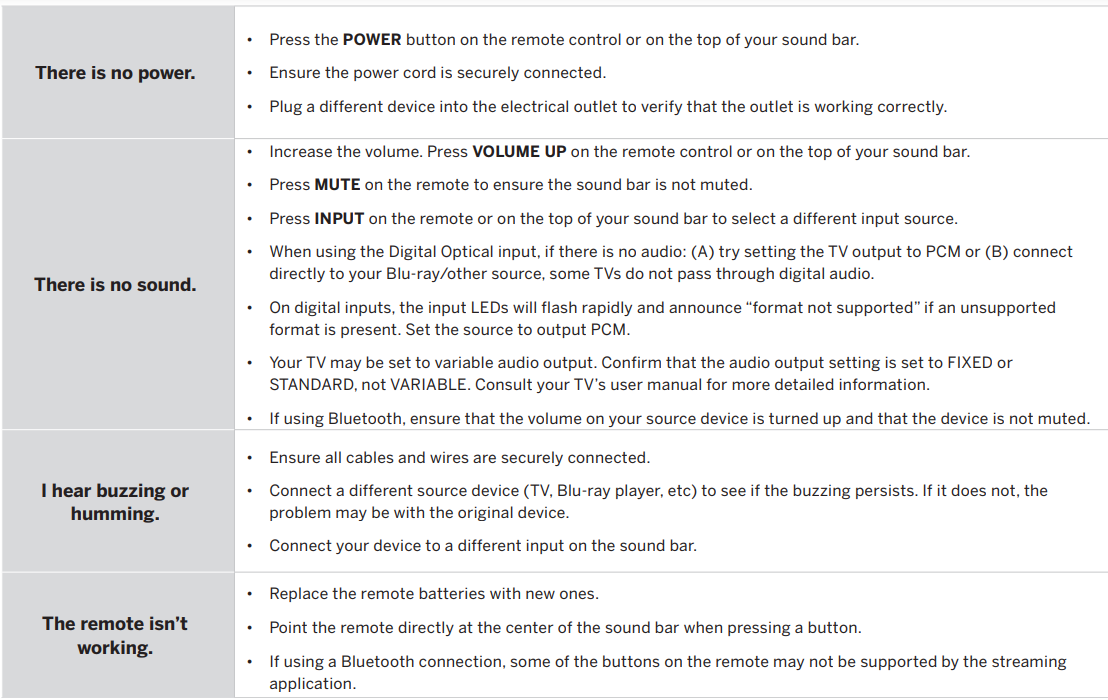
Help & Troubleshooting
Limited Warranty
UNITED STATES
By using this VIZIO product, you accept all VIZIO Terms and Conditions, including all the Terms of Warranty, BINDING ARBITRATION AGREEMENT, and Class Action Waiver. If you do not agree to the terms of this warranty, do not use the VIZIO product and, within thirty (30) days of the date of purchase, return it for a refund to the authorized retailer where you purchased it.
You have the right to opt out of the Arbitration Agreement and Class Action Waiver within 60 calendar days of your purchase. Please refer to the full section “Binding Arbitration Agreement; Class Action Waiver” below for more details and instructions for opt-out. Full Terms and Conditions may be viewed at vizio.com/en/terms/terms-of-service.
How Long This Warranty Lasts
For non-commercial use, VIZIO warrants the product on the terms set forth below for one (1) year from the date of original purchase. For commercial use, VIZIO warrants this product on the terms set forth below for ninety (90) days from the date of original purchase.
What This Warranty Covers
VIZIO warrants the product against defects in materials and workmanship when the product is used normally by VIZIO’s user guides and manuals. Except where restricted by law, this warranty applies only to the original purchaser of a new product. The purchase must have been made from an authorized retailer in the United States (including Puerto Rico). The product must also be located in the country where it was purchased at the time of warranty service.
How to Get Service
Before obtaining warranty service, you may visit www.vizio.com for additional help and troubleshooting. To obtain warranty service, contact VIZIO Customer Support by going to support.vizio.com and selecting Contact Us. You can also call Customer Support (US): at 855-209-4106.
What This Warranty Does Not Cover
This warranty does not cover: (a) cosmetic damage; (b) normal wear and tear; (c) improper operation; (d) improper voltage supply or power surges; (e) signal issues; (f) damage from shipping; (g) acts of God; (h) customer misuse, modifications or adjustments; (i) installation, set up, or repairs attempted by anyone other than by a VIZIO authorized service center; (j) products with unreadable or removed serial numbers; (k) products requiring routine maintenance; or (l) products sold “AS IS”, “CLEARANCE”, “FACTORY RECERTIFIED”, or by a non-authorized reseller.
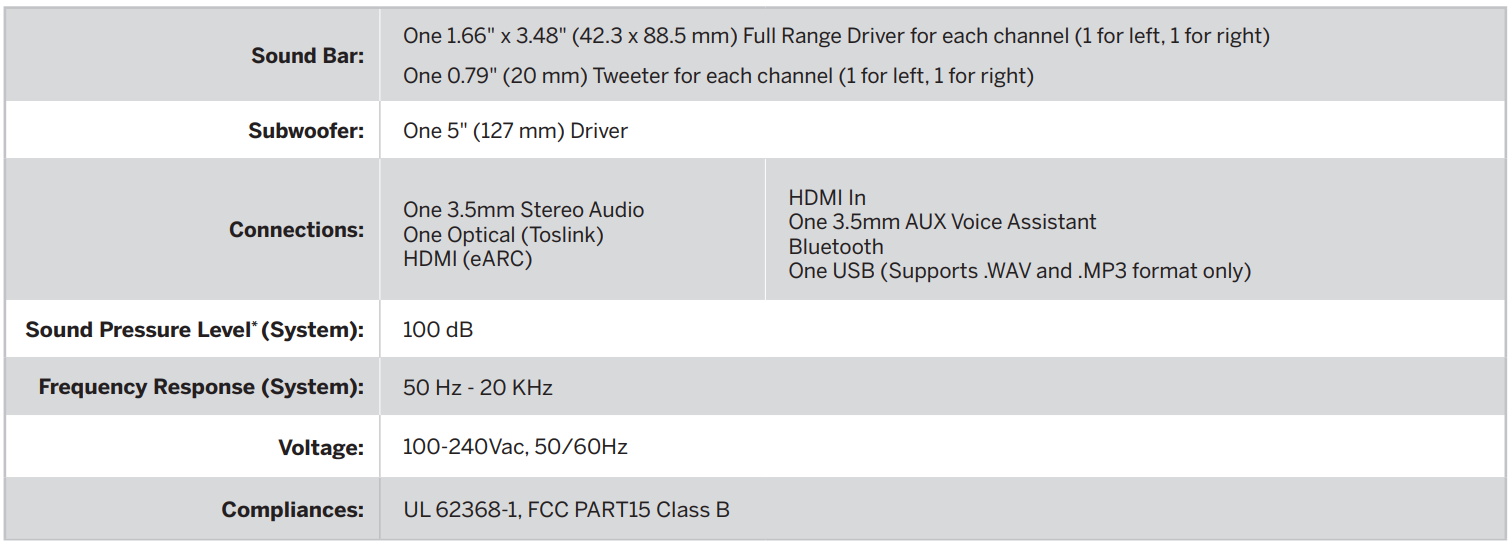
Specifications
For more Manuals by VIZIO, visit MANUALSDOCK
Faqs About VIZIO M-Series M215a-J6 Sound Bar
What is the VIZIO M-Series M215a-J6 Sound Bar?
The VIZIO M-Series M215a-J6 is a sound bar designed to enhance your TV audio experience. It’s part of VIZIO’s M-Series lineup, known for its balance between performance and affordability.
What are the key features of the VIZIO M-Series M215a-J6 Sound Bar?
This sound bar typically boasts features like Dolby Atmos and DTS support, allowing for immersive audio experiences. It might have multiple speakers and a wireless subwoofer for rich bass. Additionally, it may offer Bluetooth connectivity for wireless streaming from your devices.
What size TVs is the VIZIO M-Series M215a-J6 Sound Bar compatible with?
The compatibility might vary, but generally, it’s designed to complement TVs ranging from 40 inches to 75 inches or larger.
How is the installation process for the VIZIO M-Series M215a-J6 Sound Bar?
Typically, the installation is straightforward. It can usually be mounted on the wall or placed on a TV stand. Wireless connectivity simplifies setup, and it often comes with all the necessary cables and hardware.
Does the VIZIO M-Series M215a-J6 Sound Bar come with a remote control?
Yes, it often includes a remote control for convenient operation. Some models may also support control via a smartphone app for added convenience.
Can the VIZIO M-Series M215a-J6 Sound Bar be used for music playback?
Yes, it can often be used for music playback via Bluetooth or other compatible wireless connections from smartphones, tablets, or other devices.
Does the VIZIO M-Series M215a-J6 Sound Bar support voice assistants?
This feature might vary depending on the model and firmware updates. Some sound bars in the M-Series lineup may offer support for voice assistants like Amazon Alexa or Google Assistant.
What is the warranty period for the VIZIO M-Series M215a-J6 Sound Bar?
The warranty period typically depends on the region and retailer. It’s advisable to check with the retailer or VIZIO’s official website for warranty information specific to your purchase.
Can the VIZIO M-Series M215a-J6 Sound Bar be connected to other VIZIO SmartCast devices?
Yes, if it supports VIZIO’s SmartCast platform, it can often be integrated with other SmartCast-enabled devices for seamless multi-room audio or casting from compatible apps.
Does the VIZIO M-Series M215a-J6 Sound Bar support firmware updates?
Yes, firmware updates are essential for improving performance and adding new features. VIZIO typically provides firmware updates for its sound bars, and they can often be easily installed via an internet connection.

