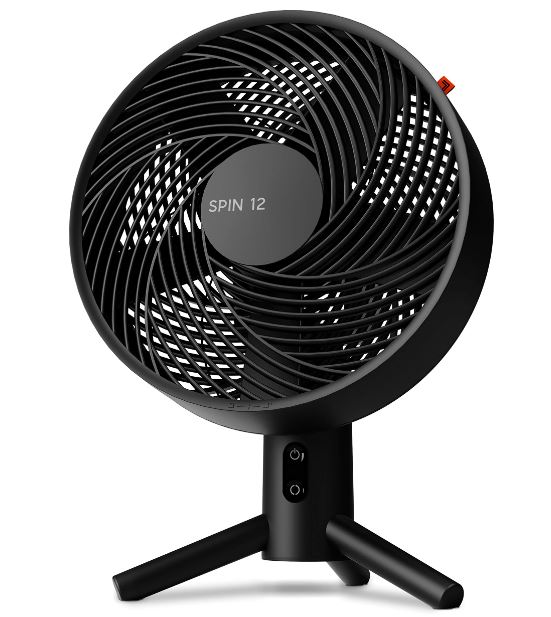
Sharper Image SPIN 12 Oscillating Desktop Fan

About Sharper Image
Sharper Image is a well-known American brand that specializes in selling a wide variety of innovative and high-tech products. The company was founded in 1977 by Richard Thalheimer with the goal of offering unique and cutting-edge consumer products that cater to various aspects of modern living. The brand gained popularity for its upscale, high-quality gadgets, electronics, and lifestyle products.
Throughout its history, Sharper Image has offered products ranging from electronic gadgets, personal care items, home appliances, audio and video equipment, massage chairs, air purifiers, and much more. Many of their products incorporate advanced technology and design, often focusing on improving convenience, entertainment, and well-being.
PRODUCT INFORMATION
Your product includes the following:
- Fan Body
- Side Legs (2)
- Back Leg (1) (not shown)
- 24 VDC 1.0A Power Supply/Cord
- Remote Control (Model SPIN 12 only)
ASSEMBLY
No tools are required.
You will need to assemble your SPIN fan. There are two unweighted legs and one weighted leg with your fan.
- Lay the SPIN on its side, facing forward. Install one unweighted leg on the front of the fan until it securely snaps into place.
- Install the second unweighted leg on the front of the fan until it securely snaps into place.
- Turn the fan over and install the weighted leg on the back side of the fan until it securely snaps into place.
- Connect the power supply to the product input and wall outlet.
Your SPIN is now assembled and ready for use!
HOW TO USE
POWER ON / OFF
- Press
 to power the unit on.
 - There are three speeds: LOW, MEDIUM, and HIGH.
- Press
 to select the desired speed or turn the unit OFF.
 - Press
 to turn Oscillation ON or OFF.
 - Press and hold
 for three seconds to turn the unit OFF.
REMOTE CONTROL
Model SPIN 12 only.
REMOTE FUNCTIONS
The remote requires a line-of-sight path to allow for the signal to be received by the circulator. Point the remote control at the control panel for best reception.
- Press
 to power the unit ON or OFF.
 - Press
 to turn Oscillation ON or OFF.
 - Press (+) to increase speed.
- Press (-) to decrease speed.
BATTERY REPLACEMENT
The remote control requires 2 AAA batteries (included but not installed). To install the batteries, remove the cover located on the underside of the remote control. If necessary, clean the battery contacts and also those of the device prior to battery installation.
Remove any plastic protection from the batteries. On the inside of the battery cover, there is a + and a – sign indicating which direction you should insert your batteries. Ensure the batteries are installed correctly with regard to polarity. Then replace the cover on the bottom of the remote.
For battery replacement, always use the correct size and grade of battery for this product.
Note: Remove batteries from the remote control when not in use for an extended period of time and always remove dead batteries immediately and replace them with fresh ones. Do not store dead batteries in the remote.
CLEANING
WARNING: To reduce the risk of electrical shock and injury to persons, unplug the circulator before removing the grille or blade.
GRILLE REMOVAL (Screwdriver required)
- Power off and unplug the unit.
- Remove 6 screws located at the 12, 2, 4, 6, 8, and 10 o’clock positions on the back of the fan head.
- Remove the front grille.
- Dust or wash Front Grille with mild dishwashing soap. Do not place the grille in the dishwasher. Excessive heat can distort the plastic.
BLADE REMOVAL
- Power off and unplug the unit.
- Rotate the blade nut clockwise until free.
- Pull the blade straight out from the shaft.
- Wipe the Blade with a damp cloth. If your fan is used in a greasy environment, such as a kitchen, mild soap or a common household cleaner may be necessary. Do not use solvents. Do not place the blade in the dishwasher. Excessive heat can distort the plastic.
To reattach the blade and front grille, follow the reverse of the instructions above.
Note: The motor is permanently lubricated and requires no oiling.
STORAGE
During the off-season or after extended periods of non-use, you may choose to store your fan. To ensure the long life of the product, it is recommended to store your fan by following these instructions:
- Unplug the power cord and bundle it loosely.
- Cover, or place back in retail carton if available. This prevents the fan from accumulating dust over time.
- Store the fan in a cool and dry location.
TROUBLESHOOTING
WARRANTY
If you’re not satisfied with this product, let us know.
Vornado Air, LLC warrants to the original consumer or purchaser that this Sharper Image® Fan (“Product”) is free from defects in material or workmanship for a period of two (2) years from the date of purchase. If any such defect is discovered within the warranty period, Vornado, at its discretion, will repair or replace the Product at no cost.
For warranty or repair service: Call 833-800-8669 or email help@sihomecomfort.com to obtain a Return Authorization (“RA”) form. Please have or include your Product’s model number and serial number, as well as your name, address, city, state, zip code, and phone number when contacting Vornado for warranty service.
After receiving the RA form, ship your Product to Vornado Air LLC Attn: Warranty & Repair 415 East 13th Street Andover, KS 67002. For your convenience, please have your model number and serial number when contacting Vornado with service inquiries.
To assure proper handling, packages must be clearly marked with the RA number. Packages not clearly marked with the RA number may be refused at the receiving dock. Please allow 1-2 weeks for repair and return of your Product after the Product is received.
Repairs not covered by the warranty or outside the warranty period will require a fee to cover the cost of materials, labor, handling, and shipping.
This warranty does not apply to defects resulting from abuse of the Product, modification, alteration, mishandling, improper maintenance, commercial use, or repair or service of the Product by anyone other than Vornado; damages which occur in shipment or are attributed to acts of God. Improper product use, which includes using an external device that alters or converts the voltage or frequency of electricity, or shipping a Vornado product to a country not intended for use will void all warranties.
Any unauthorized product modification, repair by an unauthorized repair center, or use of non-approved replacement parts is not recommended and any consequences will not be covered by support services or product warranties. The product warranty will be honored only on models that are being used in the country intended. REPAIR OR REPLACEMENT AS PROVIDED UNDER THIS WARRANTY IS THE EXCLUSIVE REMEDY OF THE CONSUMER. VORNADO SHALL NOT BE LIABLE FOR ANY INCIDENTAL OR CONSEQUENTIAL DAMAGES FOR BREACH OF ANY EXPRESS OR IMPLIED WARRANTY ON THIS PRODUCT. EXCEPT TO THE EXTENT PROHIBITED BY APPLICABLE LAW, ANY IMPLIED WARRANTY OF MERCHANTABILITY OR FITNESS FOR A PARTICULAR PURPOSE ON THIS PRODUCT IS LIMITED IN DURATION TO THE DURATION OF THIS WARRANTY.
Some states do not allow the exclusion or limitation of incidental or consequential damages, or allow limitations on how long an implied warranty lasts, so the above limitations or exclusions may not apply to you. This warranty gives you specific legal rights, and you may have other rights that vary from state to state. The manufacturer assumes no responsibility for damage caused by failure to follow these instructions or improper product use. Any such actions will invalidate the product warranty.
All company names and product names are trademarks of their respective owners. © All rights reserved. All technical information, data, and instructions for the installation, connection, and operation contained in these instructions for use correspond to the latest available information at the time of printing. The contents of this manual may differ slightly from the actual product. Observe any additional supplements.
©2021 Vornado Air LLC, Andover, Kansas 67002 USA.
Specifications are subject to change without notice.
Sharper Image® name and logo are registered trademarks.
Manufactured, marketed, and distributed under license by Vornado Air LLC, Andover, Kansas 67002.
Manufactured in China.
U.S. Patents Pending.
Sharper Image® Distributed under license by Vornado Air LLC, Andover, Kansas 67002.
FAQS About Sharper Image SPIN 12 Oscillating Desktop Fan
An oscillating fan rotates in what way?
A signal (voltage) is transferred to the fan’s motor at the top when a button is pressed. The four bar mechanism creates the oscillation motion.
What’s the maximum oscillation a fan can reach?
The majority of oscillating fans in use today run at a fixed angle between roughly 90 degrees.
Is oscillation necessary for a fan?
The best oscillating fans also move up and down. Oscillation causes fans to move in both directions.
How can an oscillating fan be stopped?
The fan can run in static or oscillating mode: Push the Oscillation Knob, which is on the back of the head assembly, to oscillate the fan head. Pull up the oscillation knob to stop the fan head from oscillating.
Why isn’t my fan turning?
Most problems with an electric fan—whether the blades aren’t spinning or the fan is loud—are brought on by inadequate lubrication or obstructions in the vents.
Which setting is ideal for an oscillating fan?
The National Renewable Energy Laboratory suggests placing fans such that the breeze blows directly into the room’s occupants.
An oscillating fan may be left on all night.
According to consumer safety organization Electrical Safety First, leaving your fan on at night could put you in danger if a malfunction develops while you’re sleeping.
Why isn’t the fan on my computer working?
Verify the fan’s connection to the motherboard’s power line. The fan for the processor might not be installed properly. Attempt connecting the fan heatsink cable to a different motherboard header. Remove the dust.
What makes it an oscillating fan?
You’ll appreciate having a fan that can oscillate, or move back and forth steadily, on a hot day. Since the Latin term oscillum, which means “swing,” is the origin of the verb oscillate, it seems logical that oscillate is used to describe an object that swings from side to side, such as a fan or a pendulum.
For more manuals by Sharper Image, Visit Manualsdock
[embeddoc url=”https://manualsdock.com/wp-content/uploads/2023/08/Sharper-Image-SPIN-12-Oscillating-Desktop-Fan-User-Guide.pdf” download=”all”]


