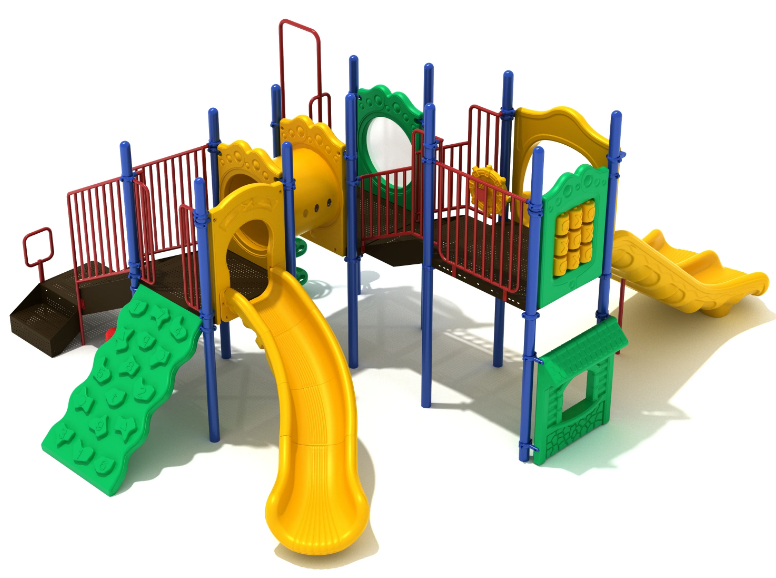
Rose Creek Large Playground System
About Rose Creek
Rose Creek Anglers, Inc. is a crafty manufacturer of fishing supplies that cares about the environment. Our modest beginnings may be traced back to Rich Femling, our founder, who developed a keen interest in aquatic ecosystems at an early age. This love of fishing developed from this interest. We provide a portion of every sale to conservation organizations because we have never forgotten our beginnings.
As a socially conscious business, we’re dedicated to using methods that protect ecosystems and preserve American jobs. Our procedures require less energy and are designed to last a long time, reducing the amount of garbage that ends up in our landfills and oceans.
Post Installation
STEP: 1
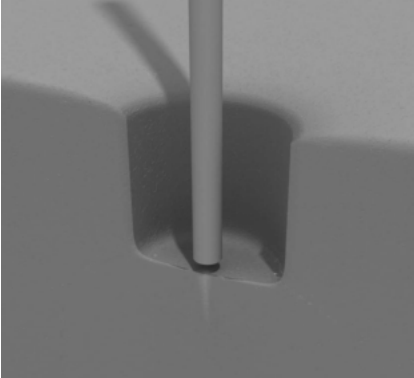
- Refer to the General Installation guide footing information and dig proper holes for the support posts.
Square Deck Installation
STEP: 1
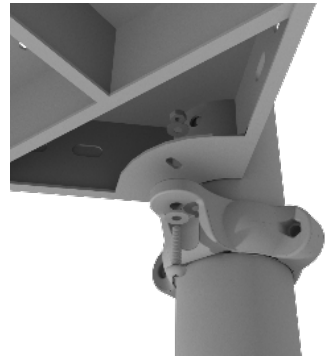
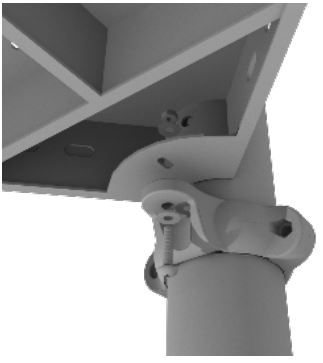
- After the posts are in place, using four (4) M10*35 bolts, eight (8) M10 washers, and four (4) M10 lock nuts, attach each square deck to each preattached deck clamp as shown in the image.
Rectangle Deck Installation
STEP: 1
- After the posts are in place, using four (4) M10*35 bolts, eight (8) M10 washers, and four (4) M10 lock nuts, attach the rectangle deck to each pre-attached deck clamp as shown in the image.
3.5-inch Clamp Installation Guide
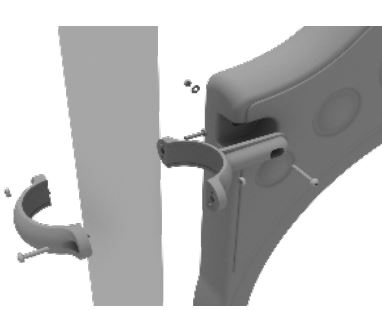
3.5-inch Flat Clamp
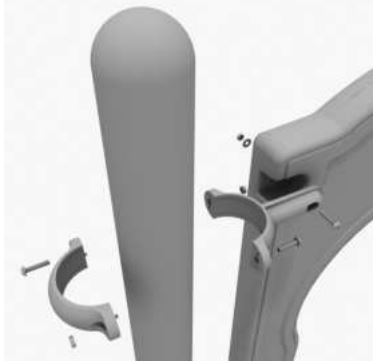
- Connect half of the flat clamp to the component using one (1) M8*40 bolt. Then, using the other half of the flat clamp and the hardware provided in the clamp hardware bag, attach the other half of the tube clamp around the post.
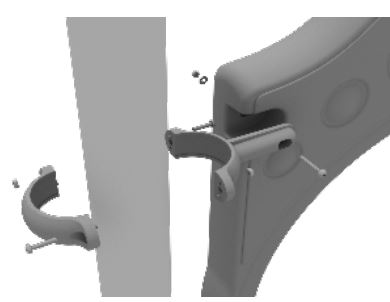
3.5-inch Tube Clamp
- Connect half of the clamp to the component using one (1) M8*30 bolt. Then, using the other half of the tube clamp and the hardware provided in the clamp hardware bag, attach the other half of the tube clamp around the post.
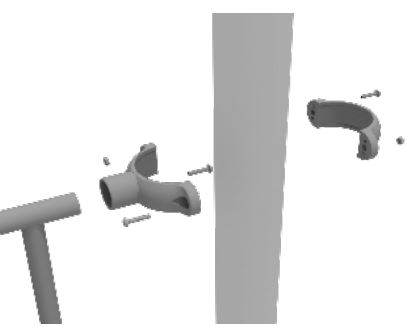
3.5-inch 90-degree Flat Clamp
- Connect half of the flat clamp to one panel using one (1) M8*40 bolt. Then, using the other half of the flat clamp and the hardware provided in the clamp hardware bag, attach the other half of the tube clamp around the post. Then, attach the next panel to the other side of the clamp using the same process.
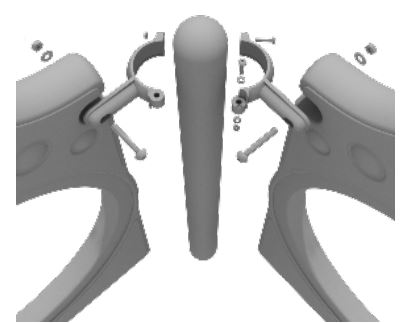
3.5-inch Double Slide Clamp
- Connect half of the double slide clamp to the double slide hood using one (1) M8*30 bolt. Then, using the other half of the clamp and the hardware provided in the clamp hardware bag, attach the other half of the tube clamp around the post.
48” Transfer Station (3.5” post) Installation
STEP: 1
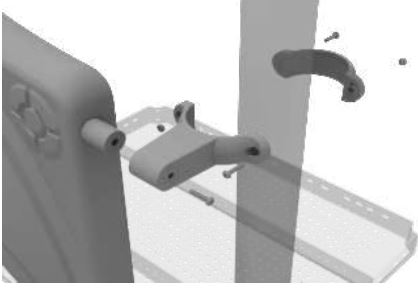
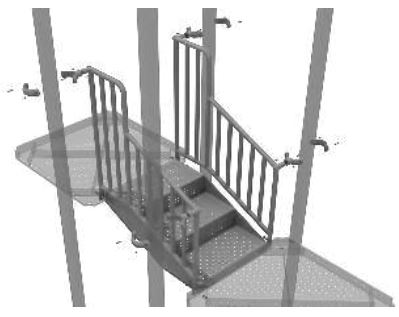
- Connect the 4-foot Transfer Handrails to the designated posts using four (4) tube clamps, and four (4) M8*30 bolts. Using three (3) M10*25 bolts, six (6) M10 washers, and three (3) M10 lock nuts, attach the top of the stairs to the deck. See the general installation guide regarding footing information for the handrail and set them into the ground.
STEP: 2
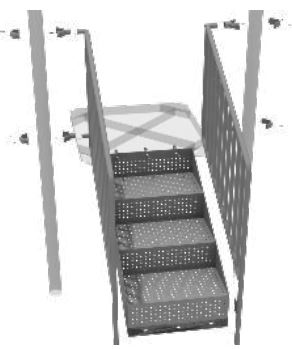
- Using three (3) M10*25 bolts, six (6) M10 washers, and three (3) M10 lock nuts, attach the top of the stairs to the deck. Then using four (4) M10*30 bolts, eight (8) M10 washers, and four (4) M10 lock nuts, attach the handrail to the bottom of the stairs.
4-foot Transfer Station Installation
STEP: 3
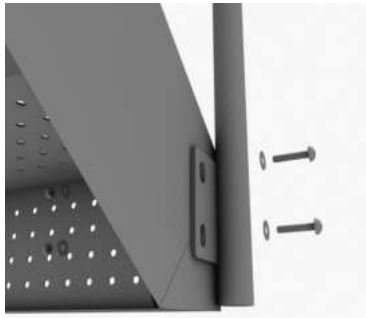
- Using three (3) M10*25 bolts, six (6) M10 washers, and three (3) M10 lock nuts, attach the ADA transfer deck to the base of the 4-foot ADA transfer stair.
STEP: 4
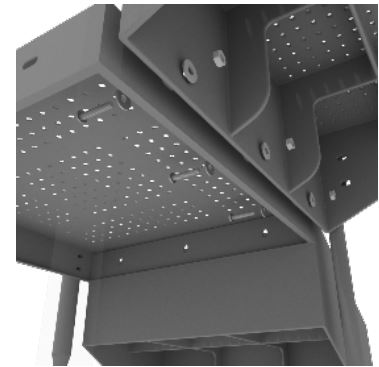
- See the general installation guide regarding footing information for the transfer deck handrail & mount. Using two (2) M10*65 bolts, four (4) M10 washers, and two (2) M10 lock nuts, attach the transfer handrail to the ADA transfer deck.
STEP: 5
- Using two (2) M10*25 bolts, four (4) M10 washers, and two (2) lock nuts, attach the transfer deck mount to the ADA transfer deck.
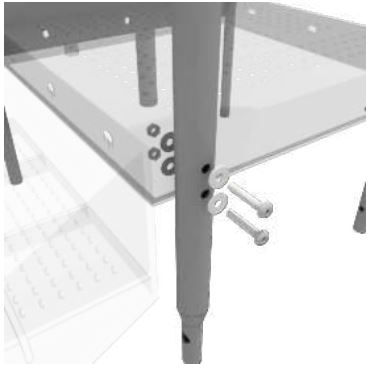
STEP: 6
- See the general installation guide regarding footing information for the ADA transfer step mount. Using four (4) M10 bolts, eight (8) M10 washers, and four (4) M10 lock nuts, attach the transfer step to the ADA transfer step mount.
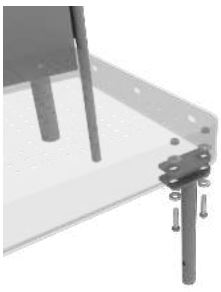
STEP: 7
- Using three (3) M10*25 bolts, six (6) M10 washers, and three (3) M10 washers, attach the top of the ADA transfer step to the ADA transfer deck.
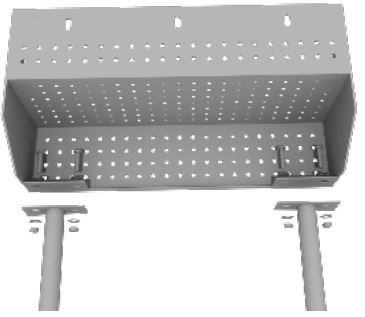
12-inch Middle Stair Installation
STEP: 1
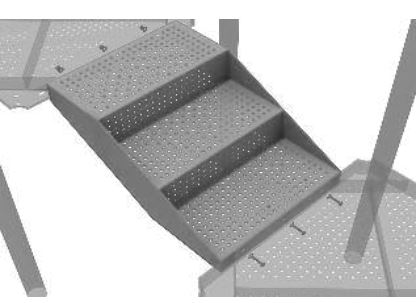
- Using eight (6) M10*25 bolts, twelve (12) M10 washers, and six (6) M10 lock nuts, attach the 12-inch middle stair to the assigned decks.
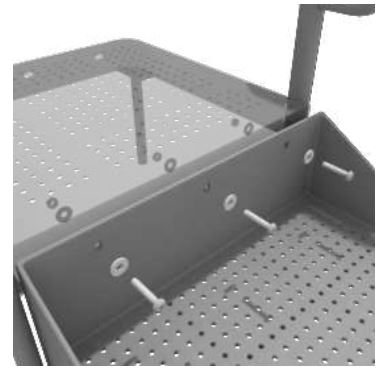
STEP: 2
- Then, once the stair is in place, attach the 12-inch connection handrail to the posts using four (4) 3.5-inch tube clamps, and four (4) M8*30 bolts. Then, attach the bottom of the handrails to the decks using one (1) M10*25 bolt, two (2) M10 washers, and one (1) M10 lock nut for each attachment point.
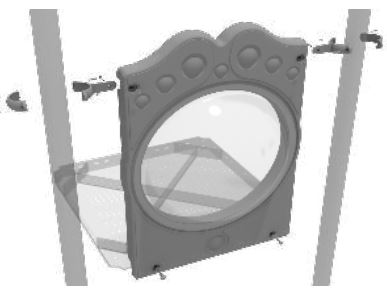
3.5-inch Bubble Panel Installation
STEP: 1
- Connect the bottom of the panel to the deck using two (2) M10*50 bolts, four (4) M10 washers, and two (2) M10 lock nuts. Then attach the top of the panel to the posts using two (2) flat clamps.
3.5-inch Store Panel Installation
STEP: 1
- Attach the Store Panel to the designated posts using four (4) 3.5- inch flat clamps, and four (4) M8*25 bolts.
3.5-inch Tube Bridge Installation
STEP: 1
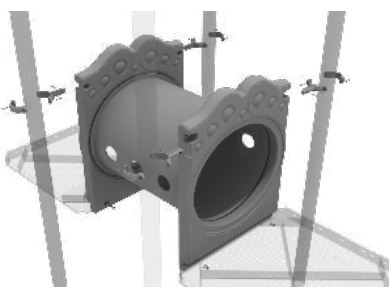
- Attach each side of the tube bridge to the proper deck using two (2) M10*50 bolts, four (4) M10 washers, and two (2) M10 lock nuts. Then, attach the top of the tube bridge to the posts using one (1) tube clamp, one (1) M8*40 one (1) M8 washer, and one (1) M8 lock nut bolt for each post attachment point.
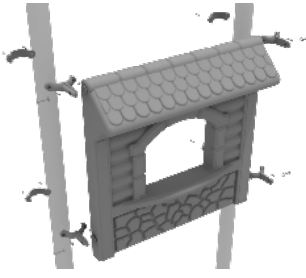
3.5-inch Tic Tac Toe Panel Installation
STEP: 1
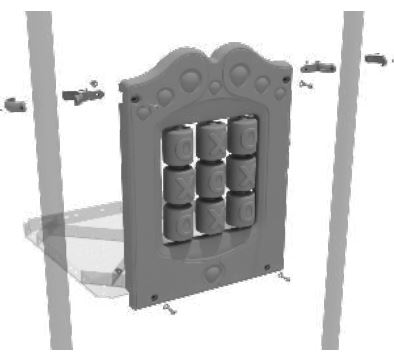
- Connect the bottom of the panel to the deck using two (2) M10*50 bolts, four (4) M10 washers, and two (2) M10 lock nuts. Then attach the top of the panel to the posts using two (2) flat clamps.
4.5-inch Metal Barrier w/ Wheel Installation
STEP: 1
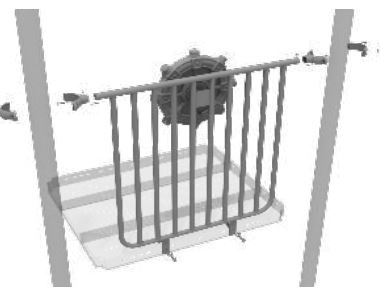
- Attach the metal barrier to the designated posts using two (2) tube clamps and two (2) M8*30 bolts. Then, attach the bottom of the metal barrier to the deck using two (2) M10*25 bolts, four (4) M10 washers, and two (2) M10 lock nuts.
4-foot Right Turn Slide Installation
STEP: 1
- Take one (1) 3.5-inch flat clamp, and loosely attach it around a post using the bolts and nuts provided in the clamp hardware bag. Repeat this process on the other post. Then, use one (1) M8*40 bolt, one (1) M8 washer, and one (1) M8 lock nut to attach each side of the slide hood to each clamp. Leave bolts loose until the slide is in place.
STEP: 2
- See the general installation guide regarding footing information for the slide end mount. Using two (2) M8*20, and two (M8) spring washers. And two (2) M8 washers, attach the slide to the slide support post.
STEP: 3
- See the general installation guide regarding footing information for the middle slide support. Using two (2) M8*20 bolts, two (2) M8 spring washers, and two (2) M8 washers, attach the middle slide support post.
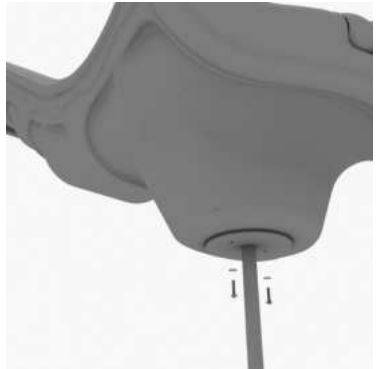
STEP: 4
- Using one (1) M10*45 bolt, two (2) M10 washers, and two (2) M10 lock nuts, attach one side of the slide to the deck.
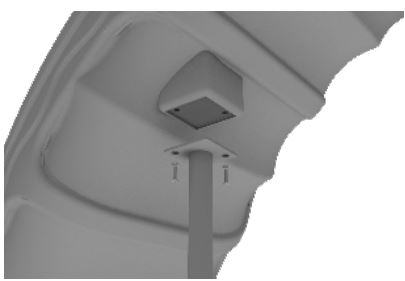
STEP: 5
- Using one (1) M8*45 bolt, one (1) M8 washer, one (1) M12 washer, and one (1) M12 inner hex spiral nut, attach the slide to one side of the slide hood. Repeat this process for the other side of the slide.
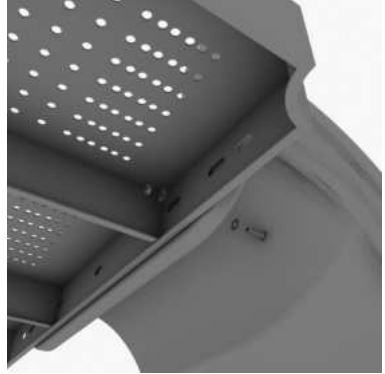
5-foot Double Straight Slide Installation
- Youide, you will first need to attach the double slide deck e for the double slidextension. This will require four (4) M10*25 bolts, eight (8) M10 washers, and four (4) M10 lock nuts.
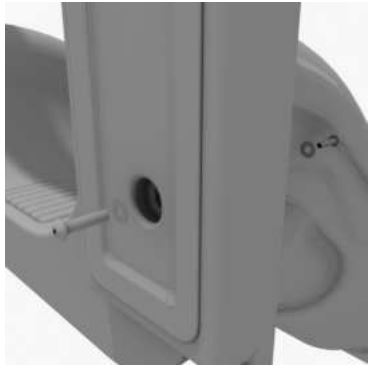
STEP: 2
- Then, See the general installation guide regarding footing information for the double slide end mounts. Using two (2) M8*20 bolts, two (2) M8 spring gaskets, and two (2) M8 washers, attach the slide end mounts to the double slide.
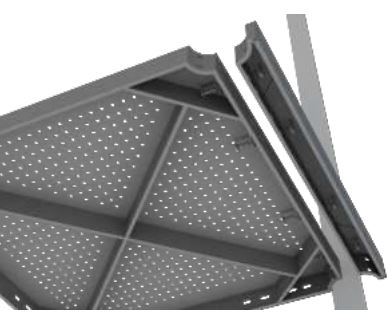
STEP: 3
- Then, See the general installation guide regarding footing information for the double-slide middle support. Attach the middle support to the slide using two (2) M8*20 bolts, two (2) M8 spring washers, and two M8 washers.
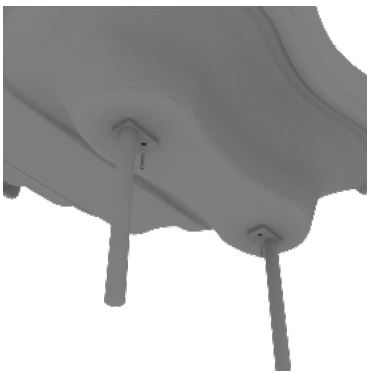
STEP: 4
- Then, attach the slide to the deck extension using four (4) M10*45 bolts, eight (8) M10 washers, and four (4) M10 lock nuts.
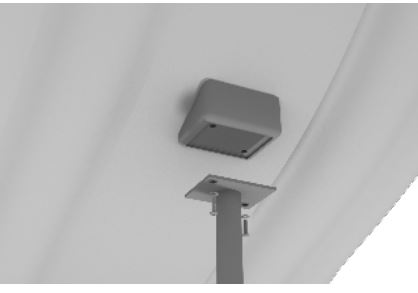
STEP: 5
- Once the slide is attached, take the double slide hood and insert it into the top of the slide, and then attach the top using two (2) double slide clamps, and two (2) M8*30 bolts.
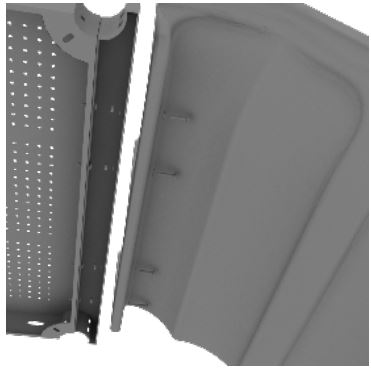
D-Rail Installation
STEP: 1
- Take two (2) 3.5-inch tube clamps and connect half of the clamps to both ends of the D-Rail using one (1) M8*30 bolt. Then, using the other half of the tube clamp and the hardware provided in the clamp hardware bag, attach the other half of the tube clamp around the post to the D-Rail. Repeat this process for the other D-Rail.
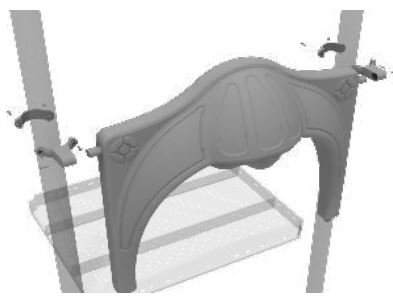
Figure Climber Installation
STEP: 1
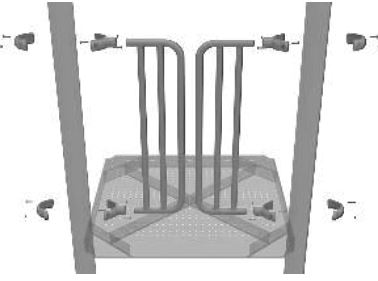
- See the general installation guide regarding footing information for the figure climber. Using two (2) M10*20 bolts, two (2) M10 spring gaskets, and two (2) M10 washers, attach the bottom of the figure climber to the climber end mounts.
STEP: 2
- Using four (4) M10*20 bolts, four (4) M10 spring gaskets, and four (4) M10 washers, attach the figure climber to the square deck.
Pod Climber Installation
STEP: 1
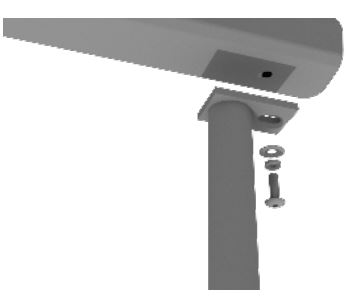
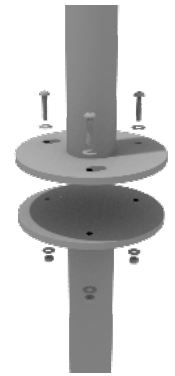
- See the general installation guide regarding footing information for the pod climber. Attach the circle end mount to the bottom of the climber using the pre-attached hardware. Each attachment uses three (3) M10*20 bolts, three (3) M10 spring gaskets, and one (3) M10 large gaskets.
STEP: 2
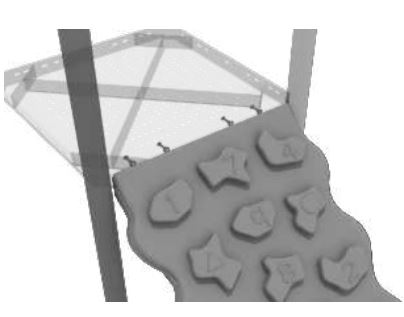
- Using three (3) M10*25 bolts, six (6) M10 washers, and three (3) M10 lock nuts, attach the pod climber to the deck.
Single Drum Installation
STEP: 1
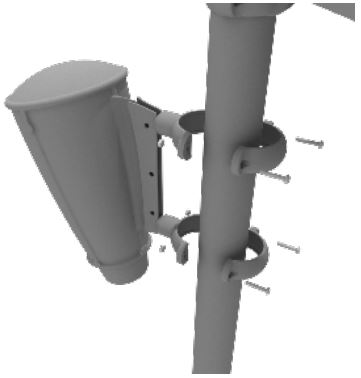
- Detach half of the tube clamps connected to the Single Drum, and re-attach the clamps around the support post, as shown in the image. Recommended install height is 20 to 36 inches above surfacing depending on age range.
1 Playground Drive Created By: Aaron Price Greenfield, IN 46140 Date: 04/18/2018\ 1-800-667-0097
FAQs About Rose Creek Large Playground System
For more Manuals by Rose Creek, Visit Manualsdock

