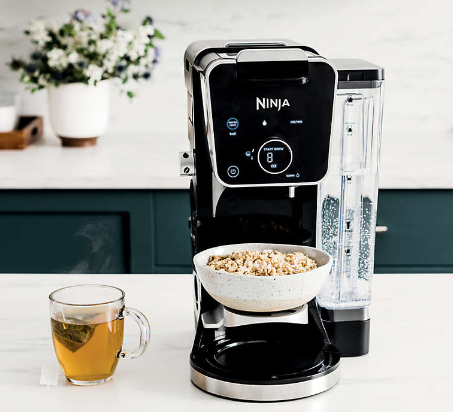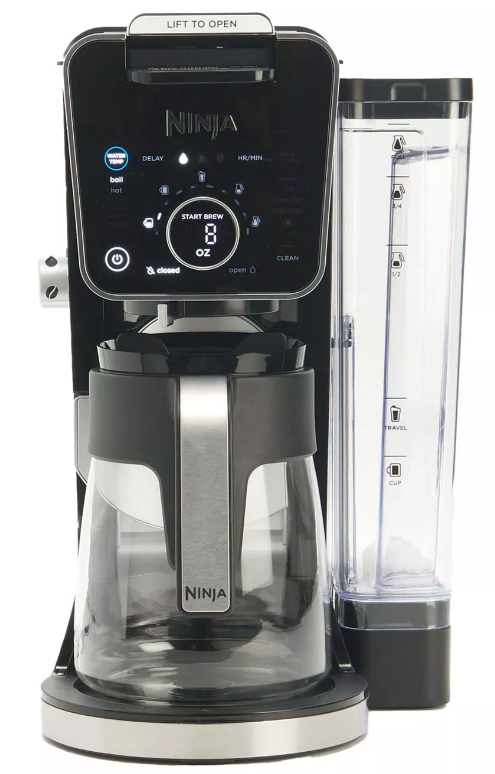
Ninja DualBrew Pro Coffee Maker
BEFORE YOUR FIRST BREW
To prime your brewer
- Plug it into an outlet and turn it on.
- Fill the water reservoir to the Full line with fresh water and place it on the base.
- Remove the Ninja Pod Adapter and slide the sliding Lid into the closed position.
- Place the empty carafe under the brew basket and run a Full Carafe, Classic brew.
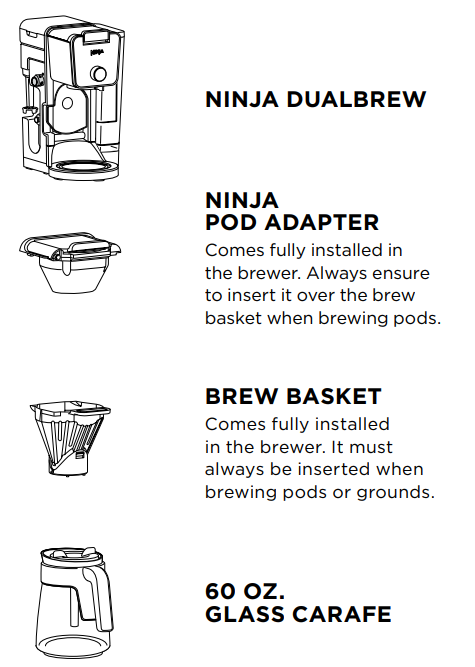
WHAT’S IN THE BOX
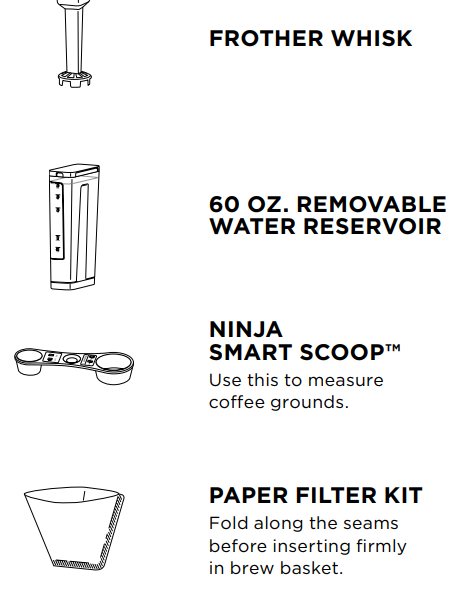
FILLING THE WATER RESERVOIR
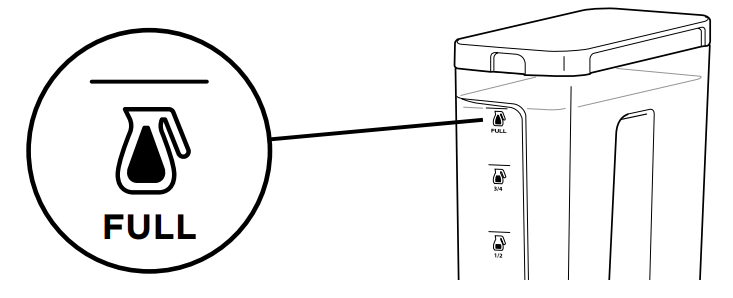
Fill up to, but do not exceed the Full line.
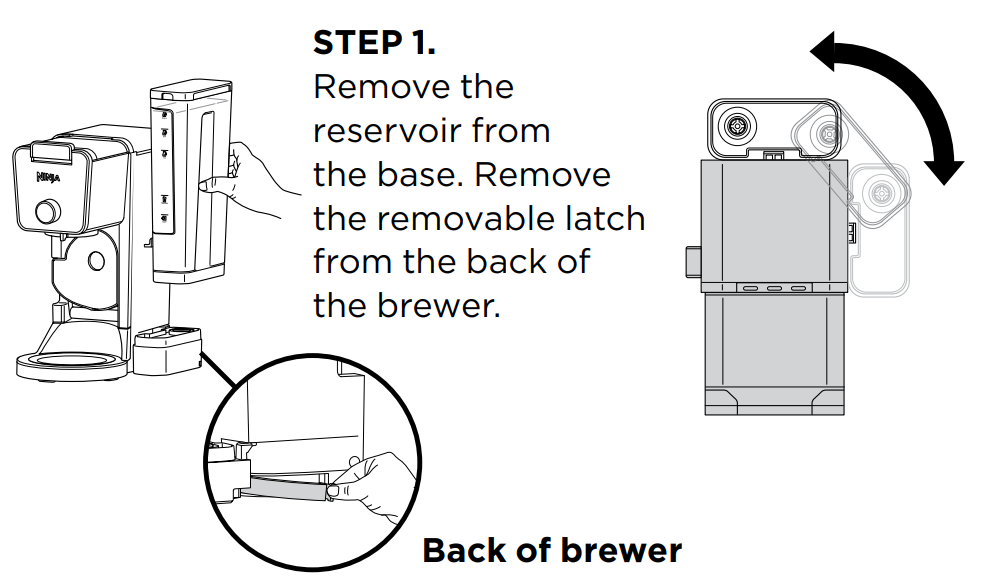
POSITIONING THE WATER RESERVOIR
The water reservoir can be positioned to the right or along the back of the brewer to optimize counter space.

CUP, MUG, OR CARAFE
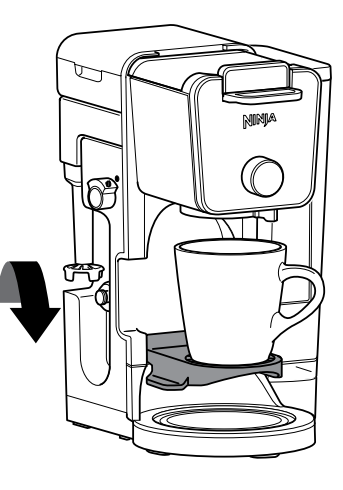
CUP
Pull down the cup platform to set a mug on it.
TRAVEL MUG & XL SIZES
Place an XL Cup, Travel Mug, or XL Tumbler on the base of the brewer.

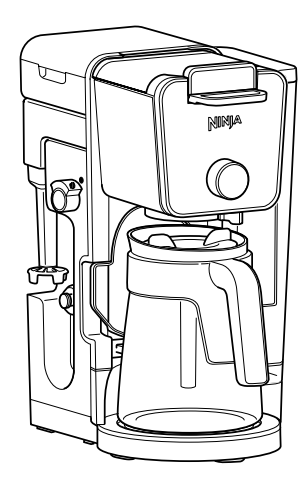
CARAFE
Place the carafe on the Intelligent Warming Plate. The Intelligent Warming Plate will turn on only if brewing a carafe size on Classic or Rich brew
WANT YOUR COFFEE TO STAY HOT LONGER?
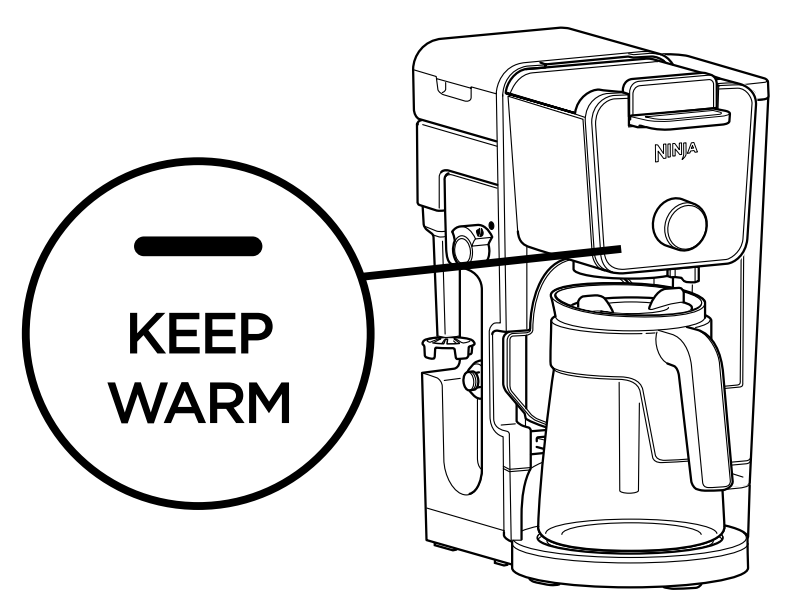
The Intelligent Warming Plate will automatically turn on while brewing a Classic or Rich brew on any Carafe size and remain on for 2 hours. To adjust how long the Intelligent Warming Plate remains on (up to 4 hours), refer to the Owner’s Guide. When the Intelligent Warming Plate is on, it can be turned off manually by pressing KEEP WARM. It can be turned on manually by pressing KEEP WARM while a Classic or Rich brew and any Carafe size is selected.
BREW BASKET AND NINJA POD ADAPTER ASSEMBLY
GROUNDS
BREW BASKET
Must always be inserted when brewing pods or grounds.
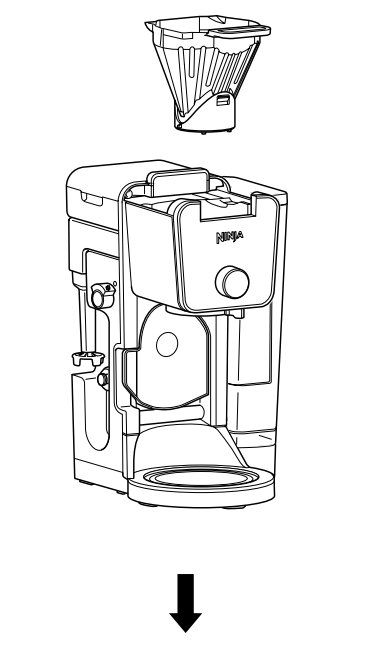
INSERT FILTER
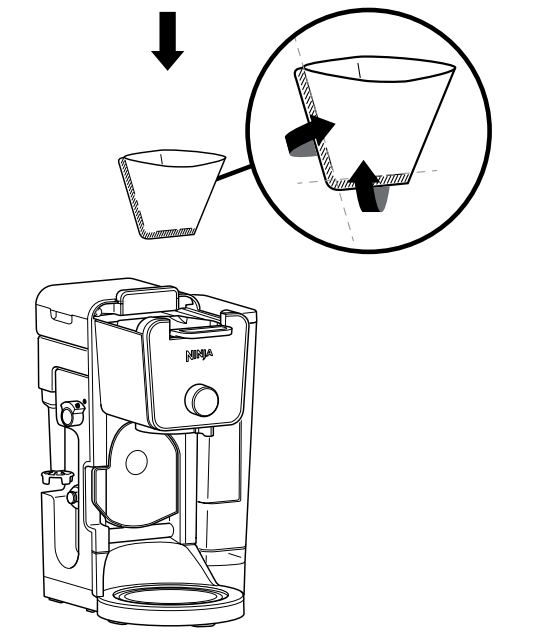
Fold the #4 paper cone filter along the seams, open the top fully, then insert the filter firmly into the brew basket.
PODS
BREW BASKET
Must always be inserted when brewing pods or grounds. Do not insert a filter.

NINJA POD ADAPTER
Ensure the adapter is in the REMOVE position before installing. Always insert it over the brew basket when brewing pods.

LOCKING AND REMOVING THE NINJA POD ADAPTER
The Ninja DualBrew Pro Coffee System comes with a unique Ninja Pod Adapter already installed on the brewer. Always ensure the adapter is installed over the brew basket.

- Once the adapter is installed in the brewer, make sure the position indicator on the left side of the adapter is aligned with LOCK by pulling the handle toward you. Then, lift to open the handle, insert a pod, firmly push down on the handle to pierce the pod, and begin programming your brew.
- To uninstall the adapter, remove the used pod and close the handle. Push the handle away from you so the position indicator is in the REMOVE position. Then, using the edges on the left and right, lift the adapter out of the brewer.
SLIDING LID
The sliding lid is used only when brewing loose coffee grounds. To use it, first remove the Ninja Pod Adapter. Then, using the handle on top of the brewer, slide the lid toward you until it firmly clicks into place.

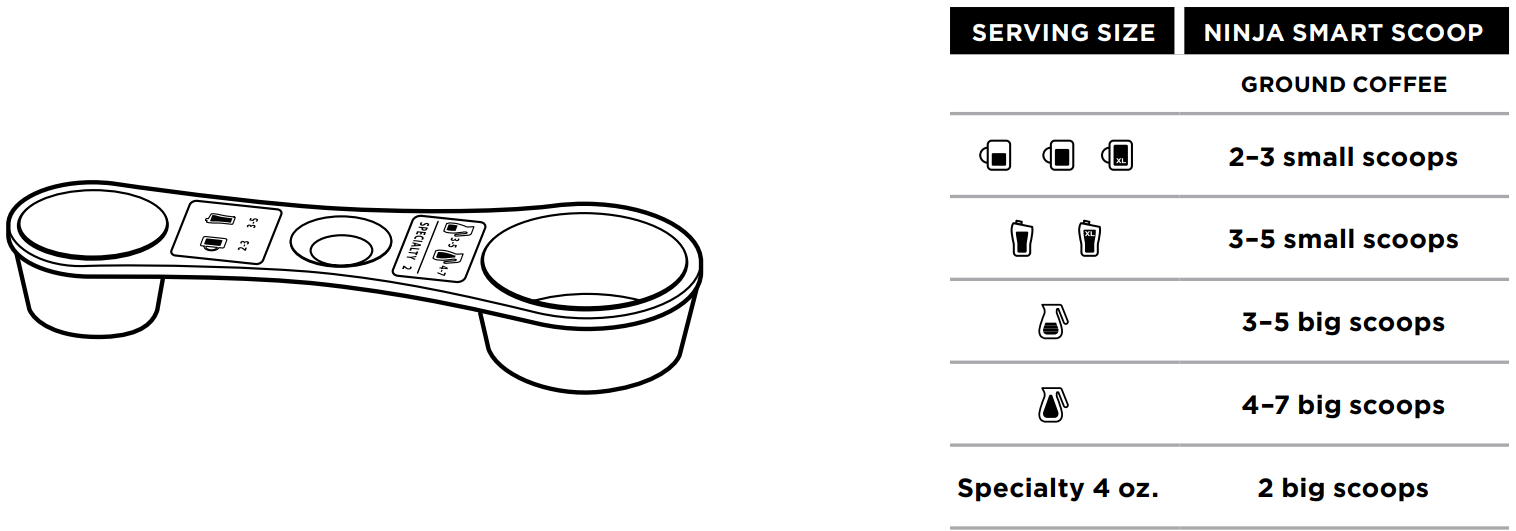
NINJA SMART SCOOP™
The Ninja Smart Scoop is used for accurately measuring coffee grounds. The numbers beside the icons show the number of level scoops recommended for each brew size.
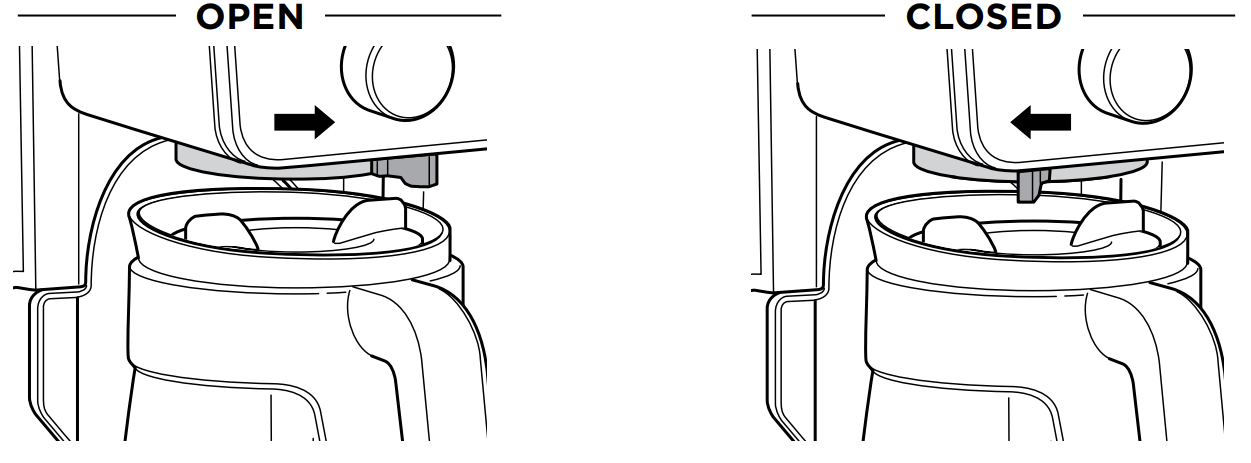
DRIP STOP
The drip stop is used to close off the brew basket to prevent any coffee from dispensing. You will need to manually open and close the drip stop by moving the handle to your desired position. The drip stop can be closed and reopened at any point before, during, or after a brew
FROTHING


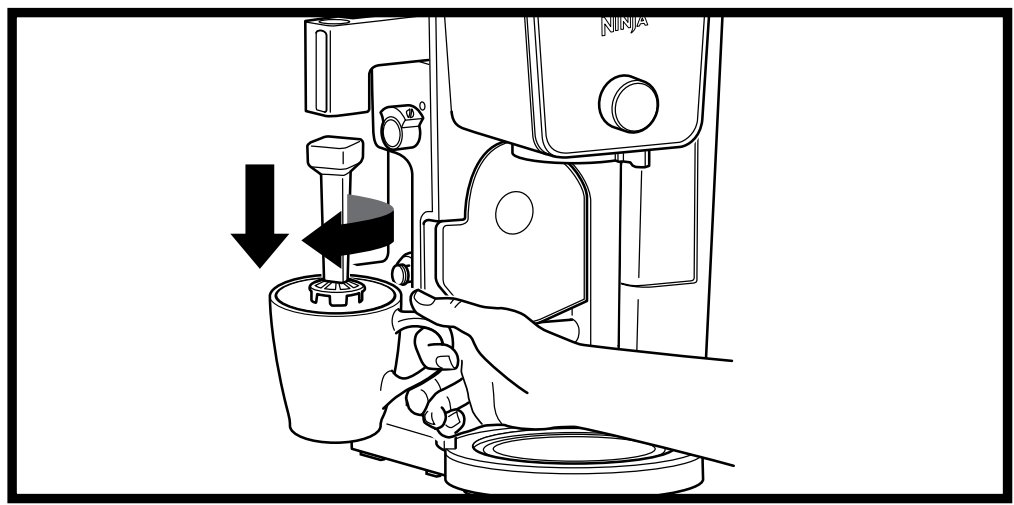
THE INTEGRATED FROTHER DOES NOT HEAT MILK
- Add milk to your cup until it is about 1⁄3 full.
- Swing the arm of the frother toward the front of the brewer. Install the frother whisk by twisting it to the right.
- Hold the cup under the frother and submerge the whisk just below the surface of the milk. Press and hold the button on top of the frother and froth for 30–45 seconds.
- Remove the frother whisk by twisting it to the left. Keep your cup below the whisk while you carry it to your sink or dishwasher for easy cleaning.
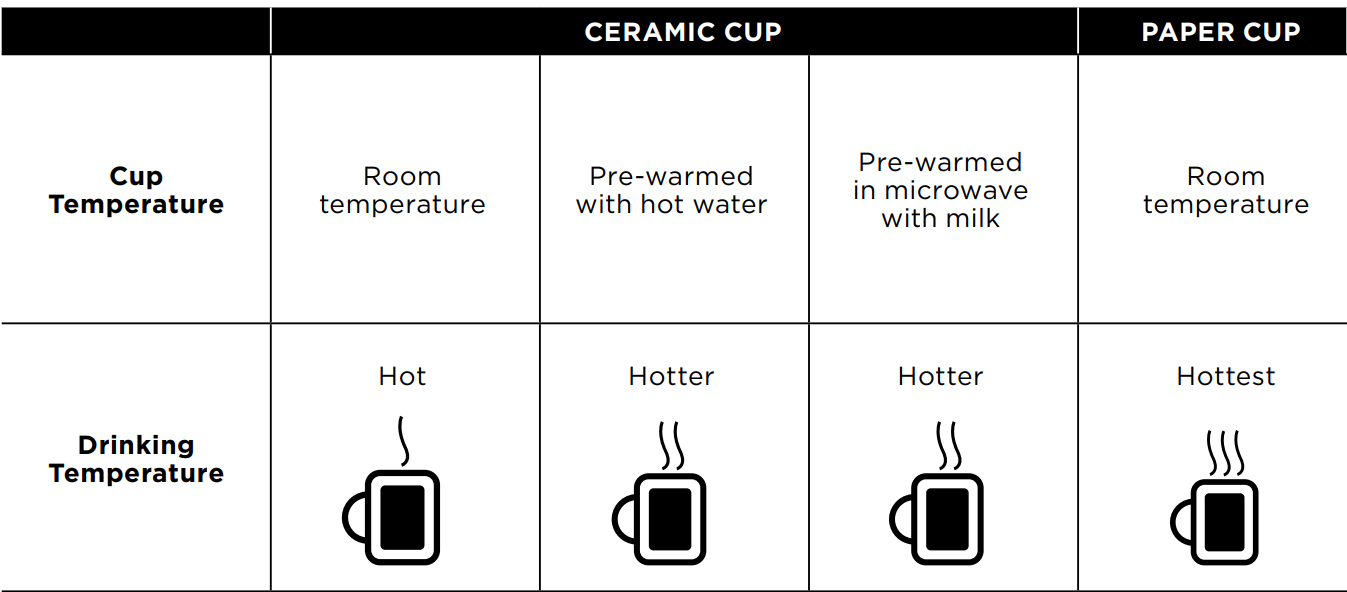
GUIDE TO KEEPING COFFEE HOT
The type of cup you brew into can greatly influence the drinking temperature of your coffee. For a hotter cup, use the hot water mode on BOIL to conveniently pre-warm the cup.

For more Manuals by NINJA, visit MANUALSDOCK

