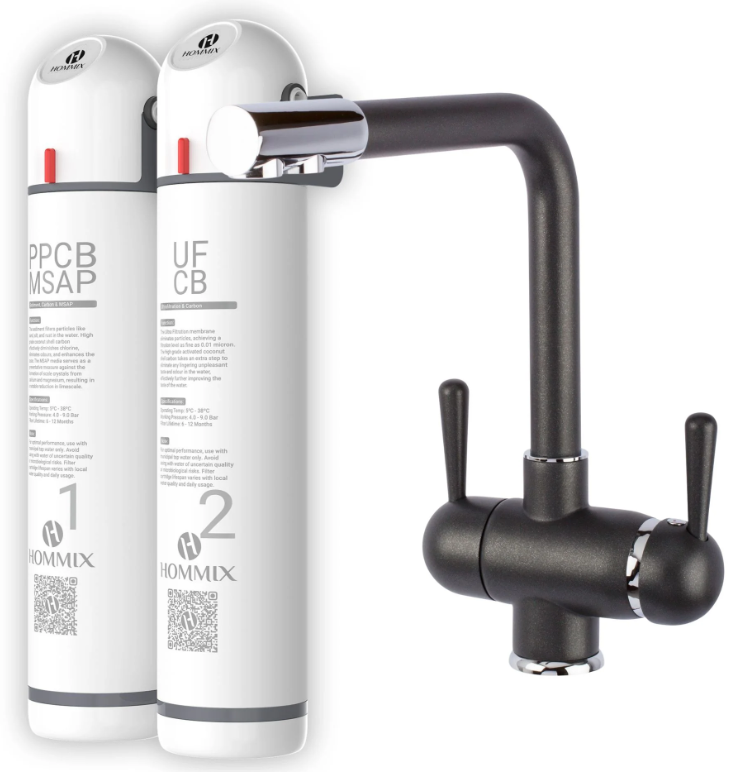
Hommix Ultra-UF Softening Drinking Water Filter
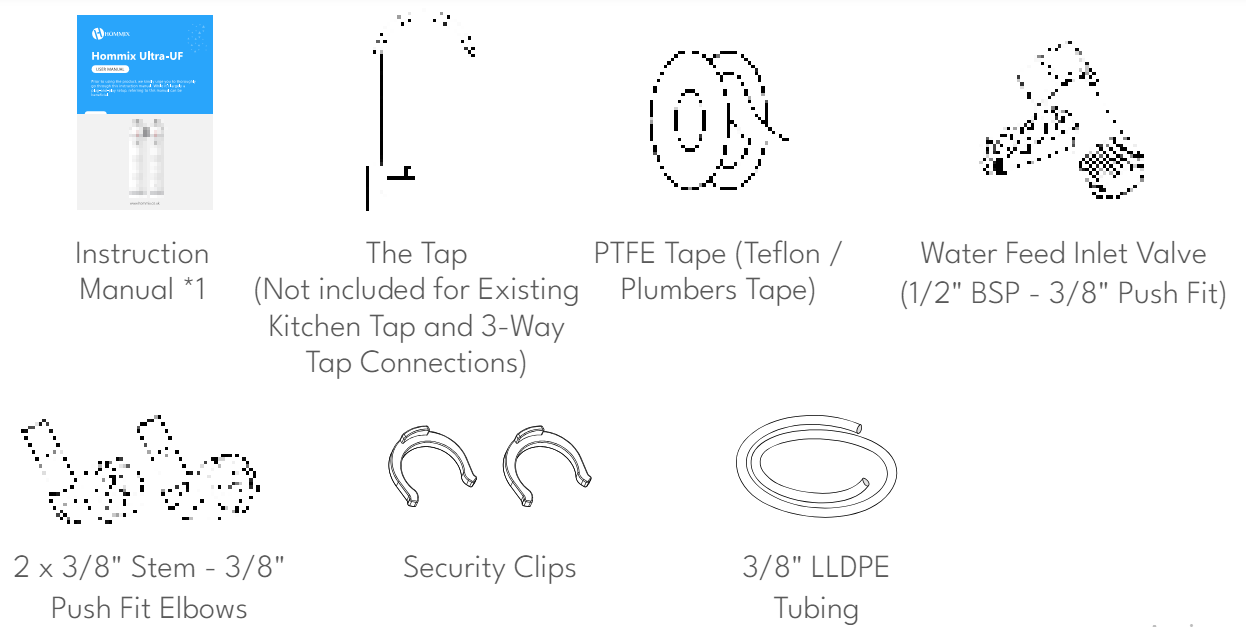
PARTS AND ACCESSORIES
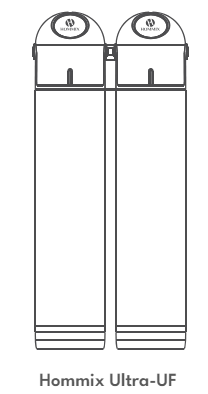
PRODUCT INFORMATION
- We are introducing the Hommix Ultra-UF Two-Stage Water Filtration System, a breakthrough in water purification. This advanced system combines four state-of-the-art filtration technologies to deliver pristine, soft, and revitalizing water.
- In the initial stage, the system utilizes sediment and activated carbon filtration to remove large particles, odors, flavors, and common contaminants. The second stage introduces Mineralised Softening with MSAP Media (Mineralised Softening and Alkaline Purification), enriching your water with essential minerals while reducing hardness and revitalizing the drinking experience.
- The Hommix Ultra-UF ensures comprehensive filtration, superior taste, and minimal maintenance, providing your family with the purest, softest, and most delightful water. Upgrade your water quality and elevate your life. with the Hommix Ultra-UF.
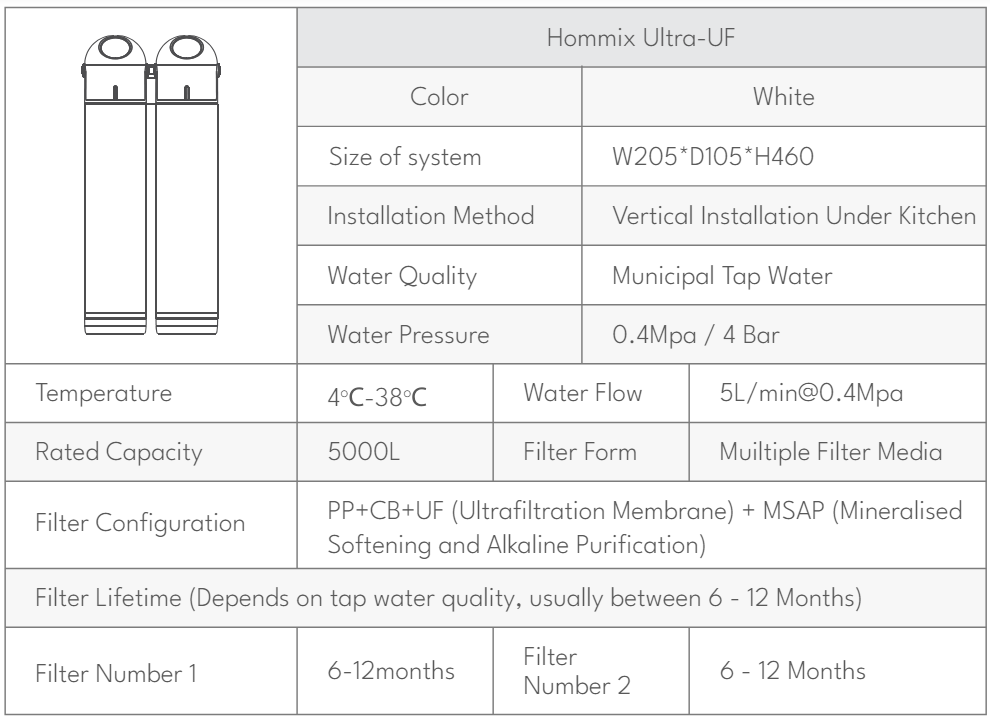
Specifications
Components

INSTALLATION
Installation can be carried out by individuals who are DIY savvy; however, it is crucial to exercise caution, particularly concerning potential leaks and the state of existing kitchen connections. In the event of a leak, it is imperative to address it promptly. If you are not confident with handling water works, we strongly advise calling a professional plumber to ensure a smooth and secure installation. Your peace of mind and the integrity of the system are our top priorities.
Pre-Installation Requirements
To install the product, it should be connected to a municipal water pipeline interface. The installation area must be kept clean and hygienic, free from pollution, and shielded from direct sunlight exposure to the filters. Moreover, ensure there are no inflammable, explosive, or electrical equipment nearby to safeguard against rain or other environmental factors.
Important
When using drilling tools, pay close attention to personal safety. Avoid drilling in areas where concealed water, electricity, or air pipelines might be located.
Installation Diagrams
Depending on the variant purchased, the connections will slightly differ. The Standard and 3-Way Tap connections are installed in the same way without the need for drilling a new hole if you’ve opted for a Hommix 3-way tap. The Inline / Existing Kitchen Tap connection however only requires two parts (1/2” BSP Male – 3/8” Push Fit & 1/2” BSP Female – 3/8” Push Fit), pretty much an ‘in and out’ setup, which dispenses filtered cold water.
Important
Please ensure the water supply is off before attempting installation.
Standard Installation
The standard installation involves the insertion of a water feed inlet valve positioned between the cold water isolation valve and the flexible pipe connected to your kitchen tap. This effectively channels the water supply to the Hommix Ultra-UF system. Additionally, a new hole must be drilled on your sink or worktop for the installation of a small tap. The OUT port on the filter will then connect to this newly installed small tap, as illustrated in the diagram below for your reference:
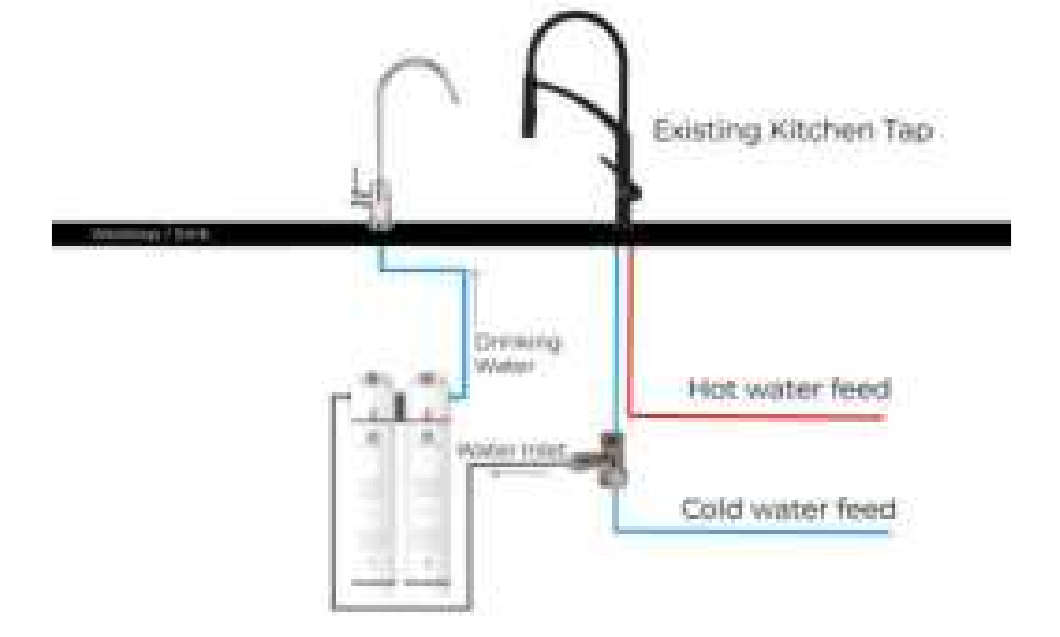
If you are mounting the system, please ensure that it is 5-10 cm off the base of the cabinet to make space for filter replacements. This installation method ensures seamless integration of the Hommix Ultra-UF system into your existing water supply with an additional tap, granting you easy access to filtered water at your convenience.
3-Way Tap Installation
The 3-way tap connection follows the same steps as the standard installation outlined above, which includes inserting a water feed inlet valve between the cold water isolation valve and the flexible pipe linked to your kitchen tap. However, in this case, there’s no need to create a new hole for an additional tap. Instead, you can seamlessly connect it directly to the push-fit connection on your Hommix 3-way tap, simplifying the installation process. Refer to the diagram below for a clear visual guide:
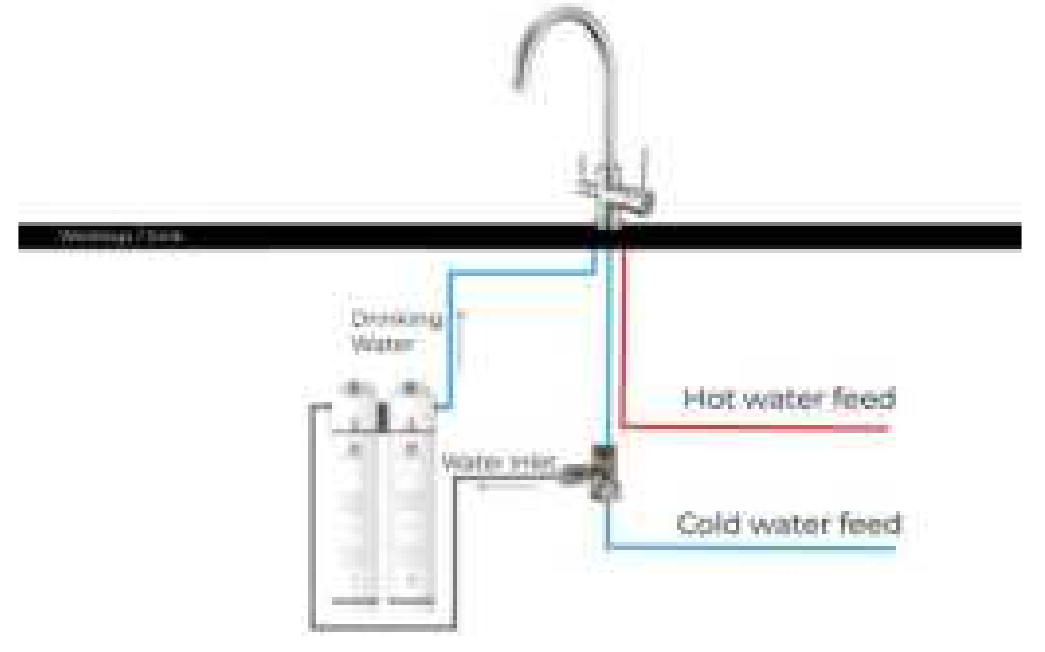
If you are mounting the system, please ensure that it is 5-10 cm off the base of the cabinet to make space for filter replacements. This streamlined approach ensures a hassle-free setup of the Hommix Ultra-UF system with your Hommix 3-way tap, allowing you to enjoy purified water without the need for extra drilling.
Existing Kitchen Tap Connection (In-line)
For the in-line connection, you will receive two essential adapters: 1/2” BSP Male – 3/8” Push Fit and 1/2” BSP Female – 3/8” Push Fit, along with a length of tubing. This approach offers a simple installation process. Begin by disconnecting the cold water flexible hose from the isolation valve. Subsequently, attach the 1/2” BSP Male – 3/8” Push Fit to the taps’ flexible pipe, and connect the 1/2” BSP Female – 3/8” Push Fit to the isolation valve. Then, cut the tubing to the desired length and connect it from the isolation valve to the port on Filter 1 and from Filter 2 to the tap. For a visual guide, please refer to the diagram below:
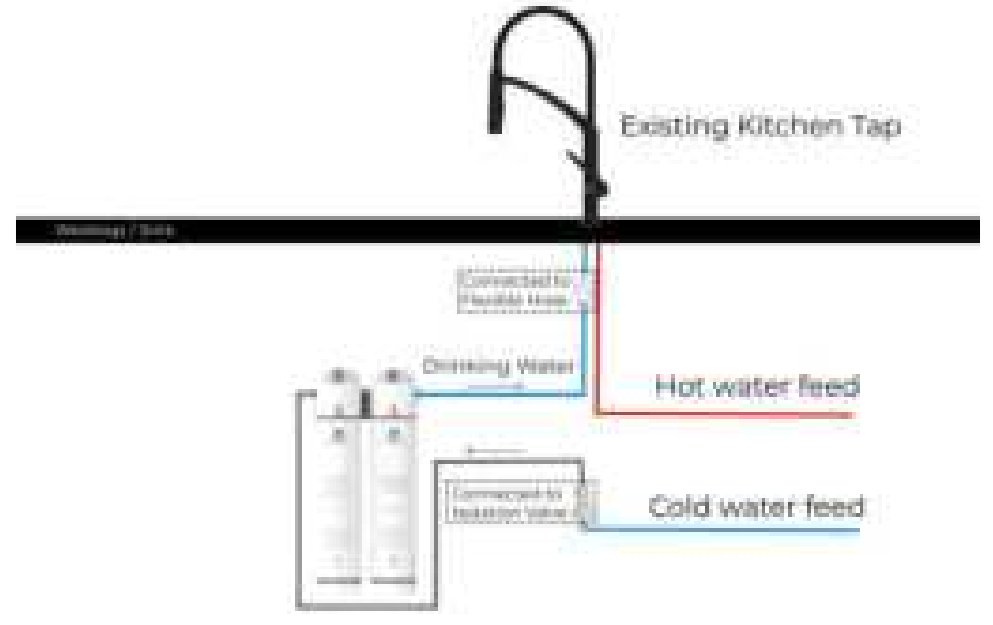
If you are mounting the system, please ensure that it is 5-10 cm off the base of the cabinet to make space for filter replacements. This user-friendly in-line connection method ensures a hassle-free setup, allowing you to connect your Hommix Ultra-UF system seamlessly and enjoy filtered water using your kitchen tap.
Water Feed Inlet Valve Installation
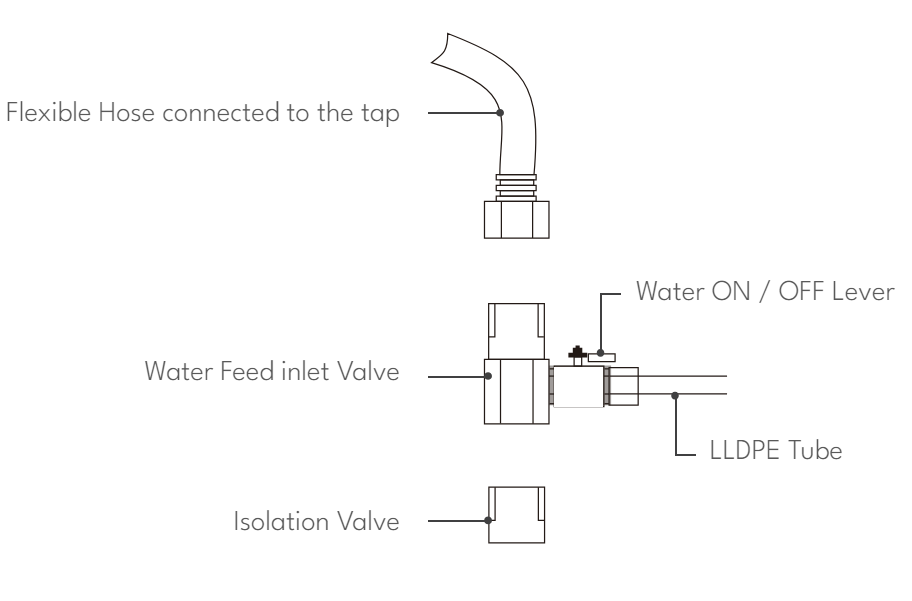
- Tools & Materials Required: To complete the installation, you’ll need the following tools and materials: Water Feed Inlet Valve (included), PTFE Tape (included), tube (included), and wrench (not included).
- Preparation: Begin by ensuring that the installation area is clean and free of debris. Close the cold water isolation valve, and proceed to remove the flexible pipe from the isolation valve. Dry the area with a dry cloth or tissue.
- Connecting the Water Inlet Tee and Ball Valve: For this step, you wouldn’t usually need PTFE tape but if necessary you can use 6-7 rounds to avoid leaks. Simply connect the ½” female side to the isolation valve (ensure you use the gasket provided) and then the flexible pipe to the male side. Connect the tube to the push-fit (push firmly in).
- Testing for Leaks: Have dried tissue available, and ensure the lever on the newly installed valve is at the off position (perpendicular to the tube). Slowly turn on the isolation valve until no leaks are detected.
- Pressure Reducing Valve (If Required): In cases where the inlet pressure exceeds 0.4Mpa, it is advisable to purchase and install a pressure-reducing valve separately to ensure the system’s optimal performance.
Filtered Water Tap Installation
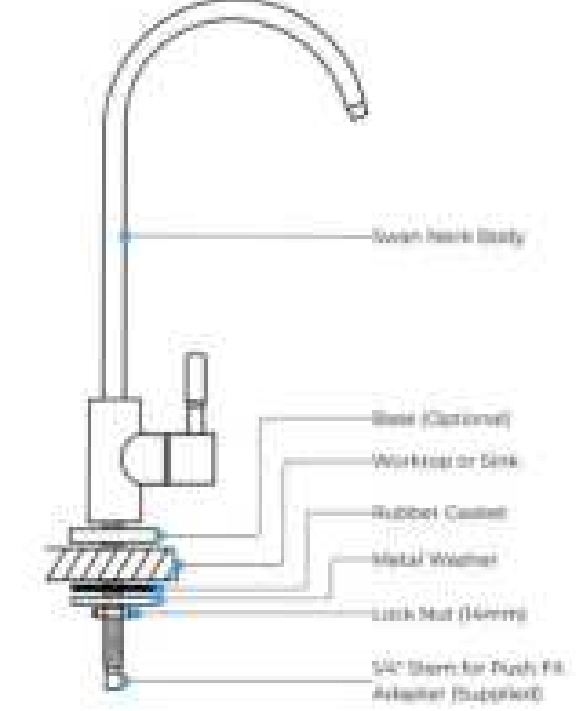
- Essential Tools and Materials: Before you begin, ensure you have the necessary tools and materials on hand, such as an electric drill and various drill bits (10-12mm drill bit required).
- Marking and Drilling: Start by marking the areas for drilling on the panel, typically around the sink or worktop. Ensure there is enough space underneath too. Then, carefully proceed with the drilling process.
- Choosing the Right Drill: When it comes to the type of hole required, it’s important to select the appropriate drill bit based on the specific installation scenario (wood or metal, etc.).
- Post-Drilling Cleanup: After completing the drilling, make sure to promptly clear away any debris or dirt resulting from the process. This step ensures a clean and tidy workspace.
Tube Connections
The Hommix Ultra-UF uses push-fit / quick-connect connections, allowing for straightforward installation by inserting the LLDPE tubes into the corresponding connections. To ensure a reliable connection, it’s essential to prepare the LLDPE pipe with the correct length, ensuring the cut end of the PE pipe is smooth and tidy to prevent any potential water leakage (use a tube cutter/razor / Stanley knife).
- Connecting the Water Inlet Pipe: Start by attaching one end of the tube to the water feed inlet valve. Then, connect the other end to the left side of the Ultra-UF; the water inlet connection (Filter 1).
- Water Purification Connection: Following this, fix one end of the 3/8″ PE water pipe to the right side of the Ultra-UF; output water connection (Filter 2), and then connect the other end to the tap.
- Precautions for Tube Connection: When installing the water tubes, it’s advisable to run them along cabinets or wall edges. Use an appropriate pipe-cutting tool to ensure a perpendicular cut of the pipe. Avoid bending the tube during installation to prevent any potential pipe compression that may affect the system’s performance and your water flow.
To enhance water flow and expedite the delivery of clean water, it’s recommended that the water pipe connected to the main unit is kept as short as possible. Following these steps and precautions will help ensure a smooth and efficient installation process.
USAGE AND MAINTENANCE
- Before turning on the water supply, ensure that the system, water feed inlet valve, and other connections are securely locked and effectively sealed.
- Turn on the tap and flush the filters by allowing water to flow through it for 10-15 minutes, removing any residual carbon powder from the rear activated carbon filter element (you may have to repeat this a few times).
- Next, close the faucet and allow the system to stand for five minutes to verify if there are any leaks.
- In the event of water leakage, promptly shut off the water feed inlet valve and attend to the necessary repairs.
Filter Replacement
Filter replacement with the Hommix Ultra-UF is really simple, however, before removing the filters please ensure that you:
- Turn off the water feed inlet valve (the lever should be perpendicular to the tube)
- Turn on the tap to release any excess water and pressure
Once this is done please proceed to the following instructions:
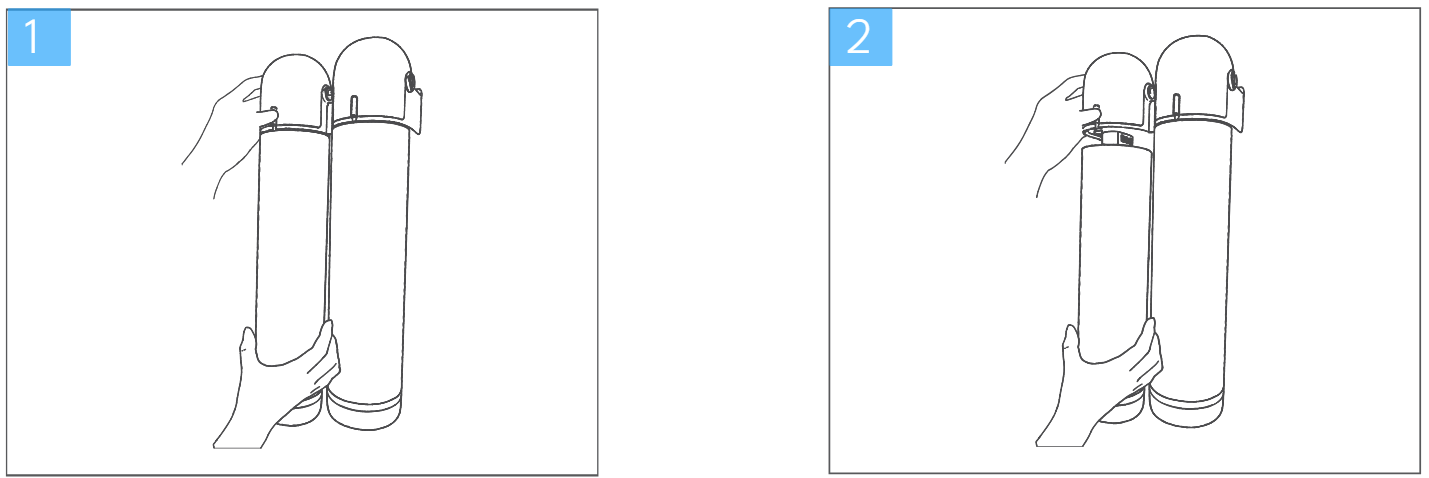
- Gently hold the lower section of the filter element and simultaneously press the red button located on the system’s head. This action will facilitate the downward release of the filter. (Picture 1)
- Insert the new filter upward into the machine head and push until it is securely locked in place. (Picture 2)
Maintenance
Filter Replacement Cycles
Over time, the filters naturally collect various impurities, which can impact both the speed and quality of the filters. To ensure the consistent quality of the water output, it is important to adhere to a regular replacement schedule for the filter element. Below are the recommended replacement intervals for your reference:

Please Note
The replacement interval for the filter is contingent on factors such as water quality, the volume of purified water consumed, and the quality of the local municipal tap water. The recommended filter element replacement periods provided above are intended as general guidelines.
Additionally, consider replacing the filter element in the following situations:
- If the water quality deteriorates, resulting in an unpleasant taste.
- When there is a significant reduction in water flow.
IMPORTANT
- Disposal of Used Filters: The filters that have been replaced cannot be effectively cleaned or recycled for further use. It is advisable to responsibly dispose of the used filters as solid non-recyclable waste. (we are working on recyclable filters)
- Long Periods of Inactivity: When planning an extended absence from home or when the system will not be in use, please turn off the water source, run the tap to release any pressure until nothing is dispensed, and then turn off the tap.
- Preserving Water Quality: Extended periods of non-use or minimal water consumption can impact water taste. Simply run the tap for 5-10 minutes before consuming the water.
- Contact for Technical Support: In any of the following scenarios, promptly turn off the water feed and contact the place of purchase:
- Water purifier pipeline or related components leaking.
- Damage to relevant components of the Hommix Ultra-UF.
- Any unusual occurrences or malfunctions.
- Replacement of Damaged Parts: If any parts of the water purifier become damaged, contact the place of purchase for replacement.
PRECAUTIONS
- Authorized Accessories: Only use accessories authorized by Hommix UK. Using unapproved accessories may result in the automatic termination of your warranty if it affects the machine’s proper operation.
- Initial Inspection: After unpacking, inspect the machine for any damage and confirm that all components are present as listed in the accessories list.
- Supervised Use for Children and Individuals with Limited Capacity: Ensure that children and individuals with limited capacity use this product under the supervision of responsible guardians.
- Immediate Response to Malfunctions: In the event of a malfunction, promptly close the water feed inlet valve and avoid using it until the issue is resolved.
- Authorized Maintenance: For any necessary product repairs, seek assistance from the place of purchase.
WARRANTY
WARRANTY INFORMATION: Hommix Ultra-UF Water Filtration System
Congratulations on your wise choice in selecting the Hommix Ultra-UF Water Filtration System. We stand behind the quality and performance of our product, and we’re pleased to offer you the following warranty:
1-Year Limited Warranty
Hommix is committed to providing you with a dependable and trouble-free experience. Your Hommix Ultra-UF Water Filtration System is covered by a 1-year limited warranty. During this period, if your system experiences any defects in material or workmanship, we will provide the necessary repairs or replacements.
Warranty Details
- This warranty begins from the date of your product’s purchase and is valid for one (1) year.
- The warranty covers manufacturing defects, material faults, and workmanship issues.
- It does not extend to normal wear and tear, improper installation, or misuse of the product.
- The warranty applies only to the original purchaser and is non-transferable.
To obtain warranty service, please retain your proof of purchase and contact our dedicated customer support team for assistance. We hope that your Hommix Ultra-UF Water Filtration System enhances your water quality and your life. If you have any questions or need further information about our warranty, please don’t hesitate to get in touch with our customer support team. Thank you for choosing Hommix, and we look forward to providing you with exceptional water filtration solutions.
Contact Details
- Web Chat: https://www.hommix.co.uk
- Telephone: +44 330 113 9292
- Mobile / WhatsApp Business: +44 77 8080 5720
- Email: cs@hommix.co.uk
- Instagram: commix. UK
- Facebook: HOMMIXUK
For more Manuals by HOMMIX, visit MANUALSDOCK


