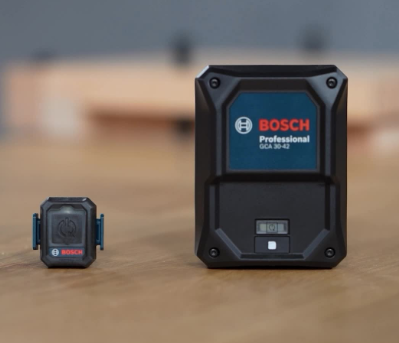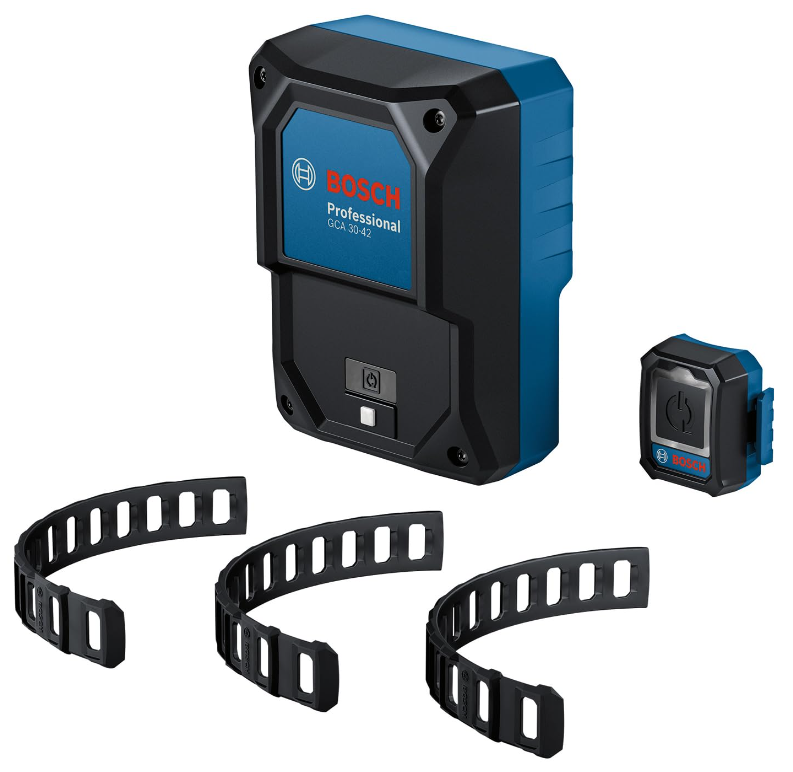
BOSCH GCA30-42K Power Tool Auto-Start Retrofit Kit
Getting to Know Your GCA30-42K Auto-Start System
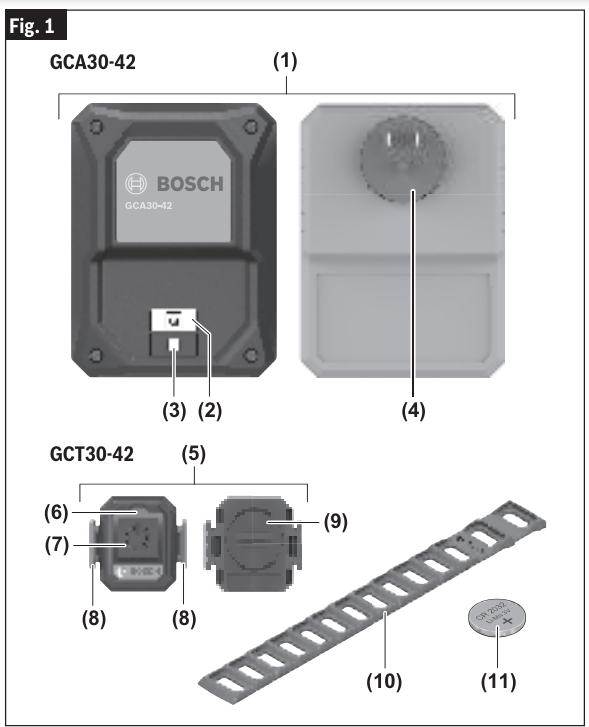
- Receiver
- Status Indicator with Auto-Start Symbol (User Interface)
- Button (User Interface)
- Plug
- Auto-Start Remote
- LED Status Indicator (User Interface)
- Start/Stop Button (User Interface)
- Fastening Hook for Attachment Band
- Battery Compartment Cover
- Attachment Band
- CR2032 3V Li-ion Coin Cell Battery*
Assembly
Mounting the Auto-Start Remote
To mount the Auto-Start Remote:
- Attach one end of the Attachment Band 10 to one of the two Fastening Hooks 8 (Fig. 2).
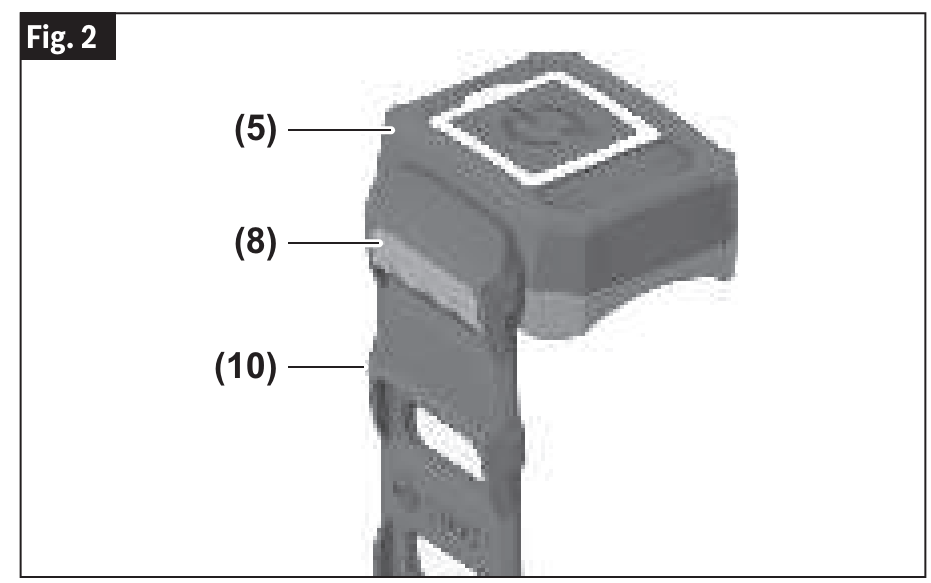 Secure the Auto-Start Remote 5 to the cordless tool. To do so, tighten the Attachment Band 10 and attach the free end to the second Fastening Hook 8 (Fig. 3). If needed, cut the attachment band to the correct length.
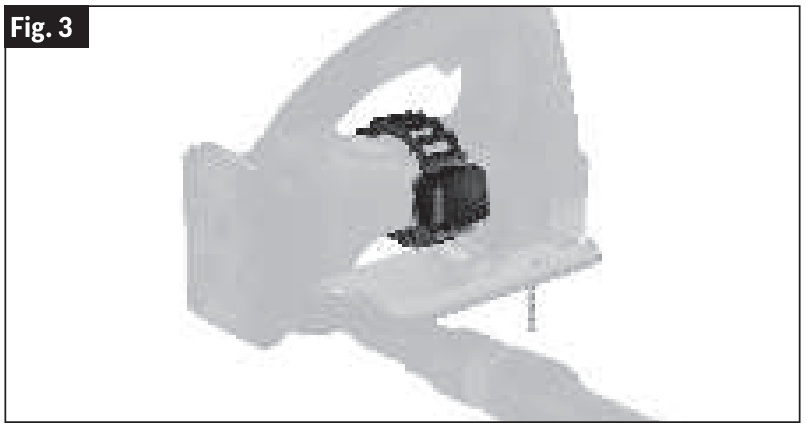
When attaching the Auto-Start Remote to the cordless tool, ensure it is placed in an area that generates sufficient vibration during operation and that it is tight on the tool.
Note
Never attach the Auto-Start Remote to places that are required to operate the cordless tool (for example, gripping surfaces, switches, etc).
Operation
Establishing Connection
- Ensure that the Auto-Start Remote 5 is within range of the Receiver 1.
- Insert the plug of the dust extractor into the primary power source.
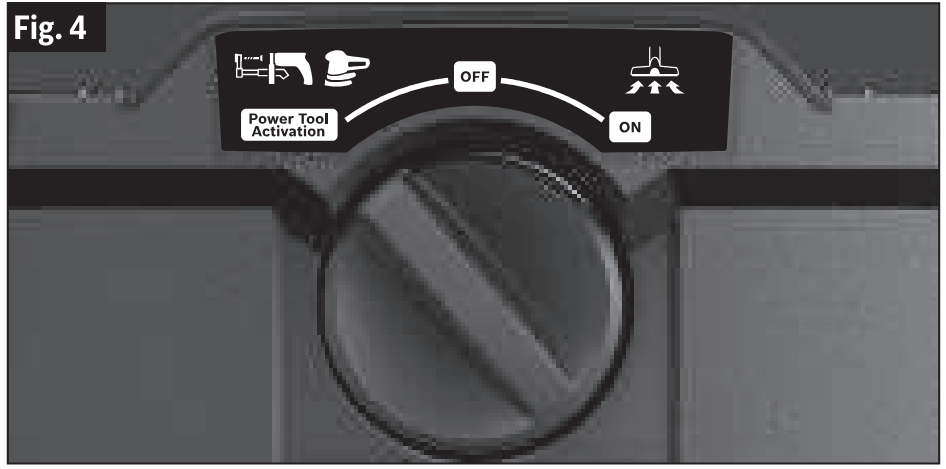
- Set the switch of the dust extractor to Power Tool Activation Mode (Fig. 4).
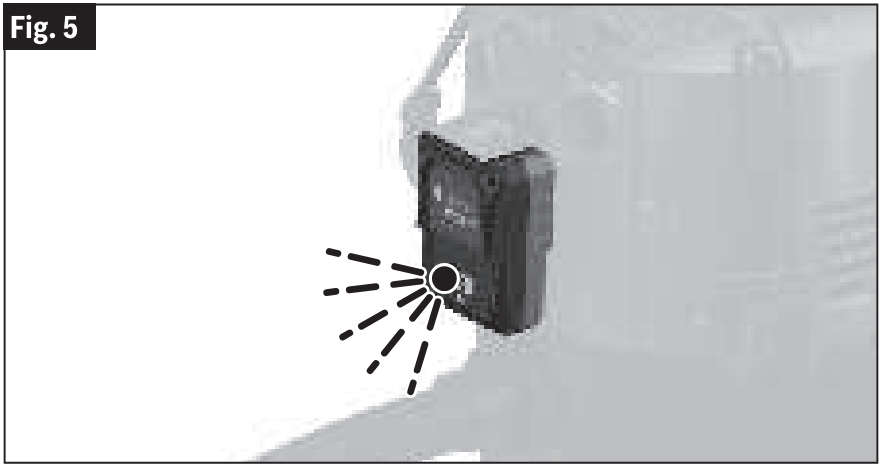
 Insert the Plug 4 of the Receiver 1 into the plug socket on the dust extractor. Pairing mode will begin automatically. The Status Indicator with Auto-Start Symbol 2 will flash blue (Fig. 5).
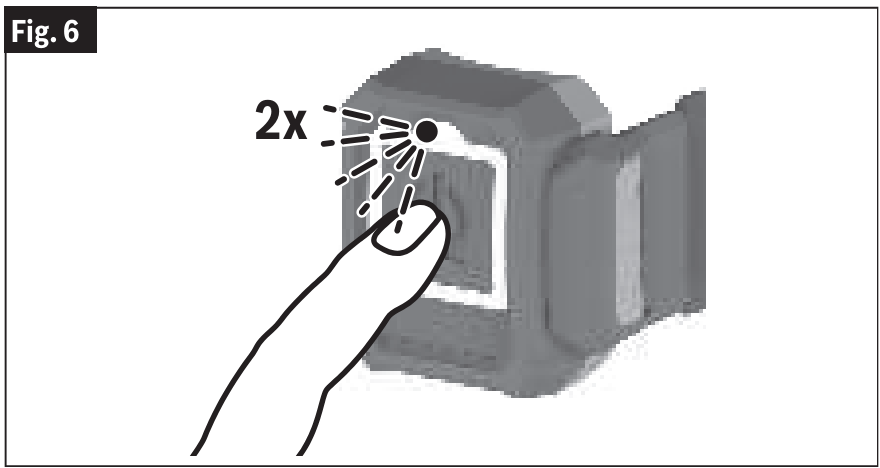
 Press the Start/Stop Button 7 on the Auto-Start Remote 5 until the LED Status Indicator 6 flashes blue twice. The LED Status Indicator 6 on the Auto-Start Remote 5 will briefly flash blue (Fig. 6).
Connection Established
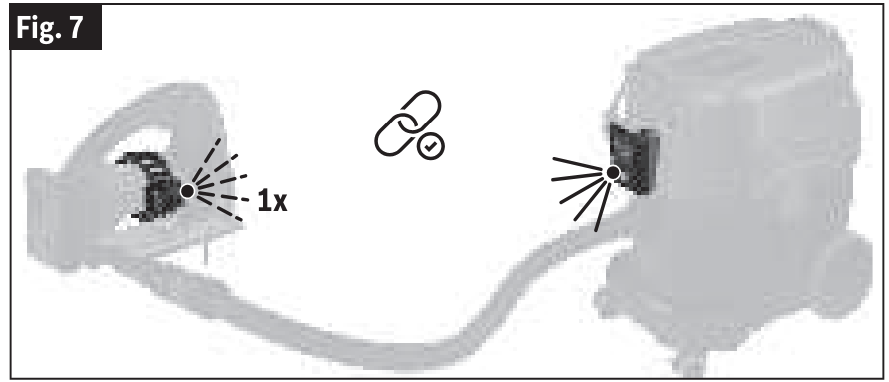
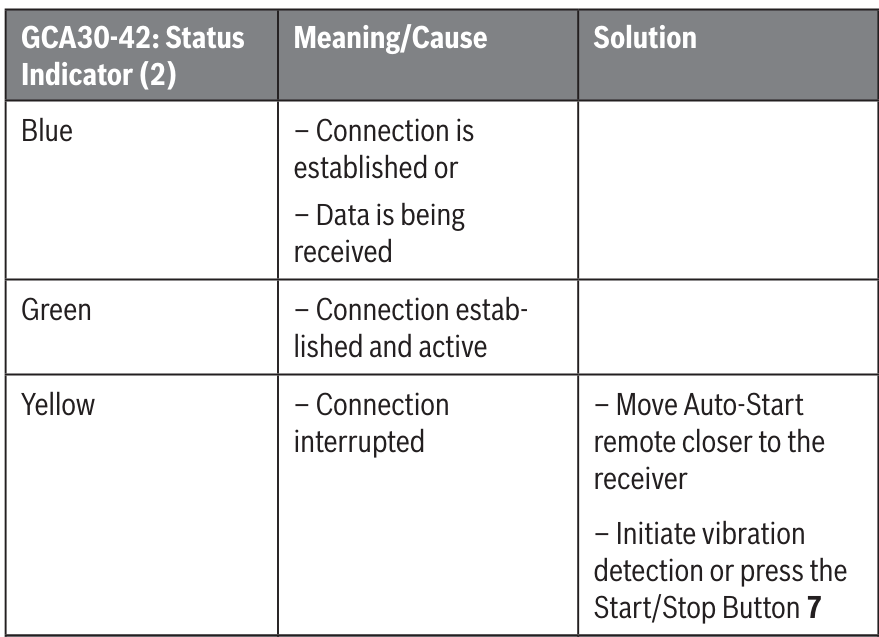
- When the connection has been successfully established, the Status Indicator with Auto-Start Symbol 2 on Receiver 1 lights up green.
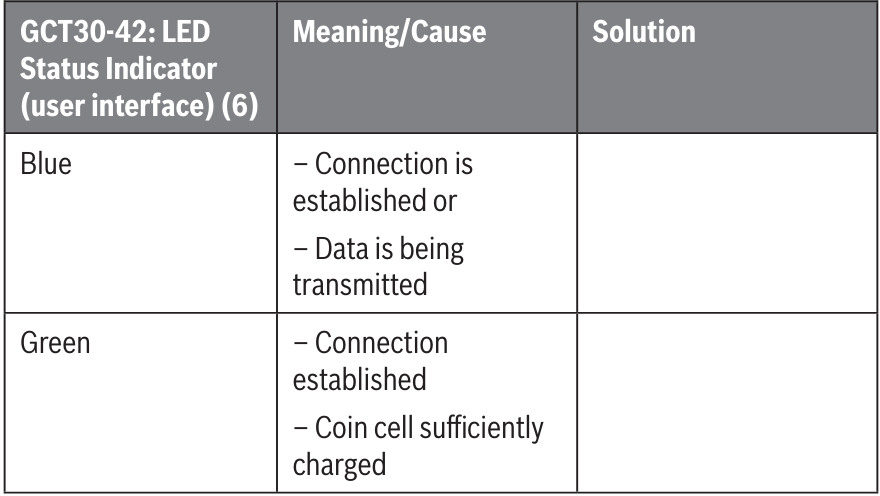
- The LED Status Indicator 6 on the Auto-Start Remote 5 will briefly flash green.
Battery Replacement
When changing the coin cell, the following shall apply:
- If the Auto-Start Remote 5 was connected to Receiver 1 before changing the coin cell, the connection is automatically reestablished after changing the coin cell.
- If the modules were not connected before replacing the coin cell, the connection will need to be established.
After a reset, the Auto-Start Remote and the Receiver must be reconnected.

Resetting to Factory Settings
- Receiver GCA30-42: Press and hold Button 3 until the status indicator with the Auto-Start Symbol 2 flashes blue four times in rapid succession.
- Auto-Start Remote GCT30-42: Press and hold the Start/Stop Button 7 until the LED Status Indicator 6 flashes blue four times in rapid succession.
Vibration Detection
The Auto-Start Remote 5 is equipped with vibration detection. Once the utilized cordless tool is activated, the Auto-Start Remote 5 detects the vibrations of the activated cordless tool and automatically switches on the dust extractor.
- If the cordless tool is switched off, the dust extractor will switch off automatically.
Note
After the tool is switched off, to empty the hose, the dust extractor switches off 10-15 seconds later.
Auto Starting/Stopping the Dust Extractor
- Once the plug of the dust extractor has been inserted into the primary power source, the switch of the dust extractor has been set to Power Tool Activation Mode, Plug 4 of Receiver 1 has been inserted into the plug socket of the dust extractor and both the Auto-Start Remote 5 and Receiver 1 have been successfully paired, your auto start system is ready to be used.
- Ensure that the Auto-Start Remote 5 is flush and snug against the mounting surface of the cordless tool by adjusting the position on the supplied Attachment Band 10.
- Insert the extraction hose into the dust extractor attachment of the cordless tool.
- Once the cordless power tool is turned on/off, a start/stop signal is sent from the Auto-Start Remote 5 to Receiver 1 and the corresponding dust extractor is turned on/off.
Utilizing Manual Mode
- Briefly press the Start/Stop Button 7 on the Auto-Start Remote 5. The dust extractor will be switched on.
- To switch the dust extractor off, briefly press the Start/Stop Button 7 on the Auto-Start Remote 5 again.
Note
If the dust extractor is switched off using the Start/Stop Button 7 on the Auto-Start Remote 5, the dust extractor will automatically switch on once the Auto-Start Remote 5 detects the vibrations of the activated cordless tool.
Maintenance
Remove any visible dirt and debris using a brush or a damp cloth. Do not use any detergents or solvents.
Coin Cell Replacement
The coin cell must always be replaced with a coin cell of the same type. There is a risk of explosion if any other coin cell type is utilized than what is recommended.
Removal of the Coin Cell
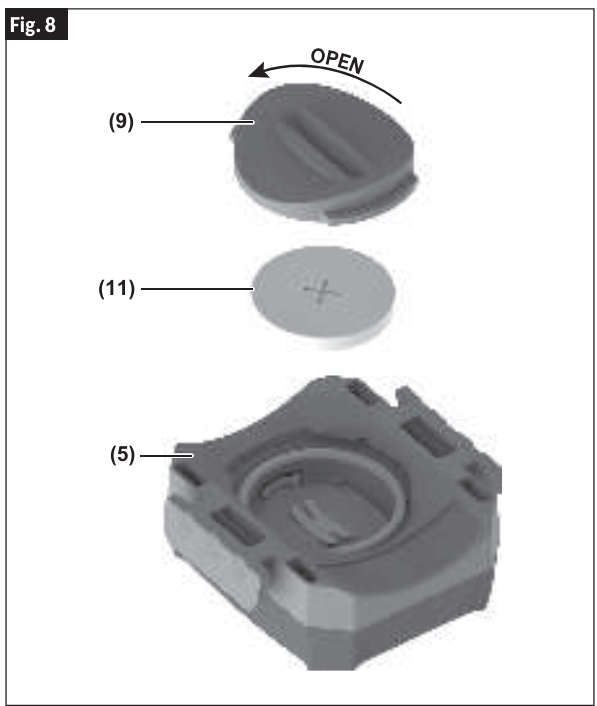
- Open the Battery Compartment Cover 9 on the rear of the Auto-Start Remote 5 with a coin or small flat-head screwdriver by turning counterclockwise (Fig. 8). Once the Battery Compartment Cover is loose, remove the battery compartment cover from the Auto-Start Remote.
- Carefully remove the older coin cell and insert the new coin cell into the Auto-Start Remote 5 (Fig. 8). To ensure the new coin cell is correctly inserted, follow the markings on the Auto-Start Remote carefully.
- Once the new coin cell has been inserted correctly, reinstall the Battery Compartment Cover 9 onto the rear of the Auto-Start Remote 5 and turn the Battery Compartment Cover clockwise utilizing a coin or a small flathead screwdriver until it can go no further (Fig. 8). This will ensure that the Battery Compartment Cover is properly secure.
FCC Statement
The GCA30-42 complies with FCC RF radiation exposure limits set forth for an uncontrolled environment. The GCA30-42 complies with the safety requirements for RF exposure by FCC Part 2.1093 for portable use conditions.
- Product Name / Model Number: Auto-Start Remote Receiver/GCA30-42
FCC Caution
The manufacturer is not responsible for radio interference caused by unauthorized modifications to this equipment. Such modifications could void the user’s authority to operate the equipment. This device complies with Part 15 of the FCC Rules. Operation is subject to the following two conditions:
- This device may not cause harmful interference, and
- This device must accept any interference received, including interference that may cause undesired operation.
NOTE
This equipment has been tested and found to comply with the limits for Class B digital devices, under Part 15 of the FCC rules. These limits are designed to provide reasonable protection against harmful interference in a residential installation. This equipment generates, uses, and can radiate radio frequency energy and, if not installed and used by the instructions, may cause harmful interference to radio communications.
However, there is no guarantee that interference will not occur in a particular installation. If this equipment does cause harmful interference to radio or television reception, which can be determined by turning the equipment off and on, the user is encouraged to try to correct the interference by one or more of the following measures:
- Reorient or relocate the receiving antenna.
- Increase the separation between the equipment and the receiver.
- Connect the equipment to an outlet on a circuit different from that to which the receiver is connected.
- Consult the dealer or an experienced radio/TV technician for help.
LIMITED WARRANTY
For details on the terms of the limited warranty for this product, go to https://rb-pt.io/PowerToolWarranty or call 1-877-BOSCH99.
For more Manuals by BOSCH, visit MANUALSDOCK

