Oster TSSTTRJB08-033 2-Slice Toaster
IMPORTANT SAFEGUARDS
When using electrical appliances, basic safety precautions should always be followed to reduce the risk of fire, electric shock, and/or injury to persons including the following:
- Read all instructions before using this product.
- This appliance generates heat during use. Do not touch hot surfaces. Use handles or knobs. Always protect your hands with non-slip oven mitts or similar
- To protect against electric shock, do not place or immerse cord, plugs, or appliance in water or other liquid.
- This appliance is not intended for use by children or by persons with reduced physical, sensory, or mental capabilities, or lack of experience and knowledge. Close supervision is necessary when any appliance is used near children. Children should be supervised to ensure that they do not play with the appliance. Keep the appliance and its cord out of reach of children.
- Unplug from outlet when not in use, before putting on or taking off parts and before cleaning. Allow to cool before putting on or taking off parts, and before cleaning. To disconnect, turn any control to OFF, then unplug power cord from outlet. Do not disconnect by pulling on cord. Always grasp the plug and pull to disconnect.
- Do not operate any appliance with a damaged cord or plug or after the appliance malfunctions, or has been damaged in any manner. Do not attempt to replace or splice a damaged cord. Return appliance to the manufacturer (see warranty) for examination, repair or adjustment.
- The use of accessory attachments not recommended by the appliance manufacturer may cause injuries.
- Do not use outdoors or for commercial purposes.
- Do not let cord hang over edge of table or counter, or touch hot surfaces.
- Do not place on or near wet surfaces, or heat sources such as a hot gasor electric burner, or in a heated oven.
- Extreme caution must be used when moving an appliance containing hot oil or other hot liquids. Always protect your hands with non-slip oven mitts or similar.
- Do not use appliance for other than intended use. Misuse can cause injuries. Intended for household countertop use only. Keep 6 inches (152 mm) clear from the wall and on all sides. Always use appliance on a dry, stable, level surface.
- Oversize foods, metal foil packages, or utensils must not be inserted in a toaster as they may involve a risk of fire or electric shock.
- A fire may occur if toasters are covered, touching or near flammable materials, including curtains, draperies, towels, walls, and the like, when in operation. Do not place any item on top of the appliance when in operation.
- Do not attempt to dislodge food when toaster is plugged in.
- Do not operate this toaster unattended.
- When heating toaster pastries, follow the instructions in the manual for toaster pastries. If no instructions are provided specific to toaster pastries, always use the lightest toast color setting.
- To reduce the risk of fire, empty the crumb tray after each use.
- Do not use with a programmer, timer, wireless plug adapter or outlet that allows control remotely, or connect to a circuit that is regularly switched on and off by the utility.
POLARIZED PLUG
This appliance has a polarized plug (one blade wider than the other). As a safety feature to reduce the risk ofelectrical shock, this plug is intended to fit in a polarized outlet only one way. If the plug does not fit fully in the outlet, reverse the plug. If it still does not fit, contact a qualified electrician. Do not attemptto defeat this safety feature or modify the plug in any way. If the plug fits loosely into the AC outlet or if the AC outlet feels warm do not use that outlet.
POWER CORD INSTRUCTIONS:
A short power-supply cord or detachable power-supply cord is provided to reduce risks resulting from becoming entangled in or tripping over a longer cord. Longer detachable power-supply cords or extension cords are available and may be used if care is exercised in their use. If a long detachable powersupply cord or extension cord is used:
- The marked electrical rating of the cord set or extension cord should be at least as great as the electrical rating of the appliance;
- The cord should be arranged so that it will not drape over the counter top or table top where it can be pulled on by children or tripped over unintentionally; and
- If the appliance is of the grounded type, the cord set or extension cord should be a grounding type 3-wire cord.
NOTICES:
- Some countertop and table surfaces are not designed to withstand the prolonged heat generated by certain appliances. Do not set the heated unit on a finished wood table. We recommend placing a hot pad or trivet under your toaster to prevent possible damage to the surface
- During initial use of this appliance, some slight smoke and/or odor may be detected. This is normal with many heating appliances and will not recur after a few uses.
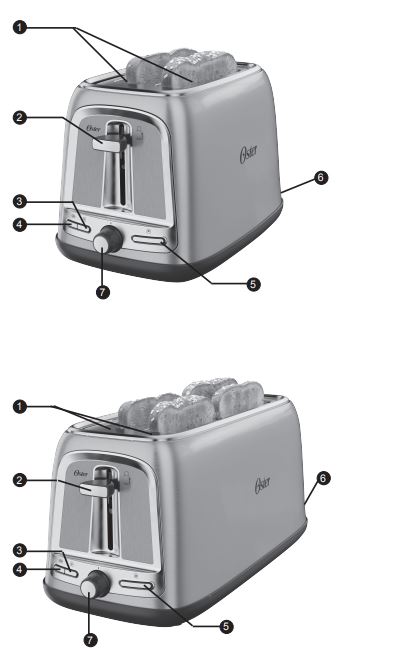
Learning About Your Toaster

- Bread slots
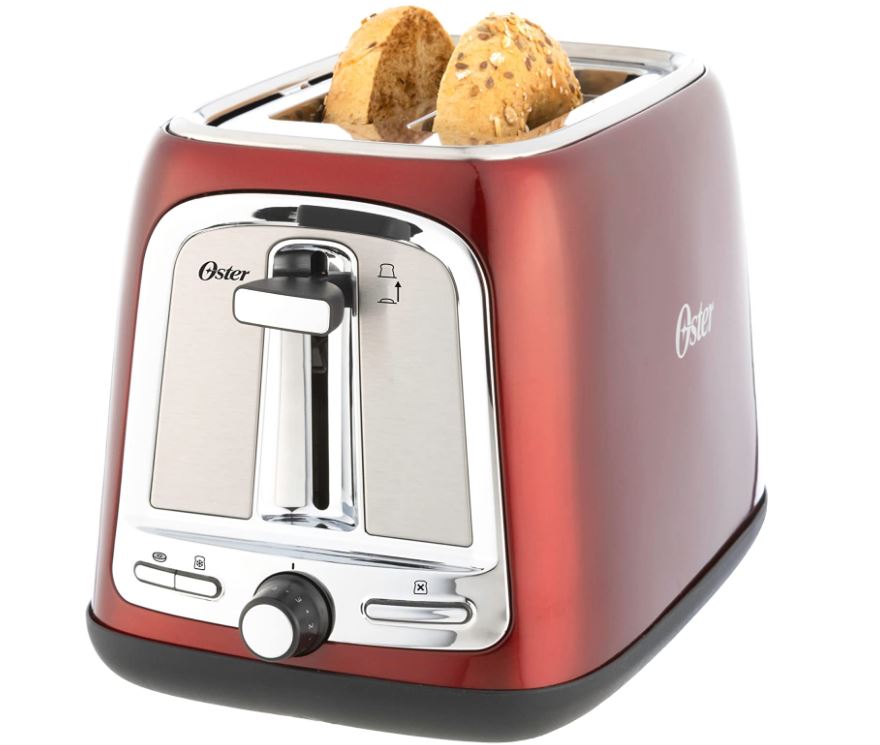
- Toast Lift Lever
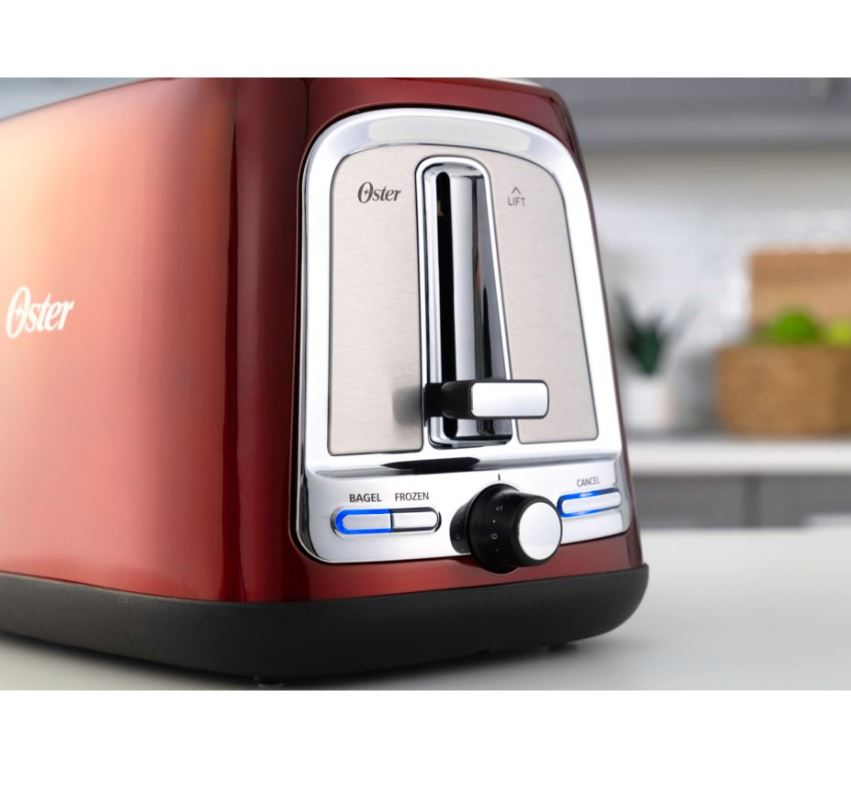
- Frozen function
- Bagel Function
- Cancel button
- Crumb tray (at rear)
- Browning control
BROWNING CONTROL
The browning control regulates how much the bread is toasted—in other words, the color of the toast. Lower settings producelighter toast and higher settings produce darker toast. When setting the browning control, remember that dry or thin slices of bread will toast quicker and require a lowersetting. Moist or thick slices of bread will require a higher setting.
CANCEL BUTTON
The toasting process can be stopped at any time by pressing the cancel button.
TOAST LIFT LEVER
The Toast Lift Lever allows the use of the loading handle to help you removethe toast. When toasting has finished, lift the loading handle upwards from its rest position to raise the toast and make it easier to remove.
FROZEN BREAD BUTTON
The Frozen bread button allows you to toast bread straight from the freezer. Insert the bread into your toaster, press the toast lever down and then press the Frozen bread button. Your toaster will extend the toastingtime to allow the bread time to defrost. Watch the toast to ensure that it doesn’t burn.
To Toast Your Bagel:
Insert the bagel into the bread slots. Press the Toast Lever until it locks. Press the Bagel button. The Bagel lightwill illuminate to indicate your selection. After the desired level of darkness has been reached, the food will pop up automatically. The Toast Lever will return to the up position and the indicator lightswill turn off. Carefully remove the toasted bagel from the bread slots.
BEFORE FIRST USE
CAUTION!
Never force bread into thetoasting slots. Bread should fit easily into the toasting slots. Never toast slices of bread that have been buttered.Take extra care when toasting items that contain sugar, jam or preserves, as there is a risk of the ingredients leaking into the toaster, causing overheating.Don’t use bent, damaged or broken bread in your toaster as it may cause it to jam.
Carefully remove your toaster from its box. Remove all packaging from inside the toasting slots. Position your toaster on a stable, secure, dry and level work surface away from the edge. Bread may burn therefore donot use the appliance near or below combustible materials such as curtains. Never use the toaster below wallcupboards or shelves. Position toaster at least 3 inches away from wall or rear of counter. Plug the cord into a 120 volt, 60 Hz ACoutlet.
Connect the plug to a suitable power outlet and make sure that the power cord does not overhang the work surface.When you first use your toaster, there may be a slight odor as the heating elements warm up for the first time. This is quite normal and not a cause for concern. Toremove the odor, simply operate your toaster for the first time without any bread in it.
USING YOUR TOASTER
- Set the level of toasting using the browning control. The higher the number selected, the darker the toast will be.
- Place the bread into the toasting slots. Only toast single slices of bread in each slot on 2 slice toasters. 4 Slice Long Slot Toasters can accommodateno more than 2 slices of bread in each slot. Press the toast lever down until it latches. The bread will be lowered into the toaster and toasting will begin. The toast lever will not latch if your toaster is not connected to a working outlet.
- When toasting has finished, the loading handle will rise and the toasted bread can be removed. You can lift the loading handle upwards beyond its rest position to help you remove the toast.
- If the toast is not done enough it can be toasted again. Turn the browning control to a lower setting and keep a careful eye on the toast to ensure that it doesn’t burn.
- Toasting can be stopped at any time by pressing the cancel button.
TOASTING TIPS
- Toasting is a combination of drying and cooking the bread because moisture levels differ from one bread to another, toasting times may vary.
- For slightly dry bread, use a lower setting than normal.
- For fresh bread or whole wheat bread, use a higher setting than normal.
- Bread which has a very uneven surface will require a higher setting.
- Thicker cut pieces of bread (including bagel) will take longer to toast—sometimes significantly longer. This is because more moisture must beevaporated from the bread before toasting can occur. Very thick pieces of bread may require two toasting cycles.
- When toasting raisin or other fruit breads, remove any loose raisins or fruit from the surface of the bread before putting it into your toaster.This will help prevent fruit pieces from falling into your toaster or sticking to the guard wires in the toasting slot.
Cleaning Your Toaster
- After use and before cleaning, unplug wall plug and wait for toaster to cool.
- Wipe the outside of toaster with a damp cloth and dry with another cloth or paper towel. Do not use abrasive cleaners.
CAUTION:
Do not immerse in water or any liquid. - To avoid damage to toaster heating elements, do not use any pointed or sharp articles for cleaning the inside of the toaster.
- CAUTION: Empty the crumb tray frequently. Crumbs will accumulate in the crumb tray and could catch fire if not emptied periodically. When the toaster has cooled downcompletely, tap the sides of the toaster lightly to dislodge any crumbs caught in the toaster chamber, remove the crumb tray and empty it. Wipe the tray clean with a dampcloth or place it in the top rack of your dishwasher for cleaning.
- Tap sides again to ensure proper disposal. Return crumb tray back into the toaster before using again. This appliance has no user serviceable parts. Any servicing beyond thatdescribed in the Cleaning Section should be performed by an Authorized Service Representative only. See Warranty Section.
One Year Limited Warranty
Sunbeam Products, Inc or if in Canada, Newell Brands Canada ULC (collectively “Sunbeam”) warrants that for a period of one year from the date of purchase, this product will be free from defects in material and workmanship. Sunbeam, at its option, will repair or replace this productor any component of the product found to be defective during the warranty period. Replacement will be made with a new or remanufactured product or component. If the product is no longer available, replacement may be made with a similar product of equal or greater value.
This is your exclusive warranty. Do NOT attempt to repair or adjust any electrical or mechanicalfunctions on this product. Doing so will void this warranty. This warranty is valid for the original retail purchaser from the date of initial retail purchase and is not transferable. Keep the original sales receipt. Proof of purchase is required to obtainwarranty performance. Sunbeam dealers, service centers, or retail stores selling Sunbeam products do not have the right to alter, modify or any way change the terms and conditions of this warranty.
This warranty does not cover normal wear of parts or damage resulting from any of thefollowing: negligent use or misuse of the product, use on improper voltage or current, use contrary to the operating instructions, disassembly, repair or alteration by anyone other than Sunbeam or an authorized Sunbeam service center. Further, the warranty does not cover: Acts of God, such as fire, flood, hurricanes and tornadoes.
What are the limits on Sunbeam’s Liability?
Sunbeam shall not be liable for any incidental or consequential damages caused by the breach of any express, implied or statutory warranty or condition.Except to the extent prohibited by applicable law, any implied warranty or condition of merchantability or fitness for a particular purpose is limited in duration to the duration of the above warranty. Sunbeam disclaims all other warranties, conditions or representations, express, implied, statutory or otherwise.
Sunbeam shall not be liable for any damages of any kind resulting from the purchase, use or misuse of, or inability to use the product including but not limited to: incidental, special, consequential or similar damages or loss of profits, or for any breach of contract, fundamental or otherwise, or for any claim brought against purchaser by any other party.Some provinces, states or jurisdictions do not allow the exclusion or limitation of incidental or consequential damages or limitations on how long an implied warranty lasts, so the above limitations or exclusion may not apply to you.This warranty gives you specific legal rights, and you may also have other rights that vary from province to province, state to state or jurisdiction to jurisdiction.
In Canada
If you have any question regarding this warranty or would like to obtain warranty service, please call 1-800-667-8623 and a convenient service center address will be provided to you. In the U.S.A., this warranty is offered by Sunbeam Products, Inc., located in Boca Raton,Florida 33431. In Canada, this warranty is offered by Newell Brands Canada ULC, located at 20 B Hereford Street, Brampton, Ontario L6Y 0M1. If you have any other problem or claim in connection with this product, please write our Consumer Service Department.
FOR MORE MANUALS BY OSTER, VISIT MANUALSDOCK


