Pyle PDIC60T 70v Ceiling Mount Speakers
Introduction
Thank you for purchasing this PYLE in-wall/in-ceiling speaker system. It is a state-of-the-art product carefully designed and manufactured for your installation needs and has been thoroughly tested to ensure consistent and reliable performance. If you have any questions about the installation or operation of your PYLEin-wall/in-ceiling speaker system which are not answered by this manual, contact your dealer immediately.
INCLUDED
IN-WALL SPEAKERS
IN-CEILING SPEAKERS

SPEAKER PLACEMENT
FRONT SPEAKERS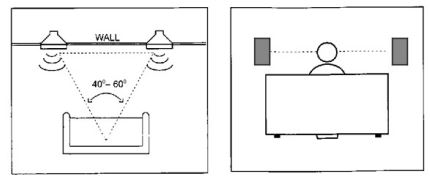
REAR SPEAKERS
IN-CEILING
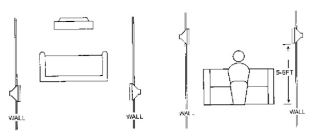
Proper placement of the speakers is an important step in obtaining the most realistic soundstage possible. These recommendations are for the optimum placement of the loudspeakers. Use these placement recommendations as a guide. Slight variations will not diminish your listening pleasure. The front speakers should be placed the same distance from each other as they are from the listening position. They should be placed at about the same height from the floor as the listener’s ears will be, with the tweeters aimed toward the listener at ear-level height.
In a home theater configuration, the two surround speakers should be placed slightly behind the listening position and ideally should face each other and be at a level higher than the listener’s ears. If that is not possible, they may be placed in a wall (or in the ceiling) behind the listening position, facing forward. The surround speakers should not call attention to themselves. They should provide a diffuse, ambient sound accompanying the main program material heard in the front speakers. In Dolby* Digital and DTS” systems, aim the tweeters toward the listening position at ear-level height.
SPEAKER CONNECTIONS
CONNECTION TIPS
The wires for both speakers should be the same length. If one speaker is placed closer to the amplifier than the other, hide the excess wire behind the wall. Speakers and electronics terminals have corresponding (+) and (-) terminals. We use red to denote the (+) termi- + nal and black for the (-) termi-nal. It is important to connect both speakers identically: (+) on the speaker to (+) on the amplifier and (-) on the speaker to (-) on the amplifier.
Wiring “out of phase” results in thin sound, weak bass, and a poor stereo image. with the advent of multi-channel surround sound systems, connecting all of the speakers in your system with the correct polarity remains equally important to preserve the proper ambiance and directionality of the program material.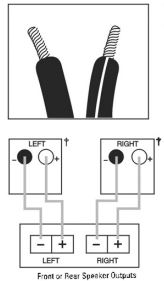
EXISTING CONSTRUCTION
IN-WALL SPEAKERS
Cut the drywall. Note Always allow at least one-half inch between a wall stud and the speaker cutcut or the locking tabs will not be able to swivel into place.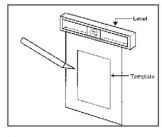
Screw out the two screws to separate the frame first.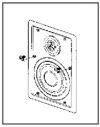
Place the frame assembly Connect the speaker wires in the wall. to the speaker. Screw down each of the six Screw down each of the six Phillips head screws. The Phillips head screws. locking tabs will swivel into place and secure the unit to the rear surface of the drywall.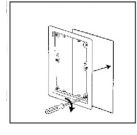
Connect the speaker wires to the speaker. Screw down each of the six Phillips head screws.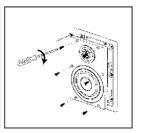
Put in the strips of adhesive to secure the grille.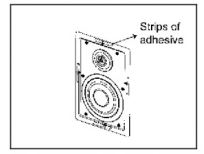
PDIW52/PDIW62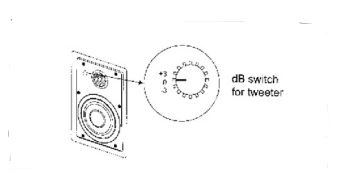
The in-wall speakers feature unique swivel mounts for the tweeters that enable you to aim the very directional high frequencies toward the listening position. at ear-level height.
tweeter adjustment
Before installing the speaker grille, gently press on the outer edge of the tweeter mount to adjust the position of the tweeter. The tweeter will not swivel more than 15 degrees in any direction; do not attempt to force it to move further.
Replace the metal grille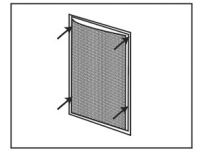
After installing the speaker grille. gently press on the mesh of the tweeter to adjust the position of the tweeter.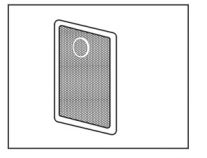
IN-CEILING SPEAKERS
Cut the drywall. Note Always allow at least one half inch between a wall stud and the speaker cutout or the locking labs will not be able to swivel into place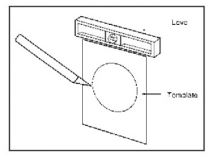 Connect the speaker wires to. the speaker
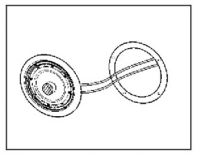
Place the frame assembly on the wall.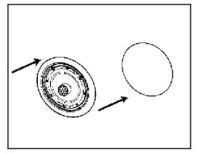
Screw down each of the four Phillips head screws. The locking tabs will swivel into place and secure the unit to the rear surface of the drywall. Put in the strips of adhesive to secure the grille.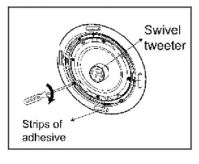
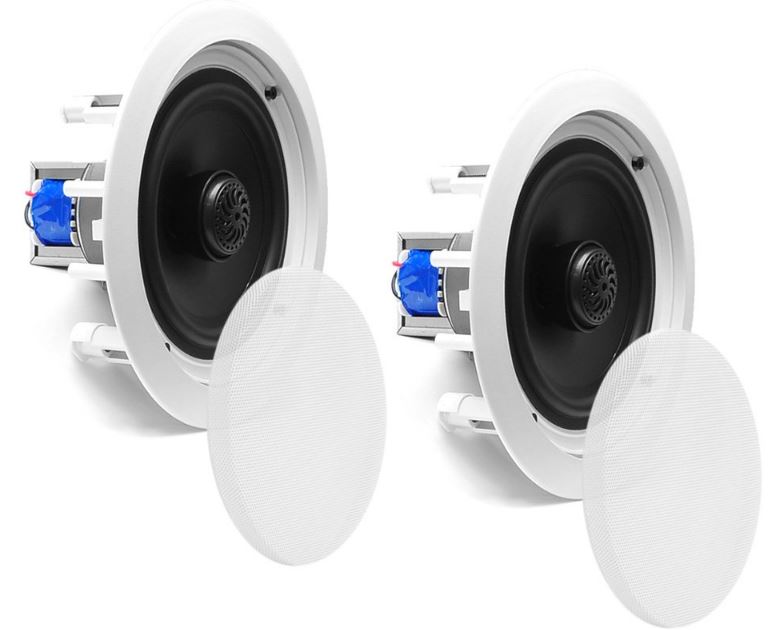
The in-ceiling speakers feature unique swivel mounts for the tweeters that enable you to aim the very directional high frequencies toward the listening position, at ear-level height. Before installing the speaker grille, gently press on the outer edge of the tweeter mount to adjust the position of the tweeter. The tweeter will not swivel more than 15 degrees in any direction; do not attempt to force it to move further.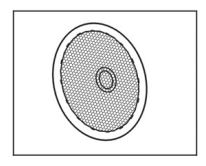
Replace the metal grille.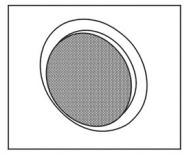
Just for PDIC60/PDIC80
After installing the speaker grille, gently press on the mesh of the tweeter to adjust the position of the tweeter.
WIRING DIAGRAM
(PDIC60T/PDIC80T)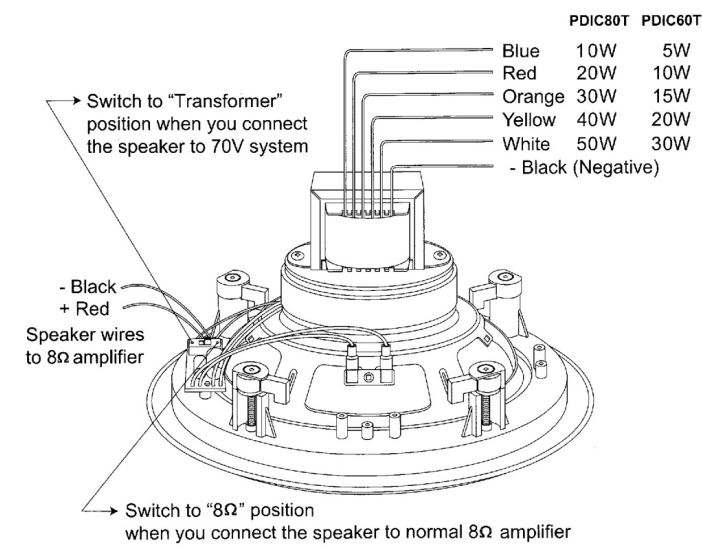
TROUBLESHOOTING
IF THERE IS NO SOUND FROM ANY OF THE SPEAKERS
- Check that the receiver/amplifier is on and a source is playing.
- Check all wires and connections between the receiver/amplifier and speakers. Make sure all wires are connected. Make
sure none of the speaker wires are frayed, cut, punctured, or touching each other - Review the proper operation of your receiver/amplifier.
IF THERE IS NO SOUND COMING FROM ONE SPEAKER - Check the “Balance” control on your receiver/amplifier. •
- Check all wires and connections between the receiver/amplifier and speakers. Make sure all wires are connected. Make sure none of the speaker wires are frayed, cut, punctured, or touching each other
IF THERE IS LOW (OR NO) BASS OUTPUT - Make sure the connections to the left and right “Speaker Inputs” have the correct polarity (+ and -).
- Consider adding a powered subwoofer to your system.
- In Dolby Digital or DTS modes, make sure your receiver/ processor is correctly configured. When using a subwoofer, make sure the subwoofer output of the receiver/ processor has been enabled. If no subwoofer is being used, make sure the left and right front and rear speakers have been configured as “LARGE.” See your receiver/process owner’s manual for further information on correct speaker configuration in Dolby Digital, DTS, and other surround sc modes.
IF THE SYSTEM PLAYS AT LOW VOLUMES BUT SHUTS OFF AS VOLUME IS INCREASED - Check all wires and connections between the receiver/amplifier and speakers. Make sure all wires are connected. Make sure none of the speaker wires are frayed, cut, punctured, or touching each other.
- If more than one pair of main speakers is being used, check the minimum impedance requirements of your receiver/amplifier.
FOR MORE MANUALS BY PYLE, VISIT MANUALSDOCK
FAQS About Pyle PDIC60T 70v Ceiling Mount Speakers
What does “70v” mean in the Pyle PDIC60T model?
The “70v” designation indicates that these speakers are compatible with 70-volt audio systems commonly used in commercial and distributed audio applications.
What is the power handling capacity of the Pyle PDIC60T speakers?
The speakers typically have a power handling capacity of 250 watts peak, allowing for robust audio performance in various settings.
Do the Pyle PDIC60T speakers include a built-in transformer for 70-volt systems?
Yes, these speakers feature built-in transformers with multiple wattage taps, allowing them to be used in 70-volt distributed audio systems without the need for external transformers.
What is the speaker size of the Pyle PDIC60T model?
The PDIC60T speakers feature a 6.5-inch midbass driver, providing balanced sound reproduction with clear highs and solid lows.
Are the Pyle PDIC60T speakers suitable for both ceiling and wall mounting?
Yes, these speakers are designed for ceiling mounting but can also be installed in walls, providing flexibility in placement for various audio setups.
Do the Pyle PDIC60T speakers come with mounting hardware for installation?
Yes, they typically include mounting brackets and hardware, facilitating easy and secure installation in ceilings or walls.
Can the Pyle PDIC60T speakers be used in outdoor environments?
While these speakers are not specifically designed for outdoor use, they can be used in covered outdoor areas where they are protected from direct exposure to the elements.
Do the Pyle PDIC60T speakers feature adjustable tweeters for directing sound?
Yes, they often include swivel-mounted tweeters, allowing users to adjust the direction of the high-frequency sound for optimal audio dispersion.
What is the impedance of the Pyle PDIC60T speakers?
The speakers typically have an impedance of 8 ohms, ensuring compatibility with most audio amplifiers and receivers.
Are the Pyle PDIC60T speakers backed by a warranty?
Yes, Pyle typically offers a manufacturer’s warranty on their speakers, providing coverage for defects in materials and workmanship for a specified period. It’s advisable to check the warranty details provided with the speakers for specific terms and conditions.

