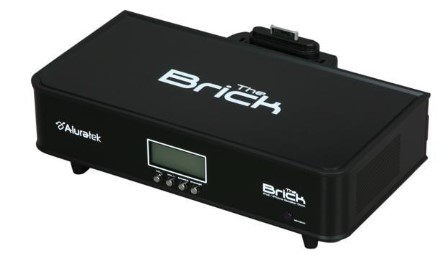
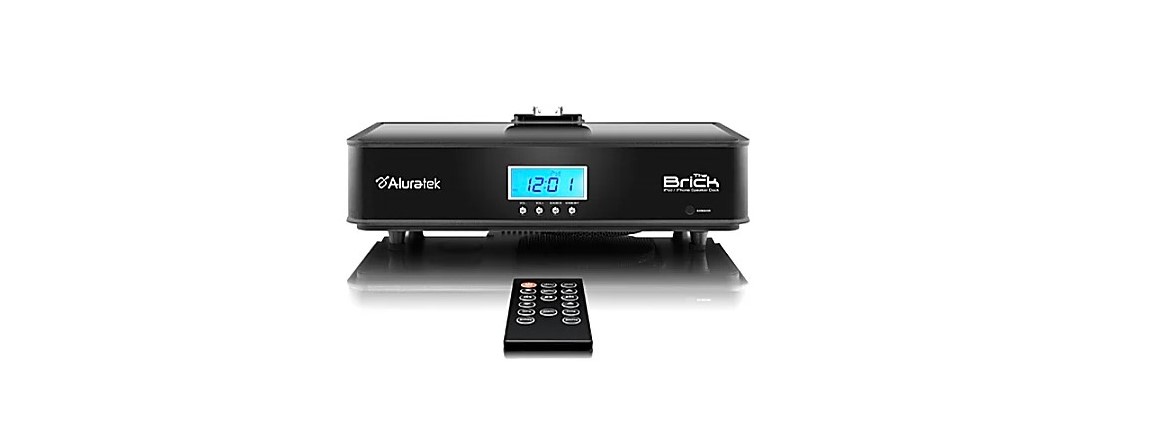
Aluratek ABS01F The Brick Touch Speaker

About Aluratek
We produce goods for everyday use. Technology should make life simpler, whether it’s a portable battery charger for your smartphone, the integration of our SmartHome accessories into your house, or a digital photo frame to liven up your living room. Our products are made to improve your life at home, at work, and on the go.
When a group of seasoned business people decided to launch attractive items in the consumer electronics sector, our journey officially began in 2006. Our company’s roots began with networking goods before expanding into the market for digital photo frames, where we are still a leader today. Throughout the United States and Canada, dozens of reputable merchants and resellers sell Aluratek products.
Package Contents
Your order has been carefully packaged and inspected. The following should be included in your package. Please inspect the contents of the package to ensure that you have received all items and that nothing has been damaged. If you discover a problem, please contact us immediately for assistance.
- BRICK iPod / iPhone / iTouch Speaker Dock with Built-in Amplifier
- Remote Control
- Power Cable
- FM Antenna
- Audio Cable
- Instructional Manual
- Registration / Warranty Card
Specifications
| 2.1 stereo speaker | Subwoofer Mid (left / right)
Treble (left / right) |
88 mm, 4
34 mm, 6 21 mm, 8 |
| Inputs | iPod / iPhone / iTouch connector AUX, 3.5 mm | |
| Output | Video Out, 3.5 mm *cable not included | |
| Input voltage | US and Canada | 110 – 120V AC 60 HZ |
| Dimensions (W x D x H) | 9.6 x 5.9 x 3 (in.)
243 x 150 x 75 (mm) |
|
| Weight | 4 lbs. (1.8 kg) | |
Product Overview

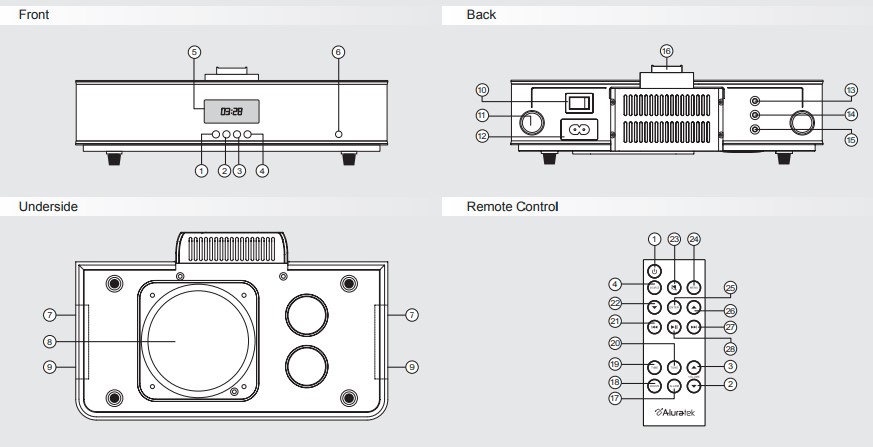
- Standby
- Volume down
- Volume up
- Source
- LCD
- Sensor
- Treble speaker
- Bass speaker
- Mediant speaker
- Power switch
- Inverse sound hole
- Power socket
- Input socket
- Video output socket
- Antenna iPod / iPhone / iTouch connector
- Alarm
- Snooze
- Time
- Tone
- Backward/ Previous
- Down
- Mute
- Menu
- Enter
- Up
- Forwards / Next
- Play / Pause
iPod / iPhone / iTouch Playback
- Connect the power cable to ABS01F.
- Power on ABS01F.
- Connect iPod / iPhone / iTouch to the iPod / iPhone / iTouch connector on ABS01F.
- Press the source button until you see “iPod” on the display.
- Press the menu key on the remote to return to iPod / iPhone /iTouch menu
- Press the up / down key to navigate and press the Enter key to select
- Press the play / pause key to play or pause the music
- Press the previous/next key to choose the previous/next track
- Press and hold the previous/next key to fast forward / rewind the current track
Note: While using iPhone with ABS01F, music will pause automatically when there is a phone call. iPhone will ring thru ABS01F. To pick up the call, disconnect iPhone from ABS01F or use hand free iPhone for a conference call.
The sound will be coming from the iPhone.
AUX Playback
- Connect the power cable to ABS01F.
- Connect the 3.5mm audio cable from the AUX jack in the back of ABS01F to the audio source such as an MP3 player, CD Player, PC, etc.
- Select “AUX” as the source by pressing the source key on the remote.
- Playback control via the audio source
Setting the Clock
- Press the time key on the remote control to adjust the clock
- Press the volume up/down key to the desired hour while the ‘hour” digit is flashing
- Press the time key again to adjust the minute
- Press the volume up/down key to the desired minute while the “minute” digit is flashing
Note: To switch between 12/24 hours display, press and hold the “Volume –“ key on ABS01F for 5 seconds during Standby mode.
Snooze Function
To Snooze / Disable the alarm
- To stop the alarm, press any key on the remote control. ABS01F will stop and disable the alarm automatically if it is not stopped after 30 minutes.
- Press the Snooze key to snooze the alarm. The alarm will resume in 9 minutes.
Snooze timer
- While ABS01F is playing, press the snooze key to set the snooze timer for 15 minutes / 30 minutes / 45 minutes / 60 minutes / OFF mode
Technical Support
If you need further assistance, please contact the Aluratek support department for troubleshooting prior to returning this device.
- E-mail: support@aluratek.com
- Web: www.aluratek.com/support
- Local (Irvine, CA): 949-419-6504
- Toll-free: 1-866-580-1978
FM Playback
- 1. Connect the power cable to ABS01F.
- Connect the antenna to the antenna port in the back of the unit.
- Power on ABS01F.
- Select “FM” as the source by pressing the source key on the remote.
- Press the previous/next key to adjust the radio frequency: press once to move in 0.1MHz increment or press and hold for 3 seconds for auto scan/search.
- You can set the current station as a preset/favorite station by pressing the select key. You can set it up to max. 20 presets
- To select the preset stations, press up/down key on the remote
Setting the Alarm
- Press the alarm key on the remote control to set up the alarm.
- While “Alarm” is shown on the LCD, press the volume up/down to adjust the hour.
- Press the alarm key again to adjust the minute using the volume up/down keys
- When the speaker is in Standby status, press the source key to choose the source of the alarm: buzzer, FM or iPod/iPhone.
- To activate the alarm, press the alarm key again or do no further operation over 8 seconds.
Radio and TV Interference Statement
WARNING!!! This equipment has been tested and found to comply with the limits of a Class B digital device, pursuant to part 15 of the FCC rules. These limits are designed to provide reasonable protection against harmful interference in a residential installation.
This equipment generates, uses, and can radiate radio frequency energy and, if not installed and used in accordance with the instruction, may cause harmful interference to radio communications. However, there is no guarantee that interference will not occur in a particular installation.
If this equipment does cause harmful interference to radio or television reception, which can be determined by turning the equipment off and on, the user is encouraged to try to correct the interference by whatever measures may be required to correct the interference.
Warranty
Aluratek warrants this product against defects in material or workmanship for 1 Year from the date of purchase.
This warranty becomes invalid if the factory-supplied serial number or “warranty void” sticker has been removed or altered on the product.
This warranty does not cover:
- Cosmetic damage or damage due to acts of God
- Accident, misuse, abuse, negligence, or modification of any part of the product.
- Damage due to improper operation or maintenance, connection to improper equipment, or attempted repair by anyone other than Aluratek.
- Products sold AS IS or WITH FAULTS.
IN NO EVENT SHALL ALURATEK’S LIABILITY EXCEED THE PRICE PAID FOR THE PRODUCT FROM DIRECT, INDIRECT, SPECIAL, INCIDENTAL, OR CONSEQUENTIAL DAMAGES RESULTING FROM THE USE OF THE PRODUCT, ITS ACCOMPANYING SOFTWARE, OR ITS DOCUMENTATION.
Aluratek makes no warranty or representation, expressed, implied, or statutory, with respect to its products, contents, or use of this documentation and all accompanying software, and specifically disclaims its quality, performance, merchantability, or fitness for any particular purpose. Aluratek reserves the right to revise or update its product, software, or documentation without obligation to notify any individual or entity.
For more manuals by Aluratek, Visit Manualsdock


